In this video I make a rustic coffee table using some old scaffold boards I found on top of a skip and some metal coffee table legs which I salvaged as part of an office clearance
Spray Paint: https://amzn.to/2yw4gOX (UK)
As an Amazon Associate I earn from qualifying purchases
In this video I'm going to be making a coffee table using some old scaffold boards I found on top of a skip which I took after asking permission ofcourse.
The boards had loads of character, very worn and weathered, they were also pretty badly warped too.
And I already had some metal legs to work with, I have a few of these and I've already used one pair on a beech and sapele table top I made a few weeks ago. These have some floating top spacers on top which I decided to remove because I don't really like them and also they won't allow for expansion and contraction of the wooden top that I was planning to make.
The legs measured 600mm so that's how wide I'd need my table top to be.
I started by removing a few blocks which were screwed in to the boards.
And there was a sneaky screw hiding on the inside too.
And I had to take the metal plate off the end too.
The boards measured 1600mm in length, so I decided to cut them in half and after setting up a stop block at the mitre saw just shy of 800mm I made the cuts.
I needed to remove the warp from the boards, and normally I would plane one face flat, and then thickness plane the opposite face. But the trouble with that is that the main thing I like about these boards is all the character that they have, and if I planed them, all of that character would be lost and this wood would just look like any other clean and kind of boring milled up piece of pine
So instead what I decided to do is rip the boards in half at the tablesaw, and then I made a series of rip cuts to both edges of each of the boards to get them at 90 degrees to the faces.
I did leave a rustic edge on two of the pieces though, as I wanted to use those for the edges of the table top.
Next I could check each edge for squareness, and for any that were a little off like this one, I took them back to the tablesaw again to rip off the edge and make it square.
Here's the offcut, and you can see that it's very slightly wedge shaped.
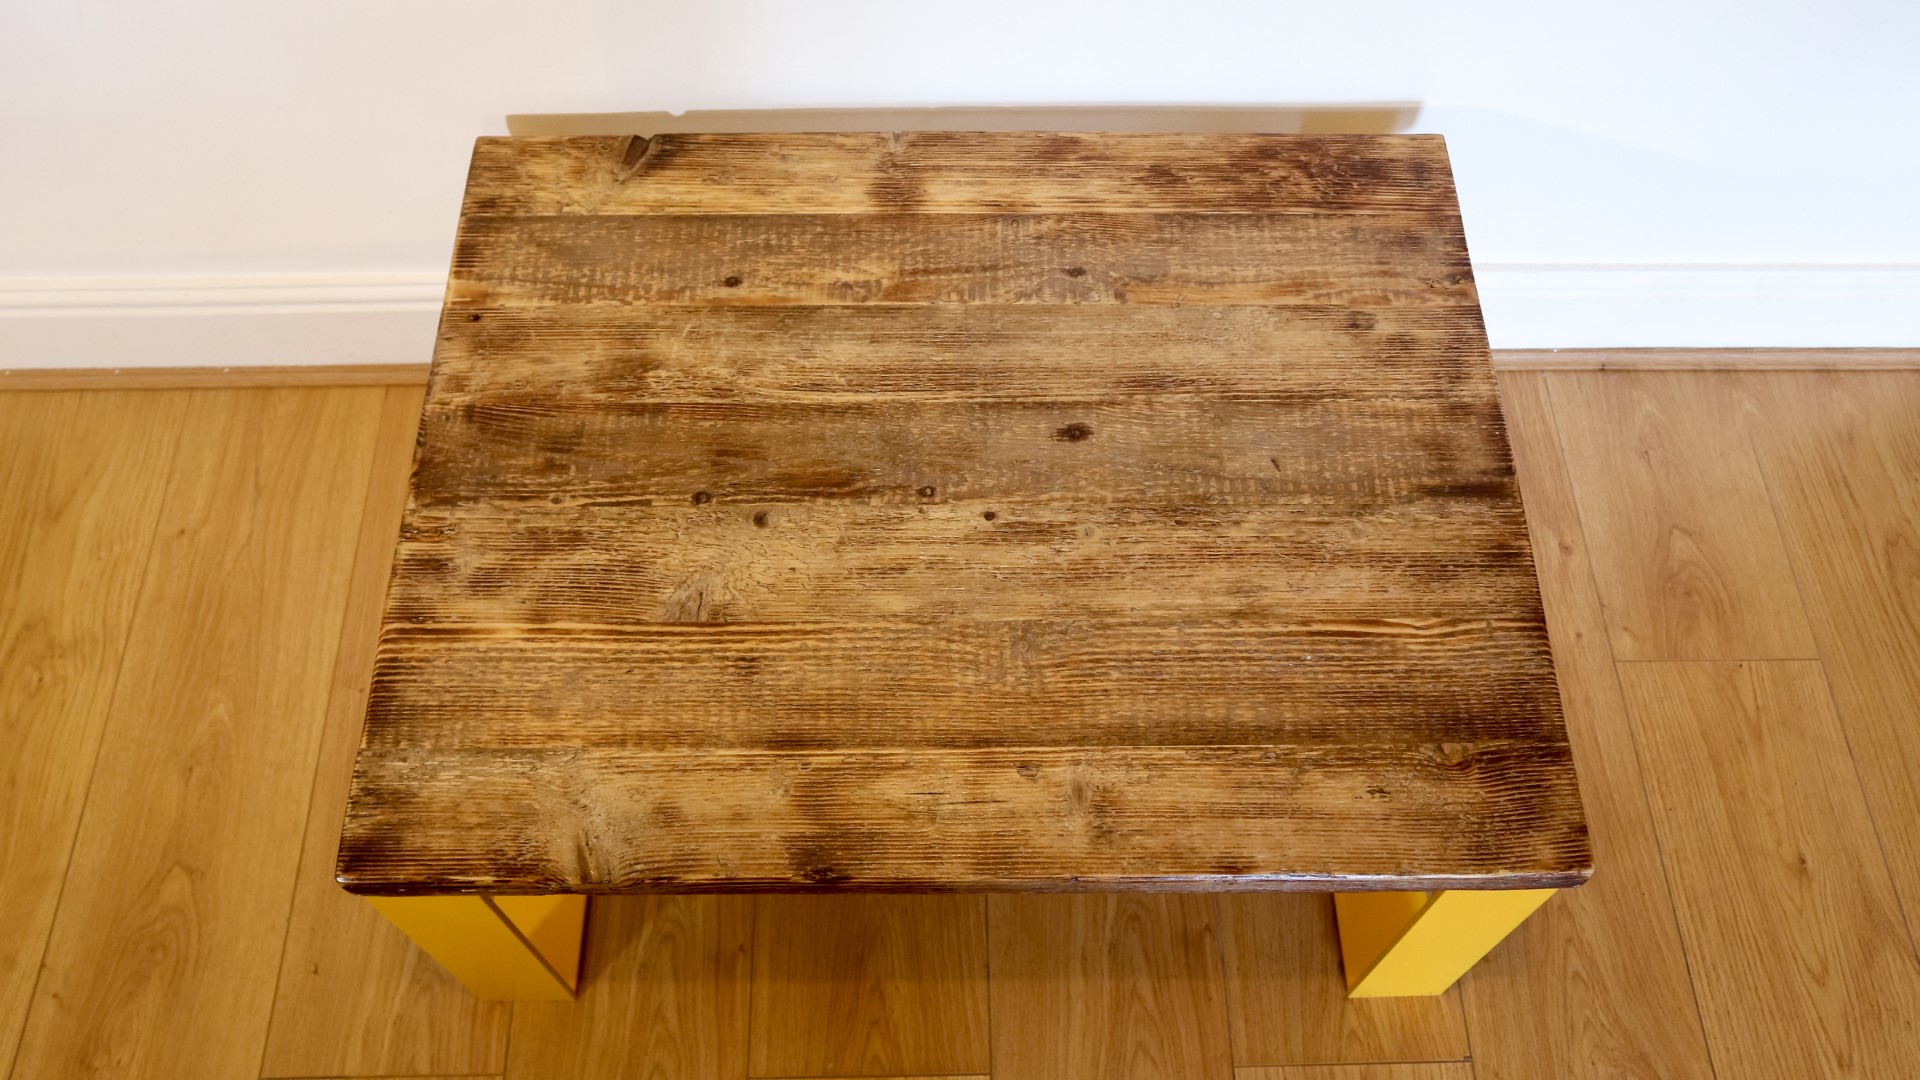
Next I laid out all the boards and I had enough to give me the 600mm width I needed to span the metal legs I'd be using
With the boards laid out, I realised that some of them were thicker than others by a couple of mm.
So I pulled out all the thicker boards, and set up my thickness planer to plane the thicker boards to match the thickness of the thinner boards. These freshley planed clean faces would be placed facing downards when I later glue up the table top so that they won't be seen - I'd use the rustic face to match the other boards for the table top.
I took a few shavings off each end of the board.
And then they went together pretty good
I'd use my parrallel clamps to glue up the top.
Once I added glue to all the joints, I could make sure all the ends were flush and then tighten the clamps.
I cleaned up excess glue with a damp cloth.
And I added some clamps from above too to try and evently distribute the pressure on both sides.
I used my mallet just to make sure that the boards were sitting flat on the shaft of the clamps. That worked for most areas, but I needed a bit more pressure on some boards so I added some F clamps with a couple of blocks to get everything nice and flat. I find it easier and quicker doing it this way rather than taking the time to add biscuits or dowels to all the joints, and as wood glue is stronger than the wood itself when used on side grain joints like these, this top didn't need any re-enforcing.
While the tabletop was clamped up I got started working on the legs, which I wanted to paint. I sanded using 240 grit which I thought would help the paint adhere better to the metal.
Then with some white spirit on a piece of cloth I could clean off all the dust and they were ready for painting.
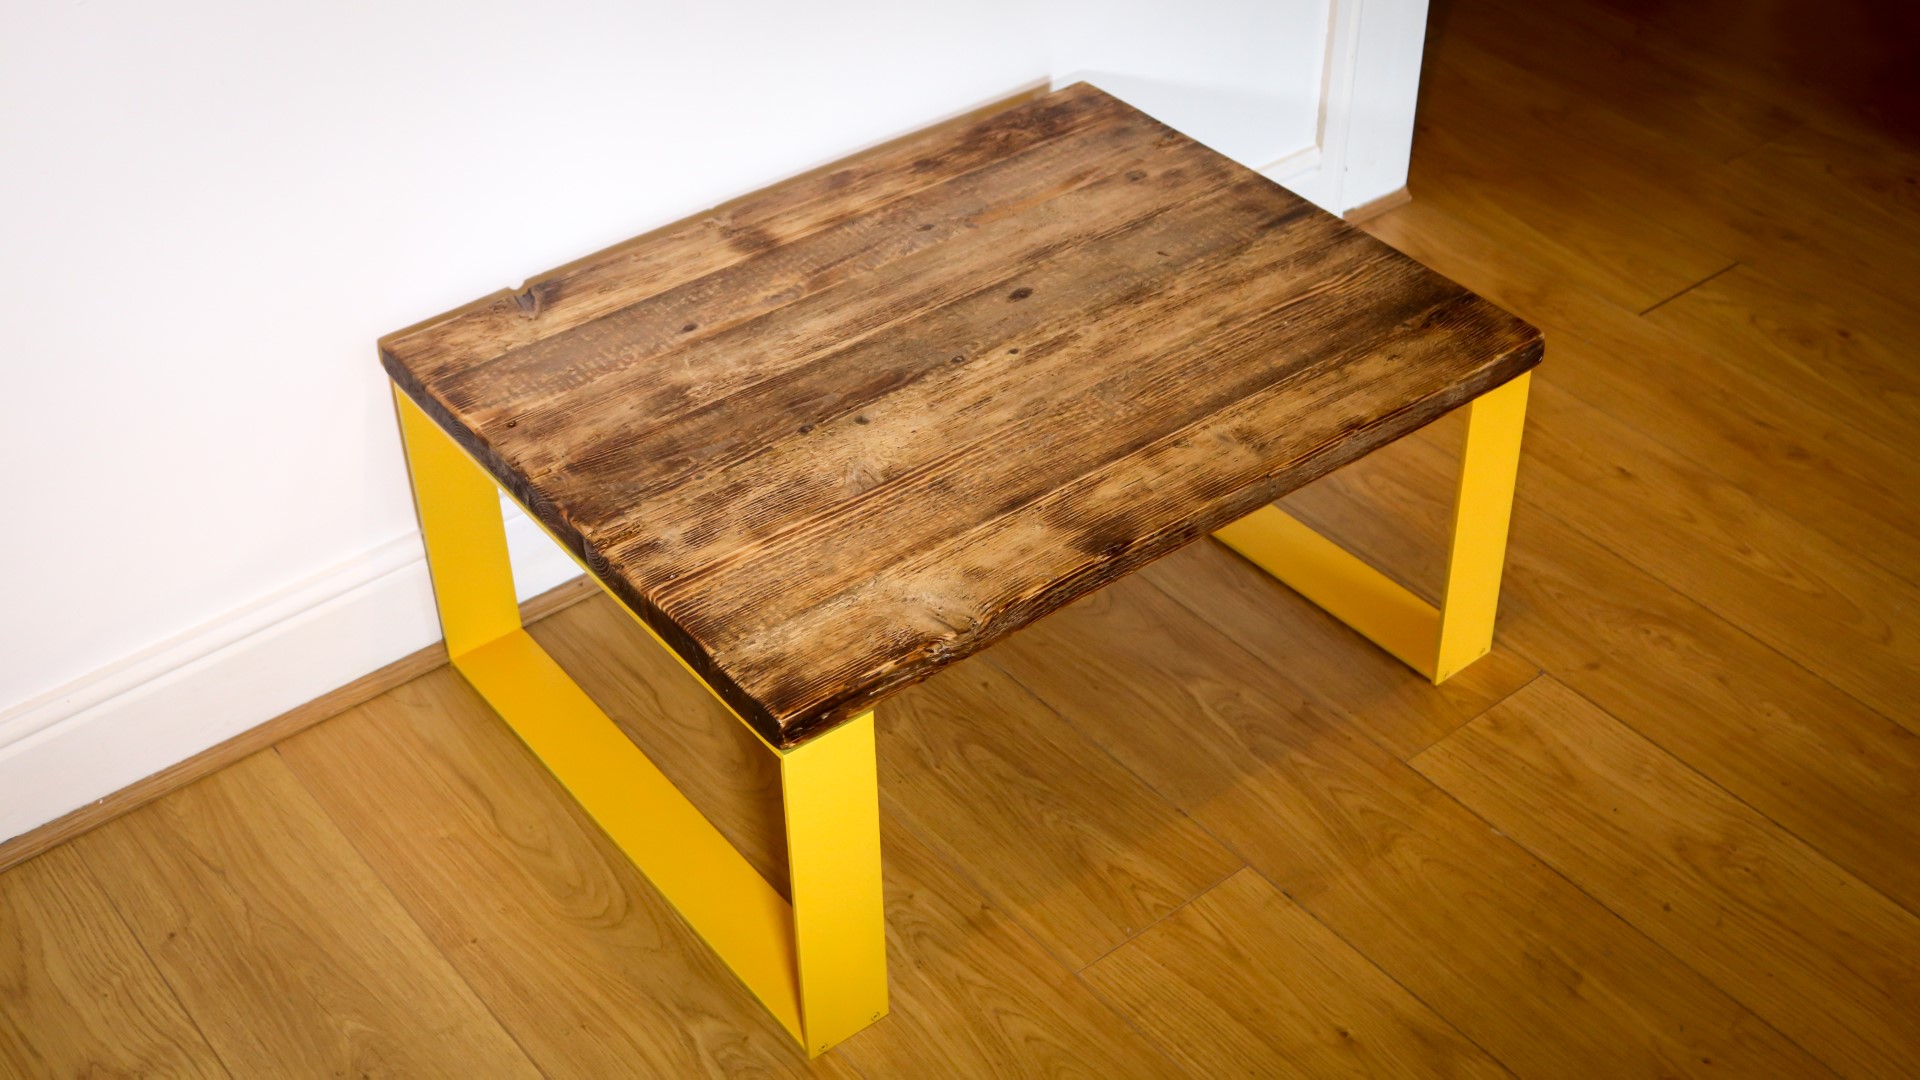
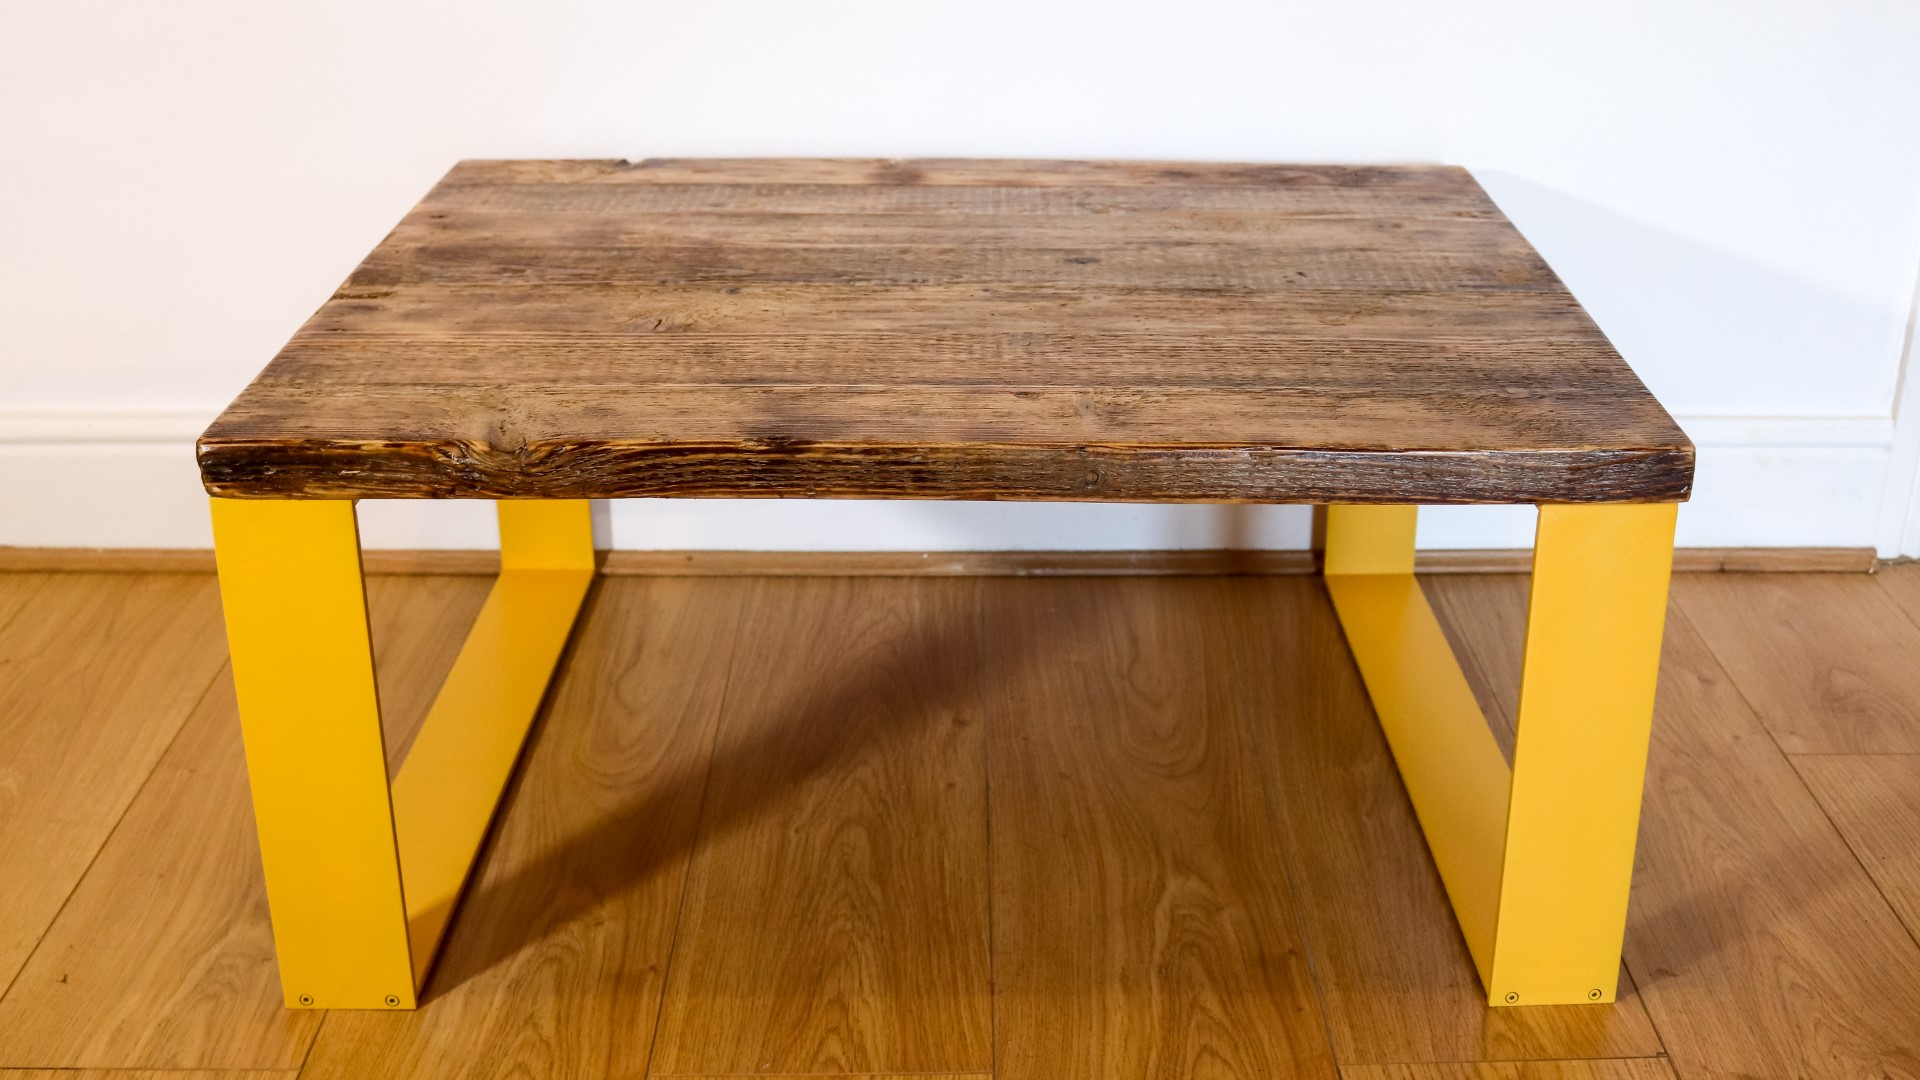
I picked this mustard yellow colour as I wanted the legs to really pop against the wooden table top. This spray paint was only five pounds on Amazon, and I was super impressed with it - the nozzle on the can is excellent at distributing the paint evenly, and coverage was really good too. I'll leave a link to this spray paint in the description box below if you're interested.
After spraying on a thin first coat, I left it about an hour to dry and then re-coated it, and then the colour looked great, really vibrant.
And once that coat had dried, I came back with some spray varnish just to add another layer of protection to the paint.
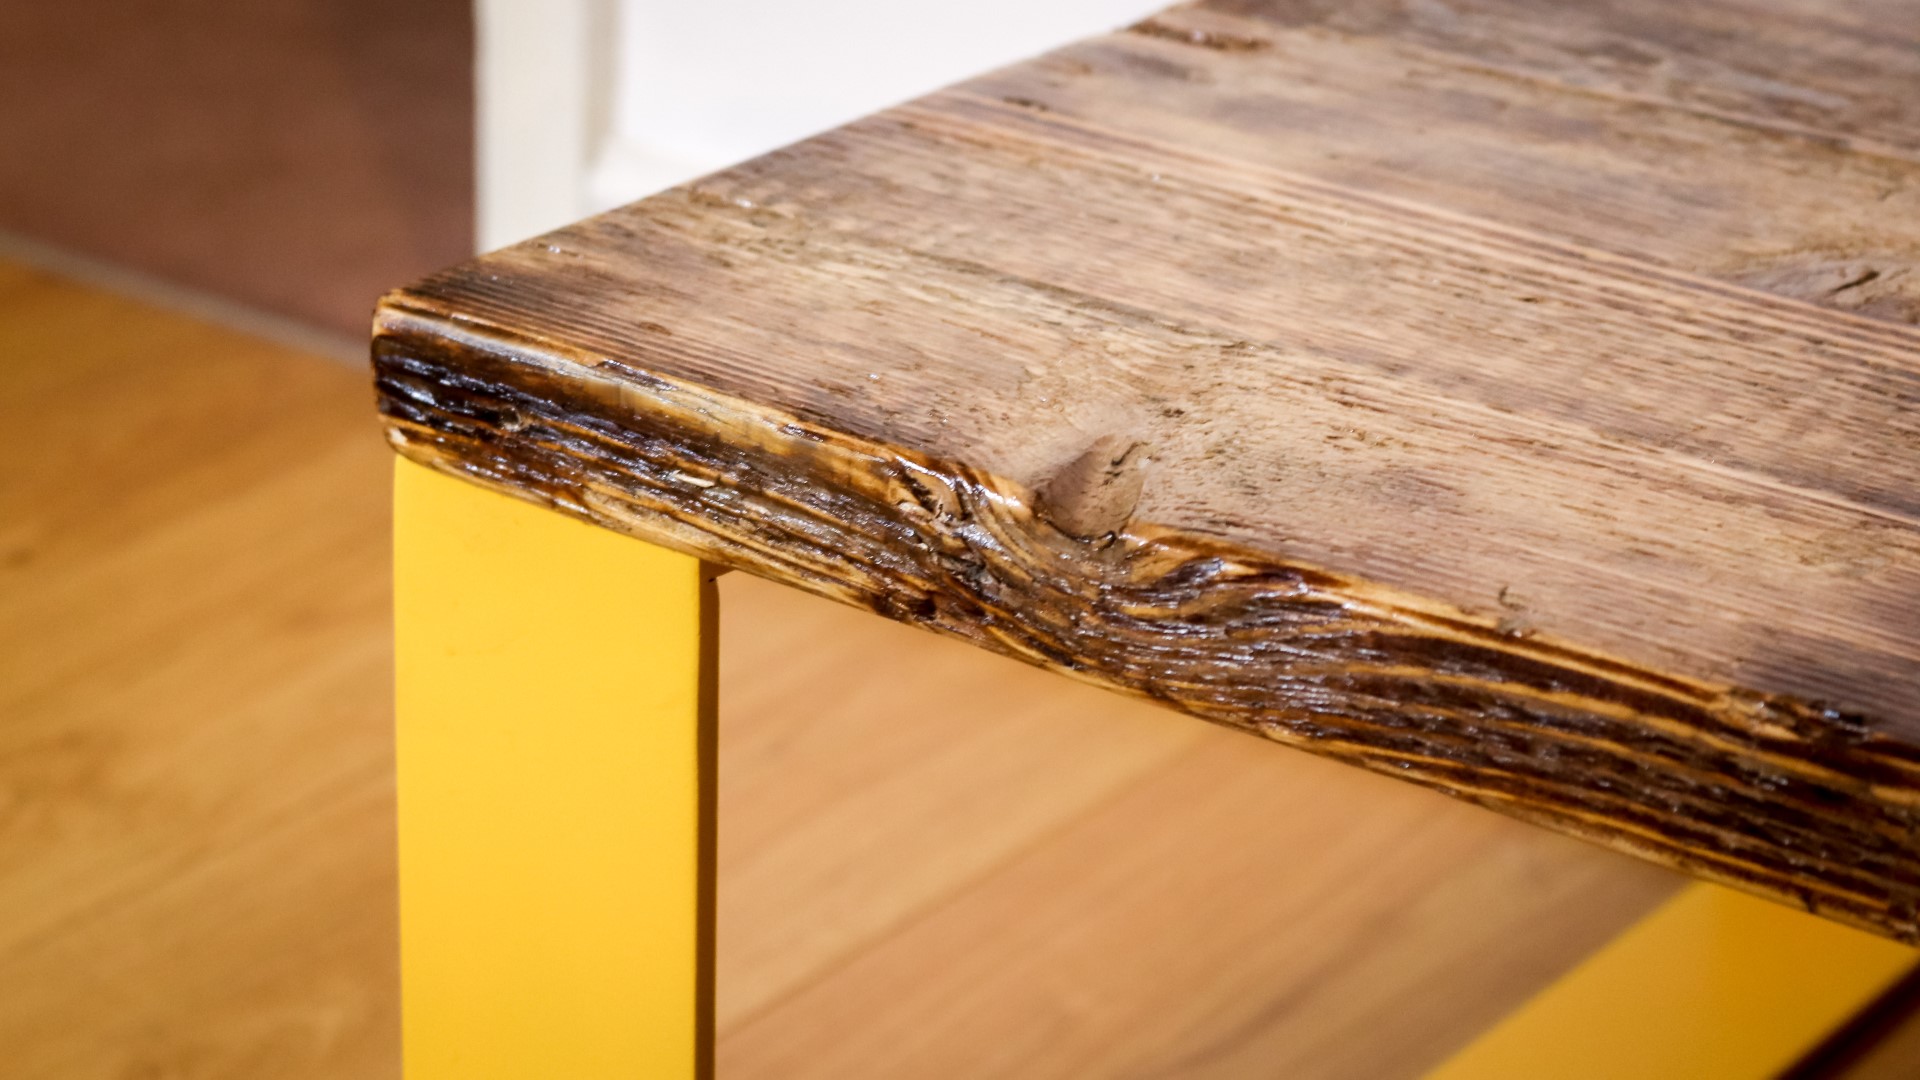
With the glue now dry on the table top, I wanted to find a way to make the end grain on the freshly cut pieces match the worn and weathered end grain. So I used a blow torch to char the ends, which raised the grain quite nicely, and then used a wire brush.
I came back a few times with the torch and a wire brush to kind of blend in how it looked with the other pieces.
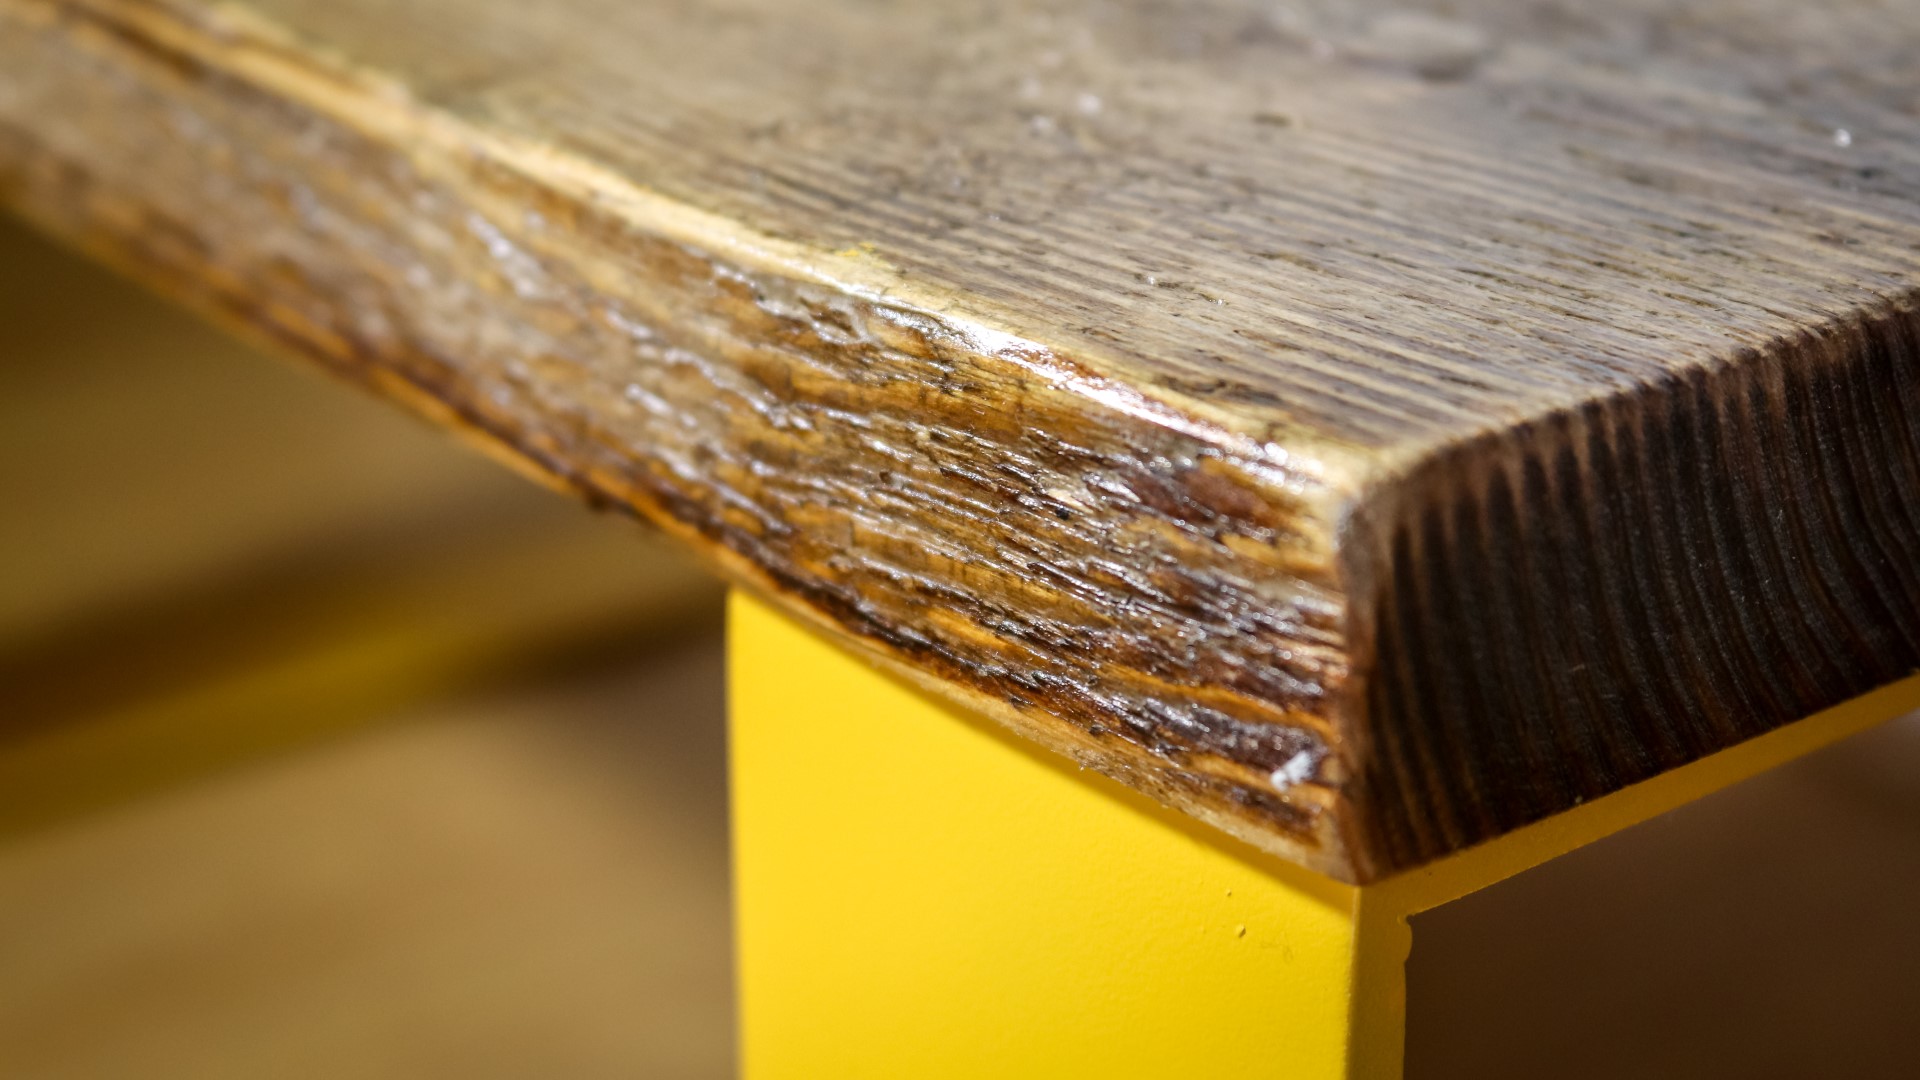
Next I sanded the table top using 80 grit and I'm trying to get a smooth enough surface and remove any wood that was likely to splinter, but also trying to retain the look and the texture as much as possible.
I sanded the end grain too and eased over the corners, and then I needed to top up the burning a bit more.
I did a bit of light burning to the top too, mainly to restore a bit of the colour that was lost through sanding the wood.
And the beauty of this is that if you accidentally burn a bit too much, you can knock it back again with the wire brush.
I did the final sanding by hand at 120 grit.
Before applying a finish, I blew away as much of the dust as possible.
I decided to use water based varnish for the table top, I chose this because I didn't want to yellow the pine which an an oil based finish would have done.
I used my air blower to remove any loose dust from the table top and then I was ready to finish it, and for that I'd use some of this waterbased varnish.
This brought out the grain nicely, and added a nice bit of colour to the wood. I added a second coat once the first had dried. This varnish came out a bit more glossy than I would have liked, so later on I took some 0000 steel wool, and rubbed on some of my home made wax - this is available to buy via my Etsy store. I later buffed out the wax, and this gave the table top more of a satin sheen which was just what I wanted
I added my makers mark to the bottom of the table top.
To fit the top I first needed to drill some holes through the metal legs using a step cutting bit in my drill, and I made these holes quite wide because I wanted to allow the wood to expand and contract with seasonal changes.
And then I secured the legs to the top using some screws and washers.
Images: