In this video I repair and restore a vintage display cabinet. I sand and re-finish the top, re-finish the legs and make new shelves for it.
In the last video - part 1 - I repaired the legs on the display unit. I made new wings for one of the legs and after sanding the leg I needed to try to match the colour of the other legs on to this one.
I first applied some of this dark teak stain, and that did a pretty good job of blending in the colour of the new wood with the old. I I applied two coats.
And because the other legs had a slight red coloured tint to them, I thought I'd try some of this mahogany varnish, which also has a red tint to it, and that helped to blend the colours even more and by this point there was really no discernable difference between the colours of the repaired leg and the old ones, so after letting the varnish dry I applied some spray varnish.
And when that was dry I sanded at 400 grit, to get the finish smooth, and then wiped away the dust and applied a second coat. And I was happy with how it looked - it was a prety good match so I left it there.
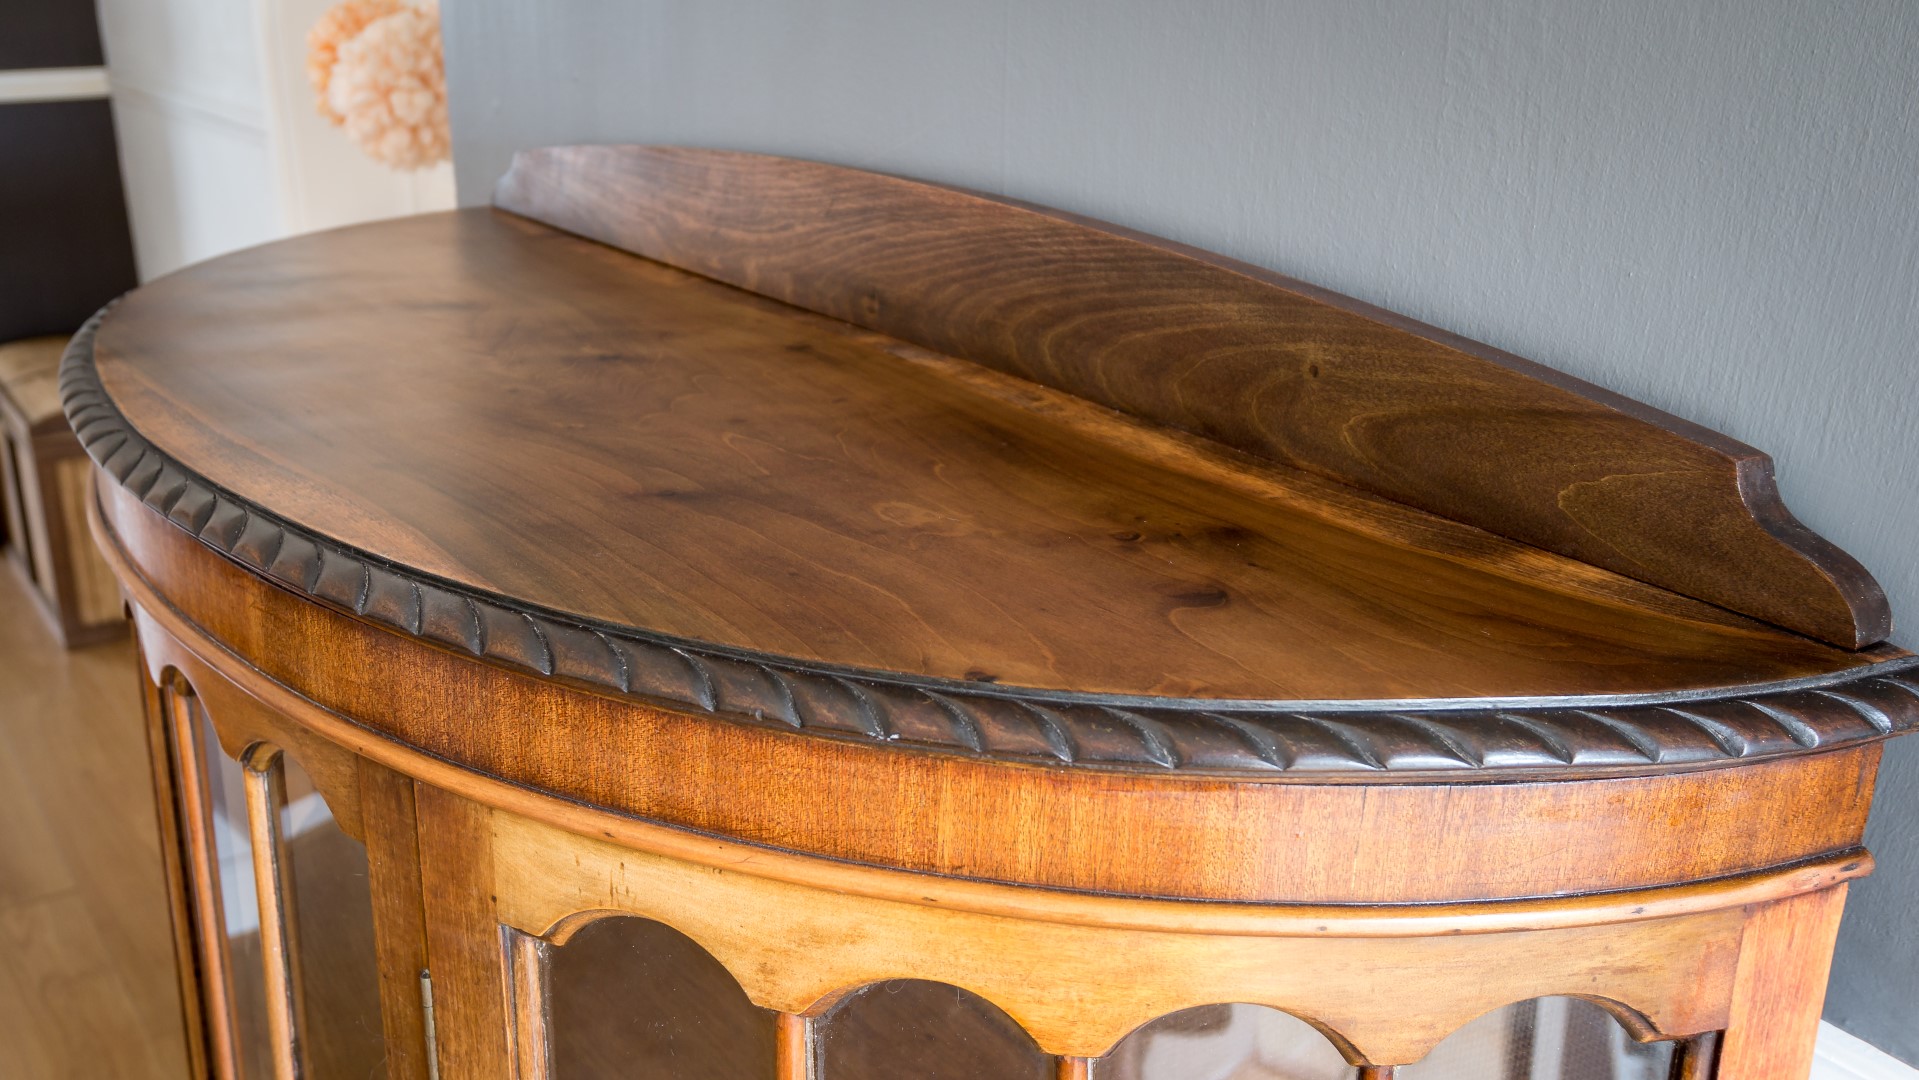
Next I did some sanding to the side of the unit which had had some damage to it, and I then I started work sanding down the top. The top was solid wood so I didn't need to worry about sanding through any veneers. I sanded at 80 with my random orbit sander and the old finish clogged up the paper quite a lot so I went through a few discs. Then I sanded at 120 and then 240 by hand.
And I also sanded the veneered back panel by hand. For some reason it hadn't occurred to me to look and see if I could remove the back panel first - which was a bit stupid of me - and more on that later.
Then I wiped the surface clean with some mineral spirits.
And then I hand sanded at 400 grit.
And then I applied boiled linseed oil to nourish the wood.
When the oil had dried I applied spray varnish. I chose it as a top coat because I knew it would be hardwearing which I think is required for a top like this as it's bound to have drinks and things put on top of it at some point in it's life.
Then I wet sanded with mineral spirits at 400 grit to smooth over the finish.
Now before I got to applying a second coat of the spray varnish, I noticed that the back panel was simply screwed to the top from underneath.
So at this point I created more work for myself, and decided it'd be better to remove it, as that would give me access to the whole top, and better access to the veneer on the back panel too, but ofcourse that meant that I needed to start again with the re-finishing process.
So I used a cabinet scraper to remove as much of the top coat that I could, and then sanded back to bear wood once again. It was quite annoying having to do this again, but it was my own fault for not thinking it through before jumping straight in to it - and I thought it would be worth it to do this again and do it properly.
So after sanding again, and wiping away the dust again I applied spray varnish again, then I wet sanded again at 400 grit, and applied a second coat. Then I wet sanded again at 600 grit and applied a third coat.
I used an 80 grit paper on the belt sander to remove the veneer.
I sanded at 80, 120 and then 240 grit with my random orbit sander to remove any marks left by the belt sander. And then I used the dark teak stain again to better match the colour of the top. After staining I sanded by hand at 400 grit and then applied some more of the mahogany varnish to give it more of a red tint.
And when that was dry I finished with spray varnish, sanding between coats again using the same method as I had for the top.
And it turned out pretty good.
So then I added the old screws again but the panel still fitted quite loose so I drilled some new pilot holes using a right angle drill attachment, and then added new screws and it was nice and solid after that.
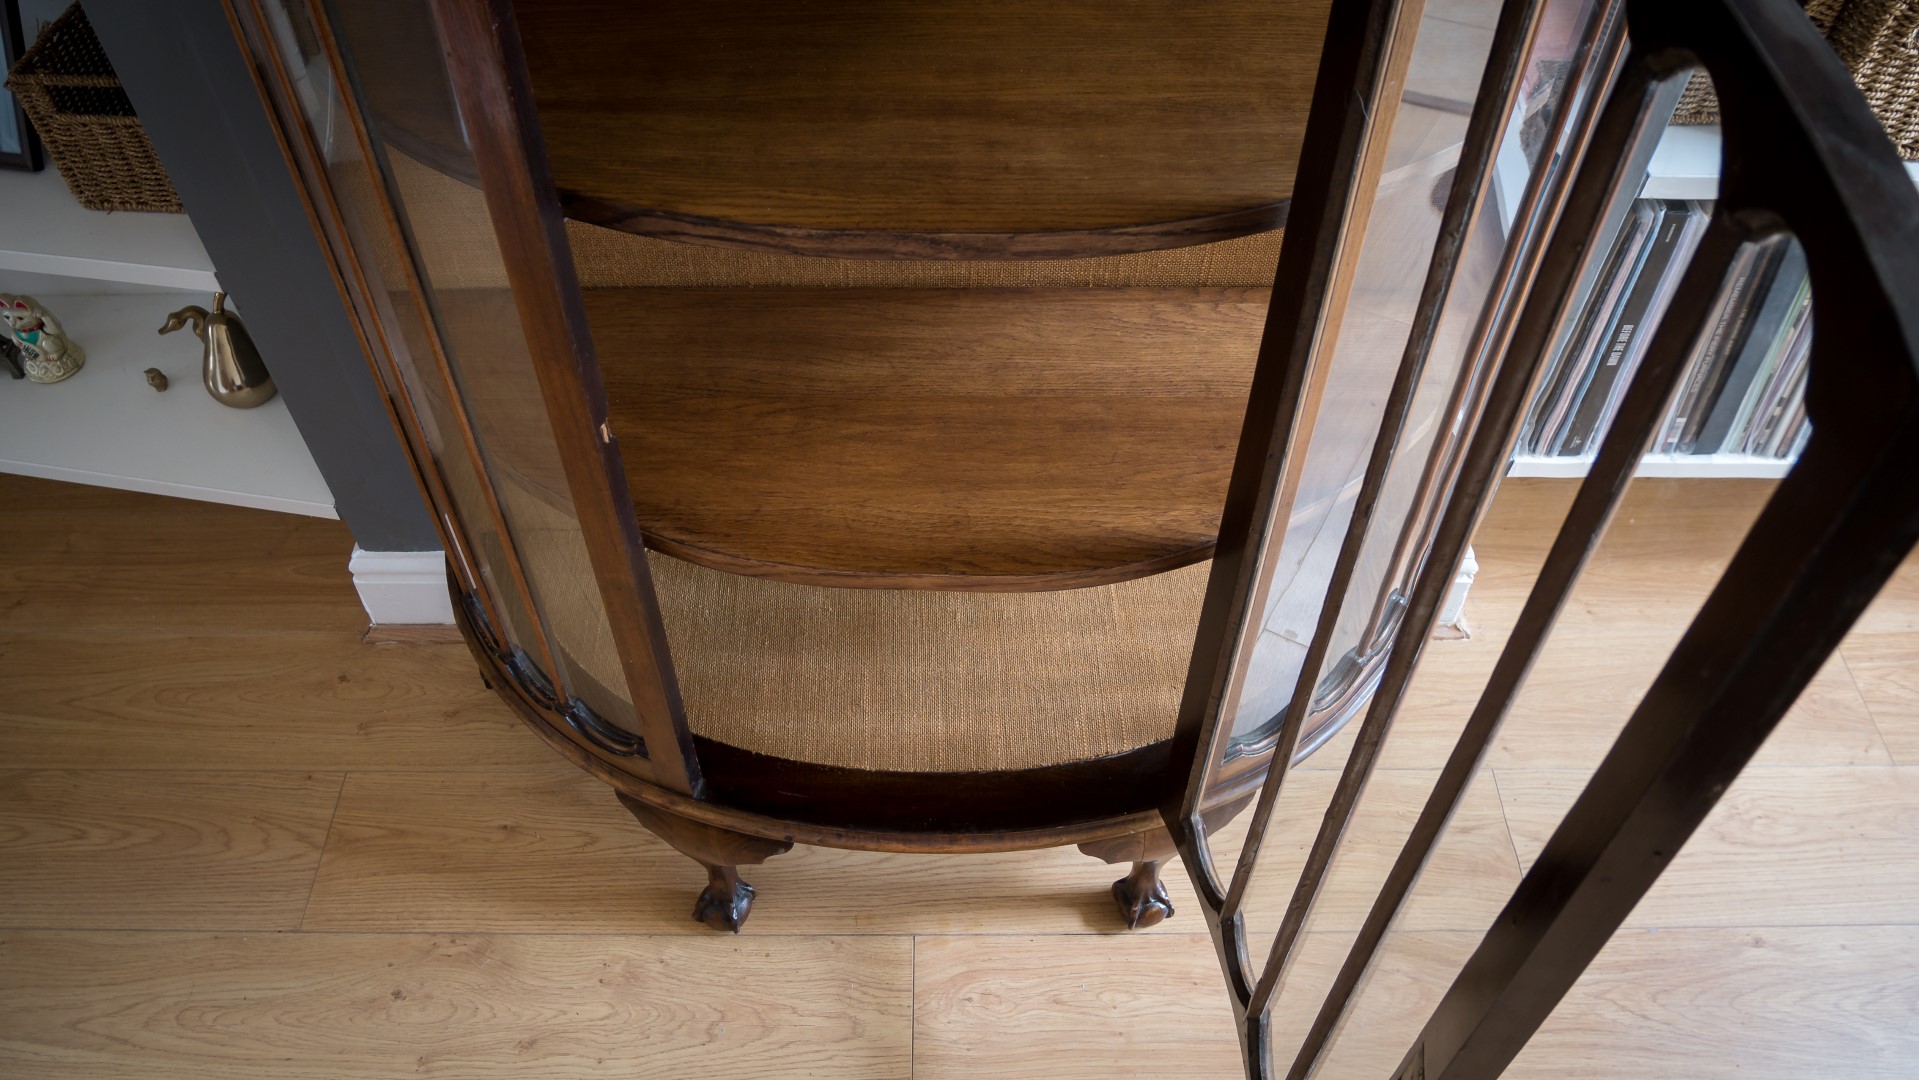
The next job was to make new shelves for the unit, so I first measured up the internal dimensions.
For the shelves I'd use some of these oak veneered pieces of MDF that I salvaged some time ago from a book case. I wanted to use what I had rather than buying something else.
I first needed to remove the solid oak trim, these were joined with glue and biscuits but a mallet loosened them up.
Then I cut them to length at the mitre saw.
And then I drew one half of the semi circle just freehand, and cut that out on the bandsaw. I used a handsaw to finish off the cut at the halfway mark
And I could use the offcut flipped over to mark up the other half of the shelf, and cut that on the bandsaw too.
I also cut off the protruding biscuits from the back edge at the bandsaw too.
Next I could scrape off the old finish with a cabinet scraper and sand back to bear wood.
I could then used the solid oak pieces of trim to make a new edge banding for the shelves to hide the MDF edges.
So I ripped some very thin slithers of oak, probably about 1-2 mm thick.
and then I could glue them on, holding them in place with an F clamp in the middle and plenty of masking tape.
After a few house I removed the tape and then used a blockplane to flush trim the edge banding to the shelf.
I didn't have enough of the dark teak stain left to do these shelves so to get them to better match the rest of the unit I used some walnut coloured Briwax instead. I wasn't really trying for a perfect match here, just a better match.
With one shelf finished, I could then mark up the next piece and I made the second shelf in the same way.
Next it was time to fit the shelves, and I found to get them in through the doors and on to the pins needed to be done in a certain order, otherwise they wouldn't fit.
Finally I just needed to give the unit a good clean, I used glass cleaner on the glass and hoovered the inside.
----
That's the display cabinet finished and I'm really glad I managed to salvage this - as soon as I saw a picture of it I really wanted to fix it up and give it a new lease of life.
I don't have space for this in my home unfortunately, but after posting a photo of it on social media, I do have a buyer lined up for it - and I'm really happy that it's going to a good home.
This project took me around 15 hours to complete, and it's difficult to make a financial profit on this kind of project, mainly because display cabinets like this one aren't particularly fashionable at the moment so they can be bought secondhand for not a lot of money, but they are usually in really bad shape - whereas this one is now probably stronger than it's ever been, and I think it looks fantastic, I really like the style of this particular one.
If the unit had been a more valuable piece of furniture, an antique for example, then I definitely would have done more of a sympathetic restoration - for example I would have used modern screws - so this was more about fixing it up and making it a useable piece of furniture rather than restoring it as such. The reasons I'm pointing this out is because I usually get some criticism in the comments on these videos from one of two extremes - I either get people telling me a piece of furniture like this is not worth wasting my time on, or from the other side saying that I've not done the restoration sypathetically enough. But what's important to me is that I've saved this piece of furniture from being thrown away, and it's now in a condition where it should be a useful piece of furniture for many years to come.
One thing that I didn't manage to fix on this project was to find a key for the lock. There is a lock number on the lock, but after doing some research, unsurprisingly it doesn't seem like these are available to buy anymore.
So what I'll probably do before the buyer collects it is to buy and fit a brass handle for the door, just to make it easy to open and close.
Thanks for watching as always. Please subscribe for mre weekly videos from me if you haven't already, and if you'd like to support this channel and what I do, please consider becoming a Patron over at my patreon page.
Images: