Recently I saw a dining table for sale on facebook ads, it was listed for just £10 and I like this style of furniture, so thought it'd make a good restoration project so I picked it up.
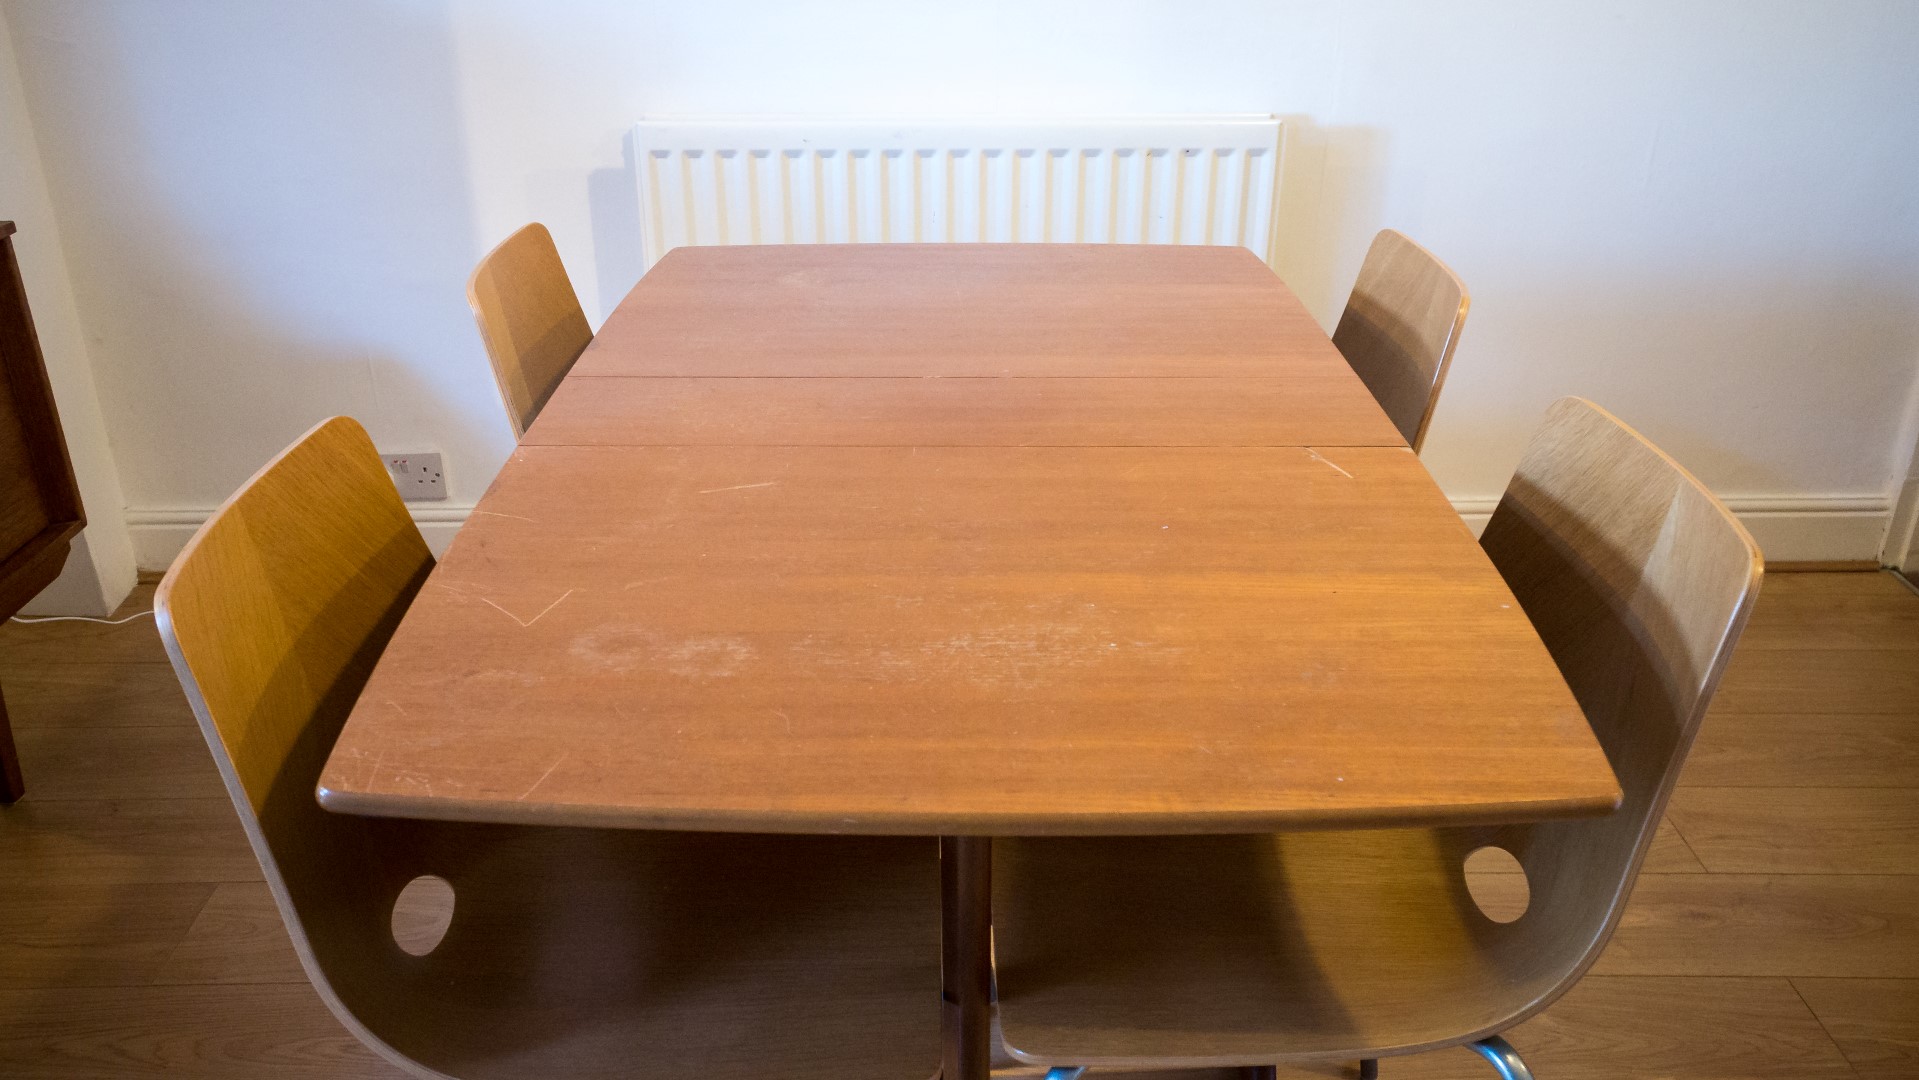
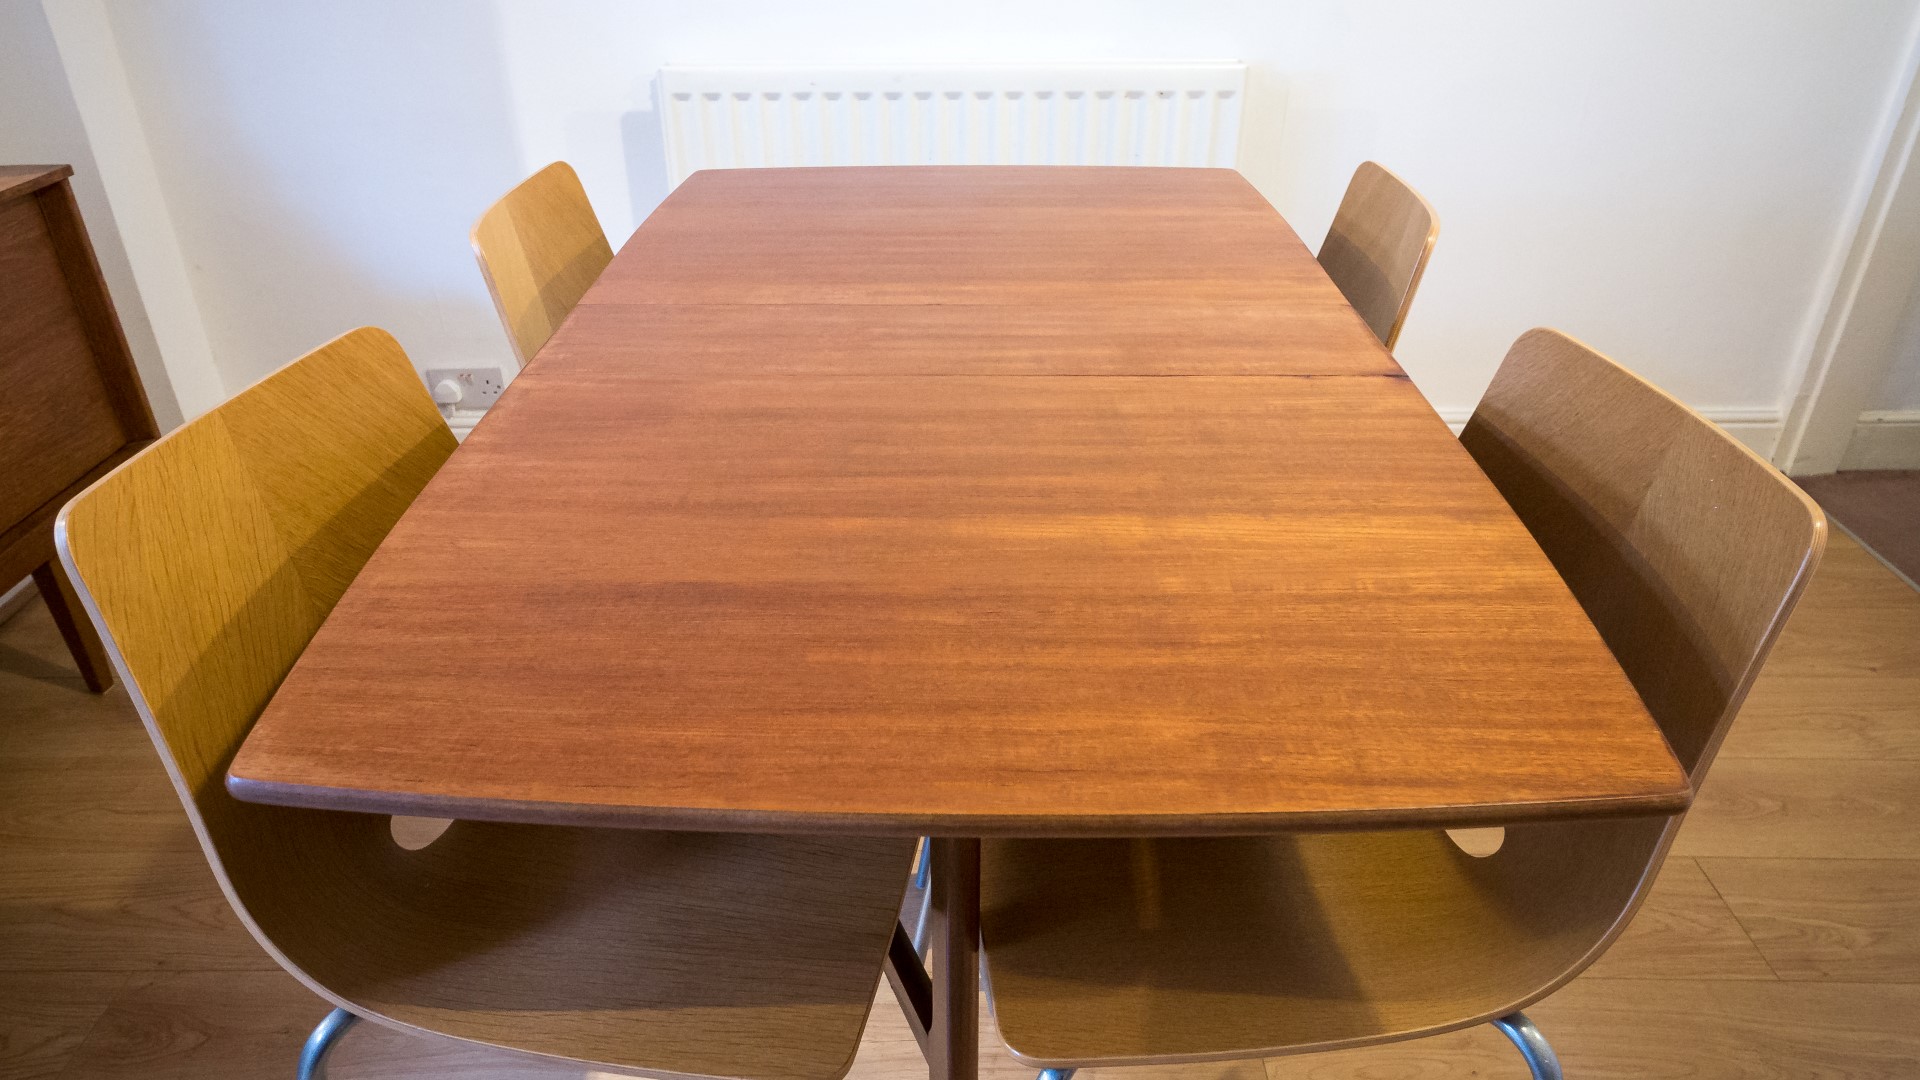
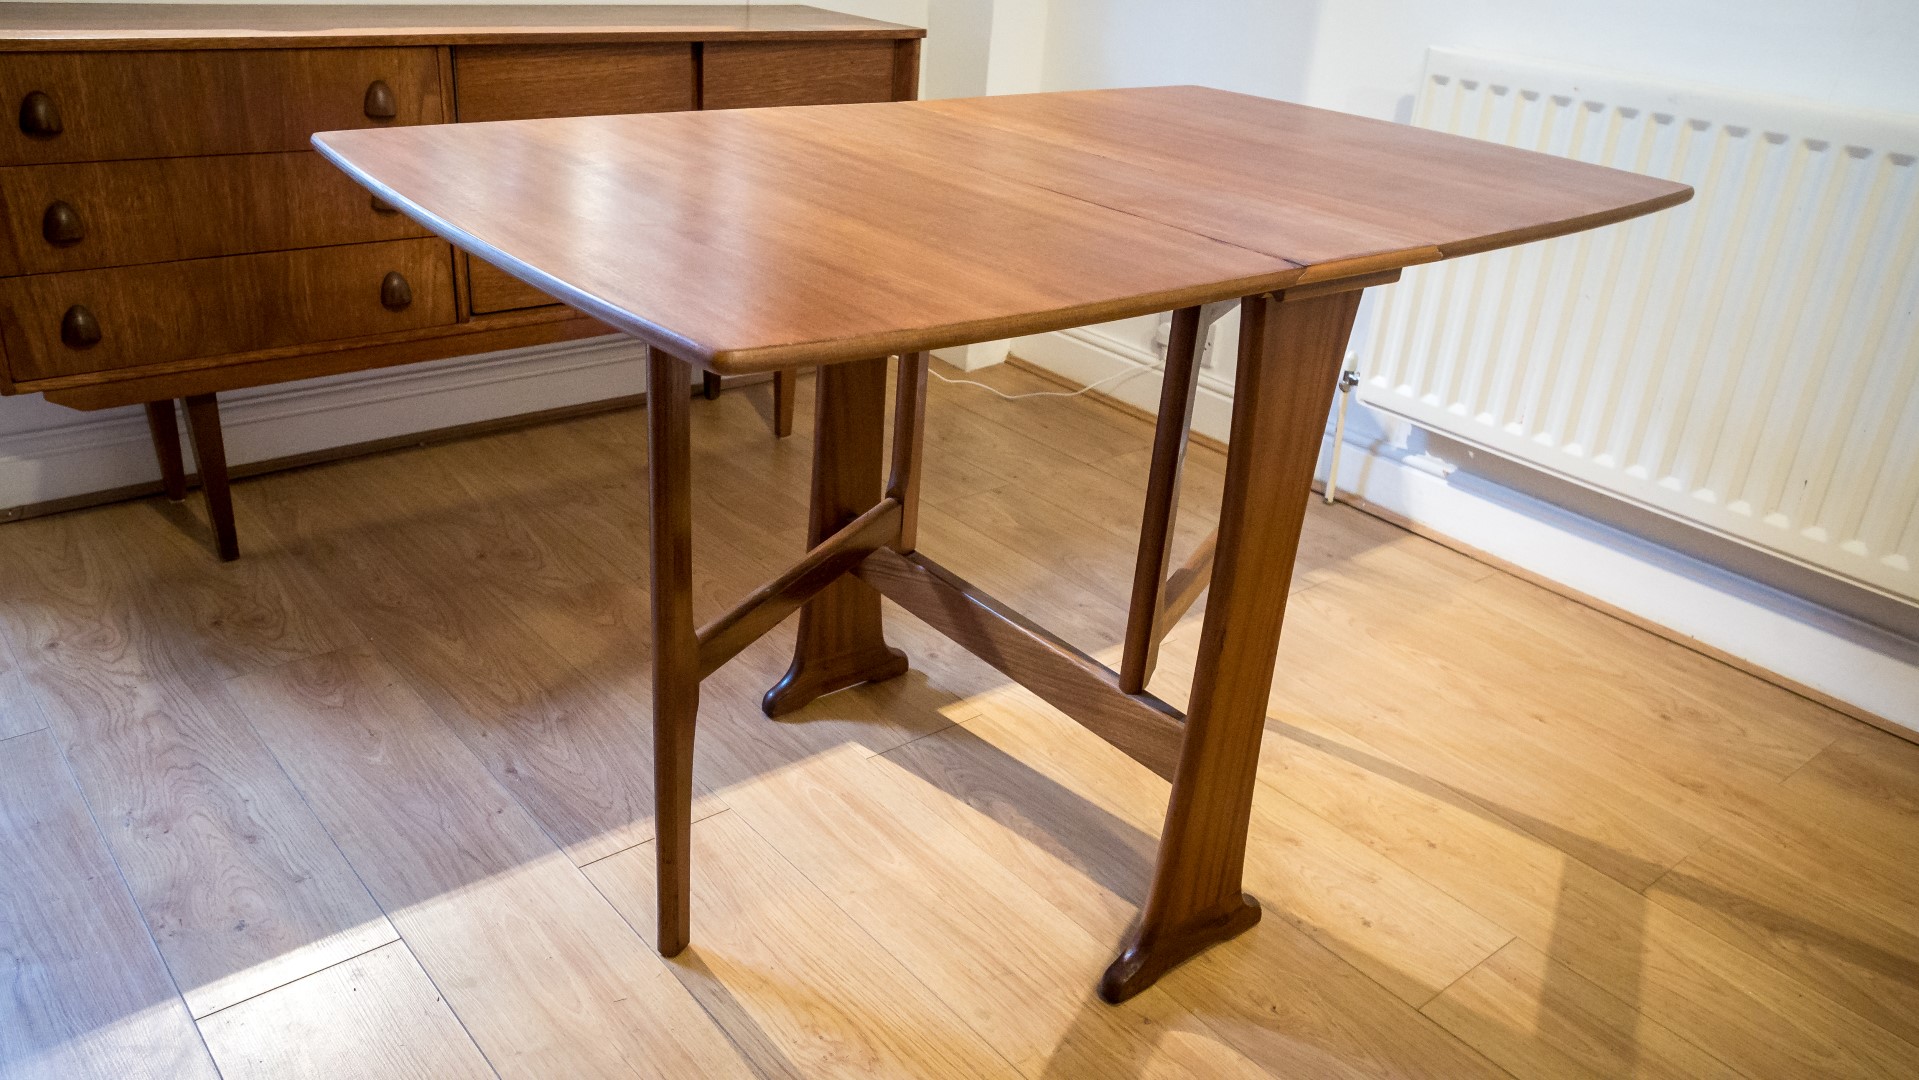
It's a small table to seat around 4 or maybe 6 at a squeeze, and it's a folding table so you can fold it up and put it to one side and it takes up very little space as you can see.
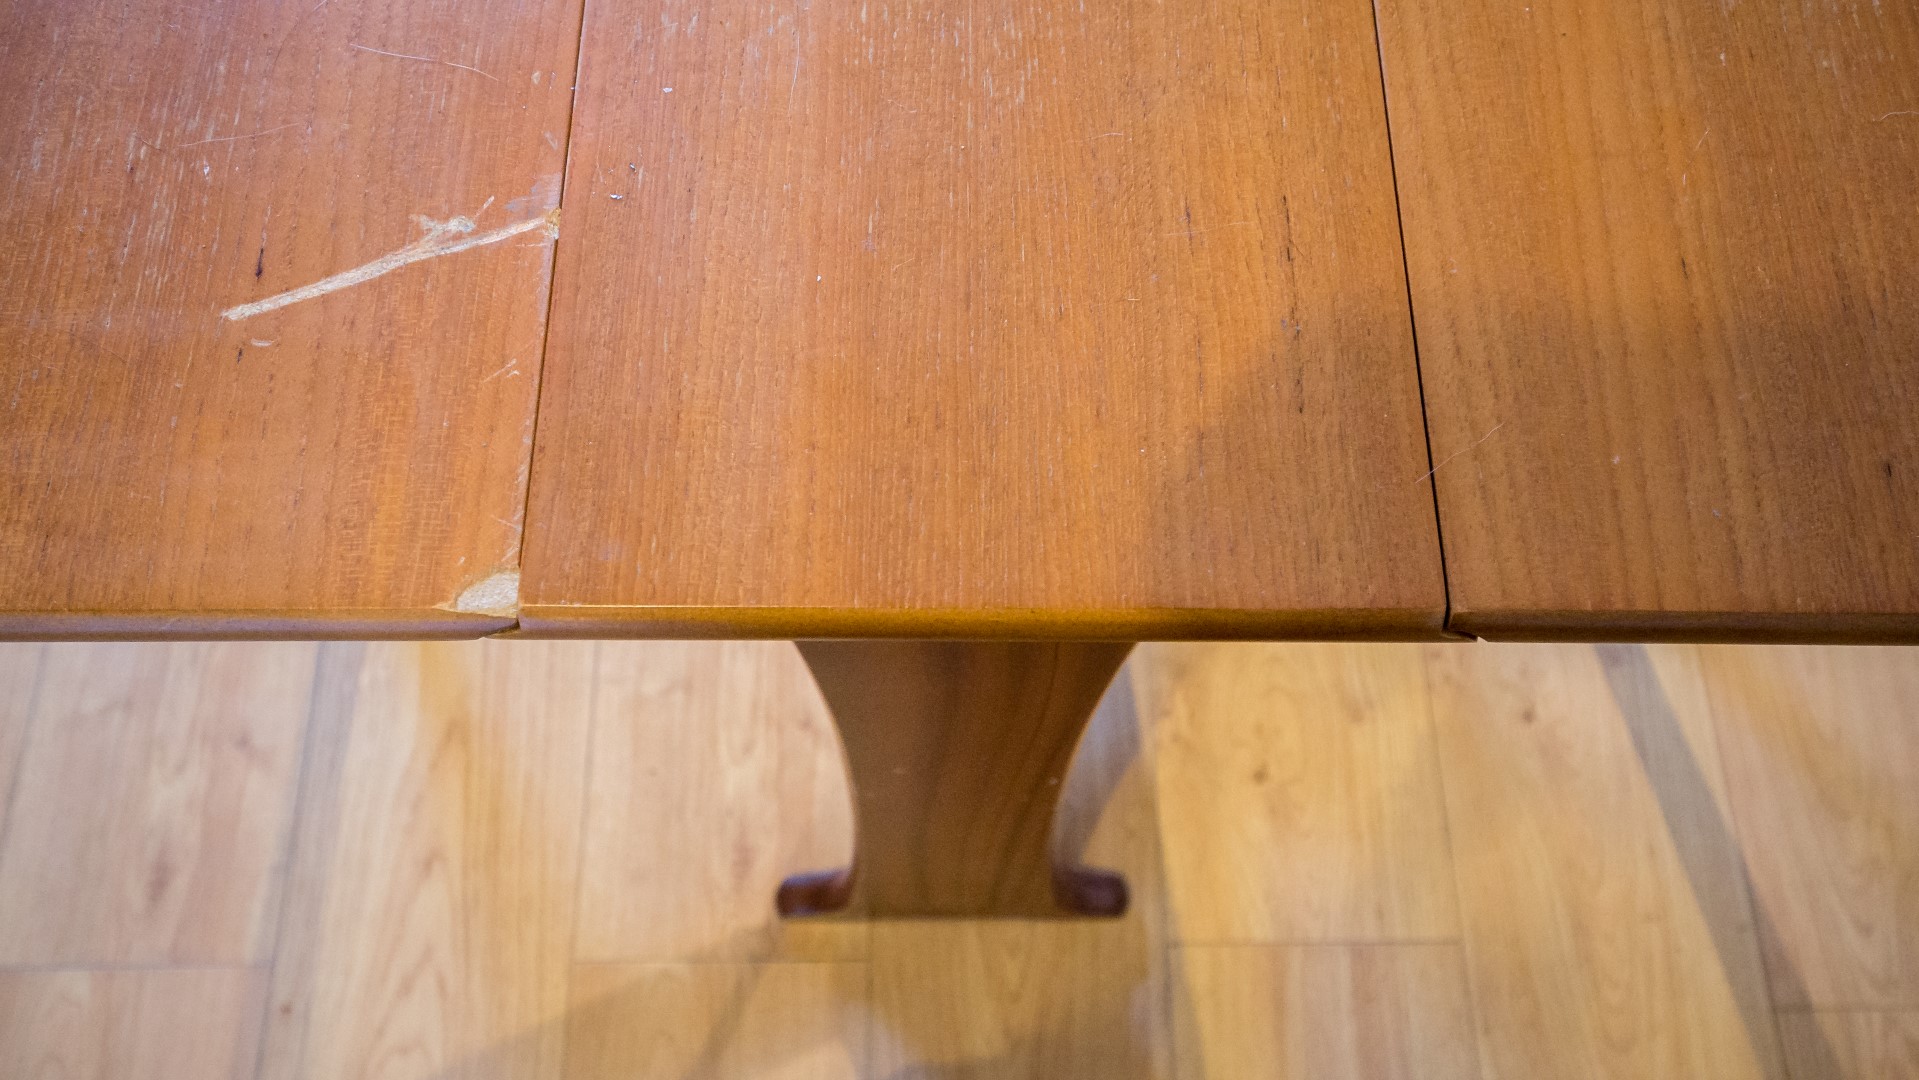
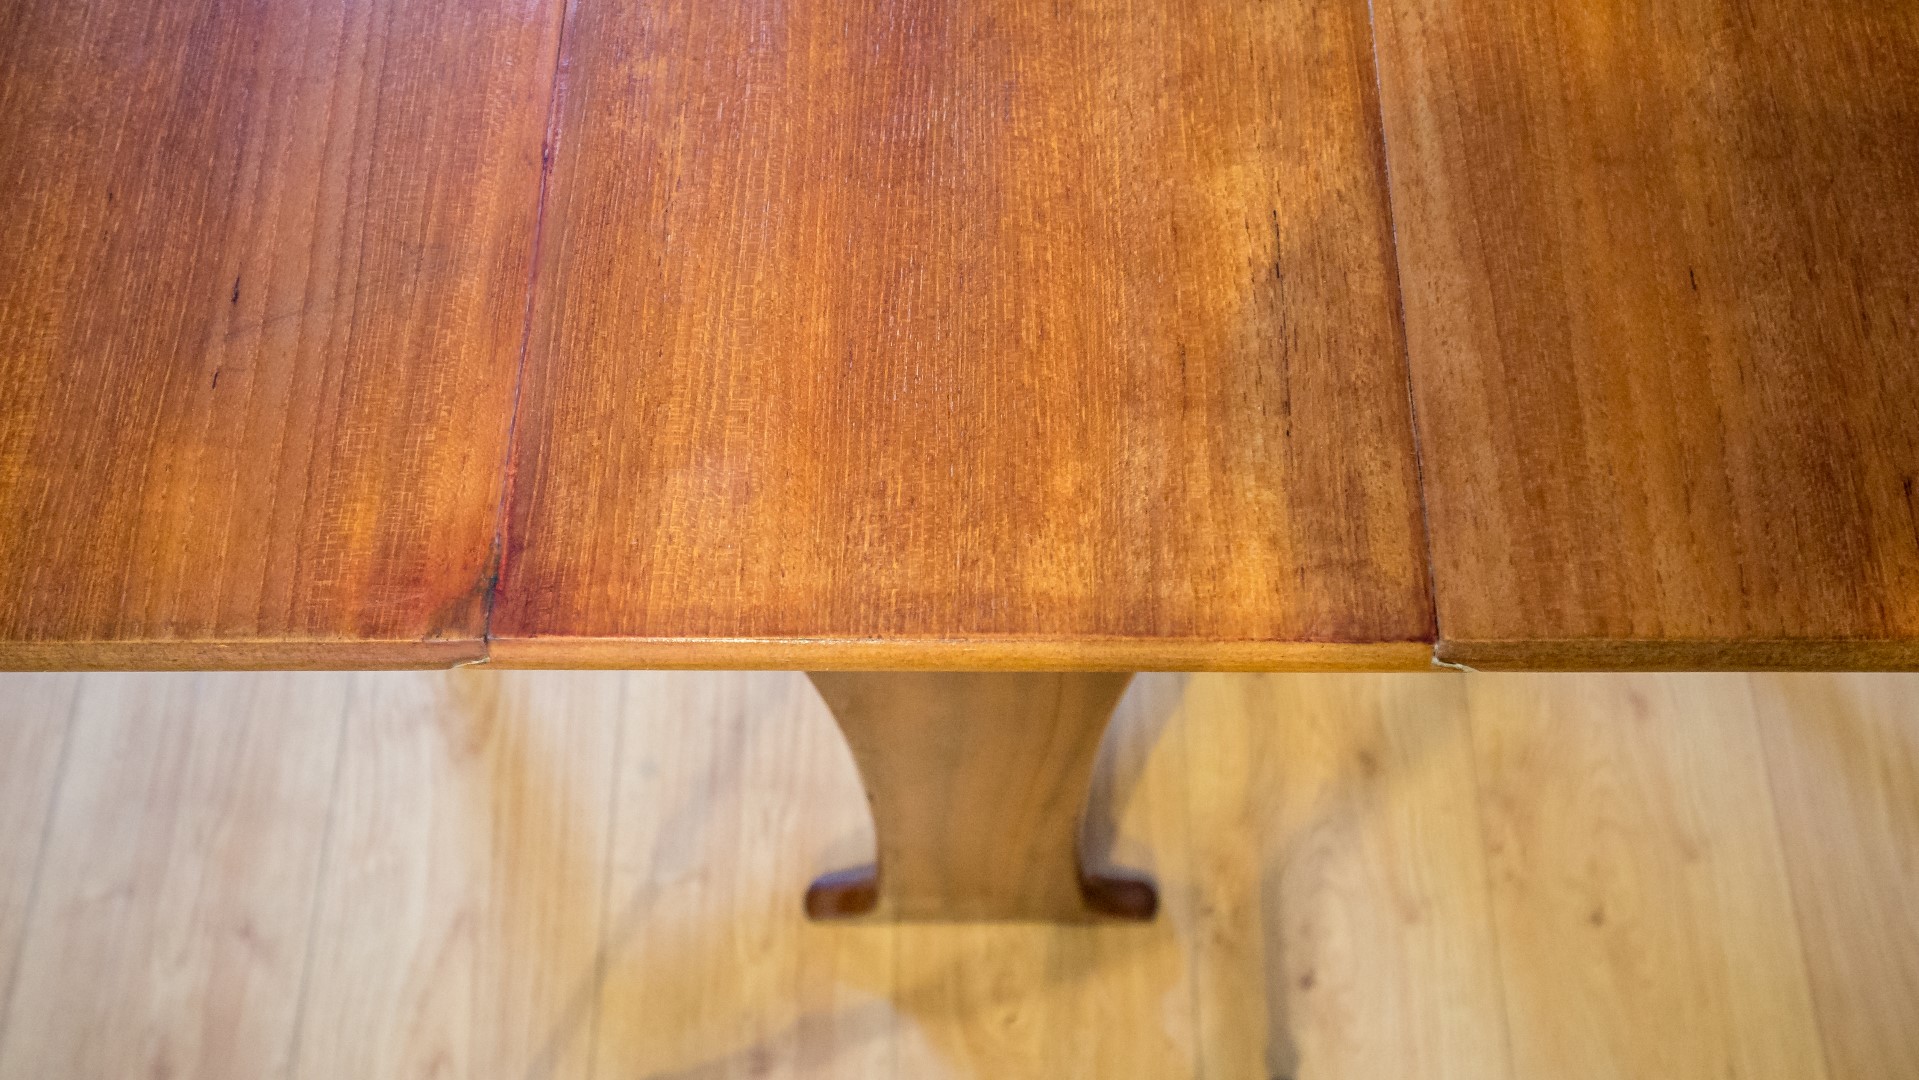
It had a few problems with the finish, some deep scratches, chipped veneer, the finish was dry and flakey an there were a few moisture stains. The top appearst to be a teak veneer laminated to MDF.
The base and frame was in really good condition except for one quite big chip on one side and it's solid sapele.
And there's a sticker underneath which says Legate furniture.
Normally when I refinish furniture like this I just use a card scraper to remove the old finish like I'm doing here just to show you for the purposes of this video. But I wanted to try something that I've not tried before for this table, so I bought some of this paint and varnish stripper by Everbuild, this bottle was around £8 which is about 11 dollars.
So I've never used this stuff before and to be honest it didn't go particularly well for me, but I'll explain the reasons why in more detail later in this video.
I followed the instructions on the bottle which said to apply it with a brush and leave it for 30 minutes.
After 30 minutes the finish was still difficult to remove but the bottle said I could re-apply if needed so that's what I did.
After another 30 minutes I found I could scrape off some of the finish a bit easier, at least in some areas, there were still a few places where the finish was being quite stubborn.
The finish on the sides scraped off a lot easier, probably because the sides are the edge grain of MDF.
So I decided to re-apply one more coat of stripped to the whole table top just to take care of the rest of the finish. Here you can see that I'm applying it across the grain rather than with the grain, and this is one of a few mistakes that I think I made on this project, I'll talk about the others in a little while
After a few minutes here you can see that where the stripper had been applied to bear wood it had left some streak marks across the grain.
After another 30 minutes, this time the remaining old finish came off a bit easier from those stubborn areas.
I then applied some mineral spirits to the table top and used this to clean up and remove any remaining finish and I'm using some 0000 steel wool to apply it. Then I wiped it down with a cloth.
So then I had to take care of the streak marks that the stripper had left across the grain so I used a cabinet scraper just to take some light shavings off. By this point it I found it quite ironic that I had decided to use stripper so that I wouldn't have to scrape the whole table top, and yet here I was, doing lots of scraping. I did manage to get rid of the streak marks by scraping though.
I thought it'd be worth talking about the problems I had using the stripper and what I'll try differently next time I use it. If there is a next time.
So firstly, as you've just seen if you apply this stuff to any areas where it's bear wood, it will leave streak marks if you apply it across the grain, so it's much better to apply it with the direction of the grain of the wood instead of across the grain like I stupidly did.
Secondly, I applied the stripper in the sunlight, and I wonder if that affected how effective the stripper was, I don't know for sure but perhaps the sun was drying out the stripper too quickly, and maybe it would have been better to apply it indoors so that the stripper could sit on the surface for longer, eating away at the old finish? I don't know...
Thirdly, maybe I didn't leave the finish on there long enough? I did follow the instructions but maybe if I'd have been more patient letting the stripper to it's thing then it may have made the old finish easier to remove.
The question is, would I use stripper again or would I just go back to my usual method of scraping the old finish away? Well on this particular project, using the stripper took much more time than my usual method of just scraping even excluding the waiting time - those 30 minute waits for the stripper to eat away at the old finish. But I will definitely try the stripper again, and hopefully next time I'll have better results because I will have learned from the mistakes I made in this project, and I can still see that using stripper could be quicker and involve less work if you're able to get on with something else while you're waiting for the stripper to do it's thing. So I will try it again in future and hopefully it will go a little better next time. Now, back to the project
Next I sanded the table top at 180 grit using my random orbit sander.
Then I applied some boiled linseed oil to nourish the wood and make it look beautiful again.
Once the oil had dried, I noticed that I'd actually worn away some of the veneer at the edges through sanding, fortunately it was just in one small area.
To fix this I used a brown Sharpie pen to colour in the edges, and smoothed it out with my finger just to better colour match the wood and disguise where I'd sanded through the veneer.
Next I could work on the chipped piece of veneer, and I really should have done this before I applied the boiled linseed oil because I needed to mask around the chipped area with masking tape and it doesn't stick so well to oiled wood even when the oil has dried.
I mixed up some epoxy and used it as a filler. After about 10 minutes I removed the tape and then I could chisel away any excess epoxy to get the surface flat and flush at the edges.
I used my brown Sharpie pen to add colour over the epoxy and blended it in with the finish using my finger before it had a chance to dry.
To make the table more hardwearing and resistant to moisture stains I chose spray varnish. I first wiped down the surface of the table top.
Then I applied the spray varnish to the edges of the table, and then the top of the table.
Once the first coat had dried, I de-nibbed the finish by spraying on some water and using some 600 grit wet and dry paper to lightly sand the surface.
I wiped away the dust and applied the next coat of spray varnish - I think I gave the table 5 coats in total by following the same process, sanding in between coats and wiping away the dust and by that point I was happy with how the table looked and it had a nice layer of protection.
I did decide to add a final layer of finish though - some of the clear Briwax. This isn't really necesary, I just like the way it feels, smells, and looks once it's buffed to a nice subtle sheen. I just think it's the ideal furniture for old mid century items like this one as it just seems in keeping in some way.
To buff out the wax I used a buffing pad attachment for my drill. And I did some final buffing of the edges using a cloth.
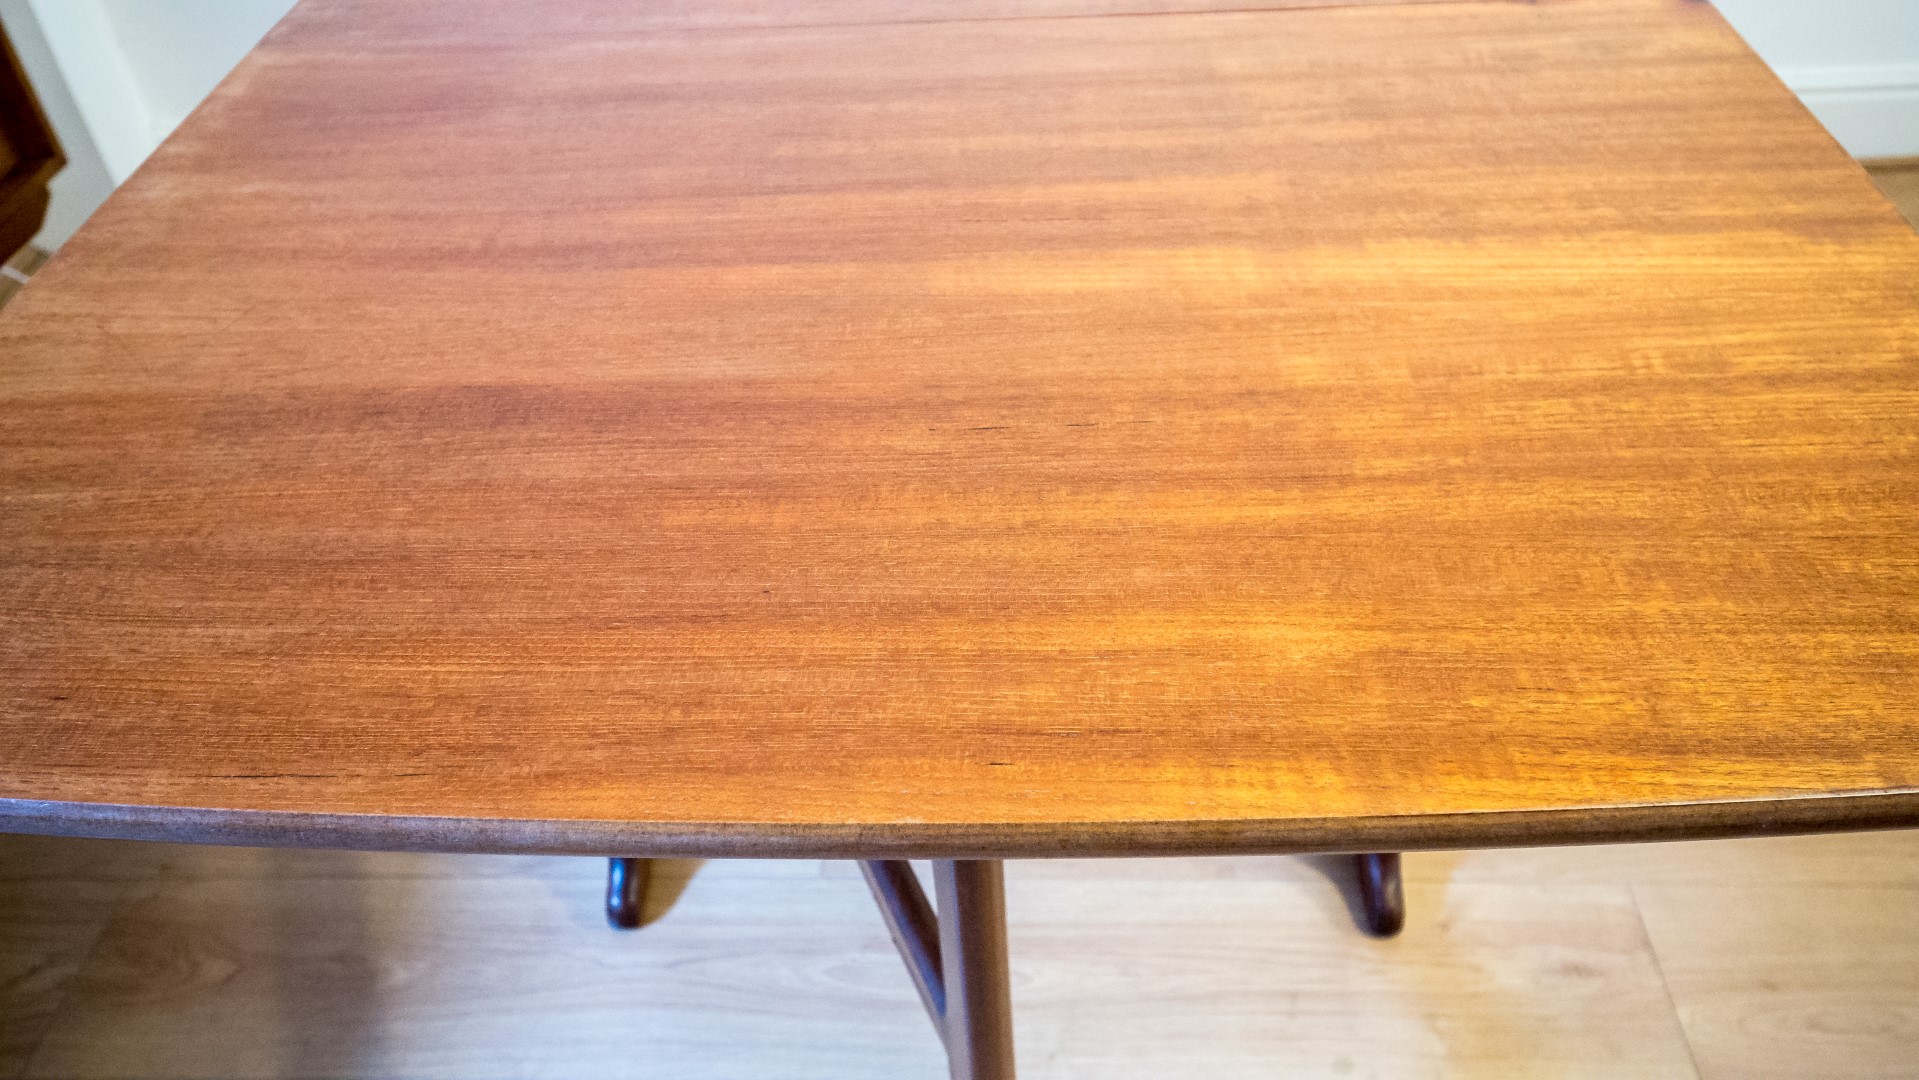
Here are some before and after shots
I had originally planned that this would be a project to restore and then sell, but now I've decided that I'm going to keep it, for a few reasons:
When I put it in my dining room to take some photos I really liked how it looked alongside my sideboard which matches it really nicely, and it looks good with my dining chairs too. I did think that I might stain the chairs to match the teak colour of the sideboard and table but actually after seeing them together with the table I think I like that they are lighter in colour.
I also really like being able to fold the table up and store it in the corner, especially because I often use the dining room for taking photos of the items that I make and restore and there's never enough space to do that properly, so having a folding table that can be tucked away in the corner will be really good for that.
And finally I'm no longer all that fond of the dining table that I was using - which is one that I made a few years ago, so I think it's time to get rid of that one. I'm not sure what I'll do with that yet I'll probably give it away locally as I'm not comfortable with selling it, mainly because I don't think it reflects well on me as it doesn't really reflect my current standard of woodworking if you know what I mean.
Images: