I looked through my scrap pile and found a piece of what I think is ash, which measured 600mm in length and 27mm square.
I'd start by drilling a hole for the pencil, and using calipers I measured the width of a pencil at 7mm. I drilled a 7mm hole, but that was a bit tight so I came back with an 8mm bit, and then the pencil could slide in.
I raised the blade on my tablesaw and then moved the fence so that the workpiece was centred to the blade, and made a cut through the hole, and a bit further. I rotated the workpiece making cuts from both sides to make sure the slot was even on both sides. Then I gave it a squeeze by hand to check how much flex there was, as this part would be the clamping part to hold the pencil and it seemed fine.
I needed an m8 bolt next, and unfortunately I didn't have any in the shop, but I did have some m8 threaded rod so I used that instead. I just needed to cut it to length with an angle grinder. This heats the metal up quite a lot so I used some water to cool it down.
Then I rounded over each end on the bench grinder to remove the burrs - this made the wingnuts screw on really easily.
Next I marked up where to drill a hole for rod and drilled with an 8mm bit.
I could then add the rod, and a washer and wingnut to each end.
I tested this out with a pencil inside and it sinched it down nicely.
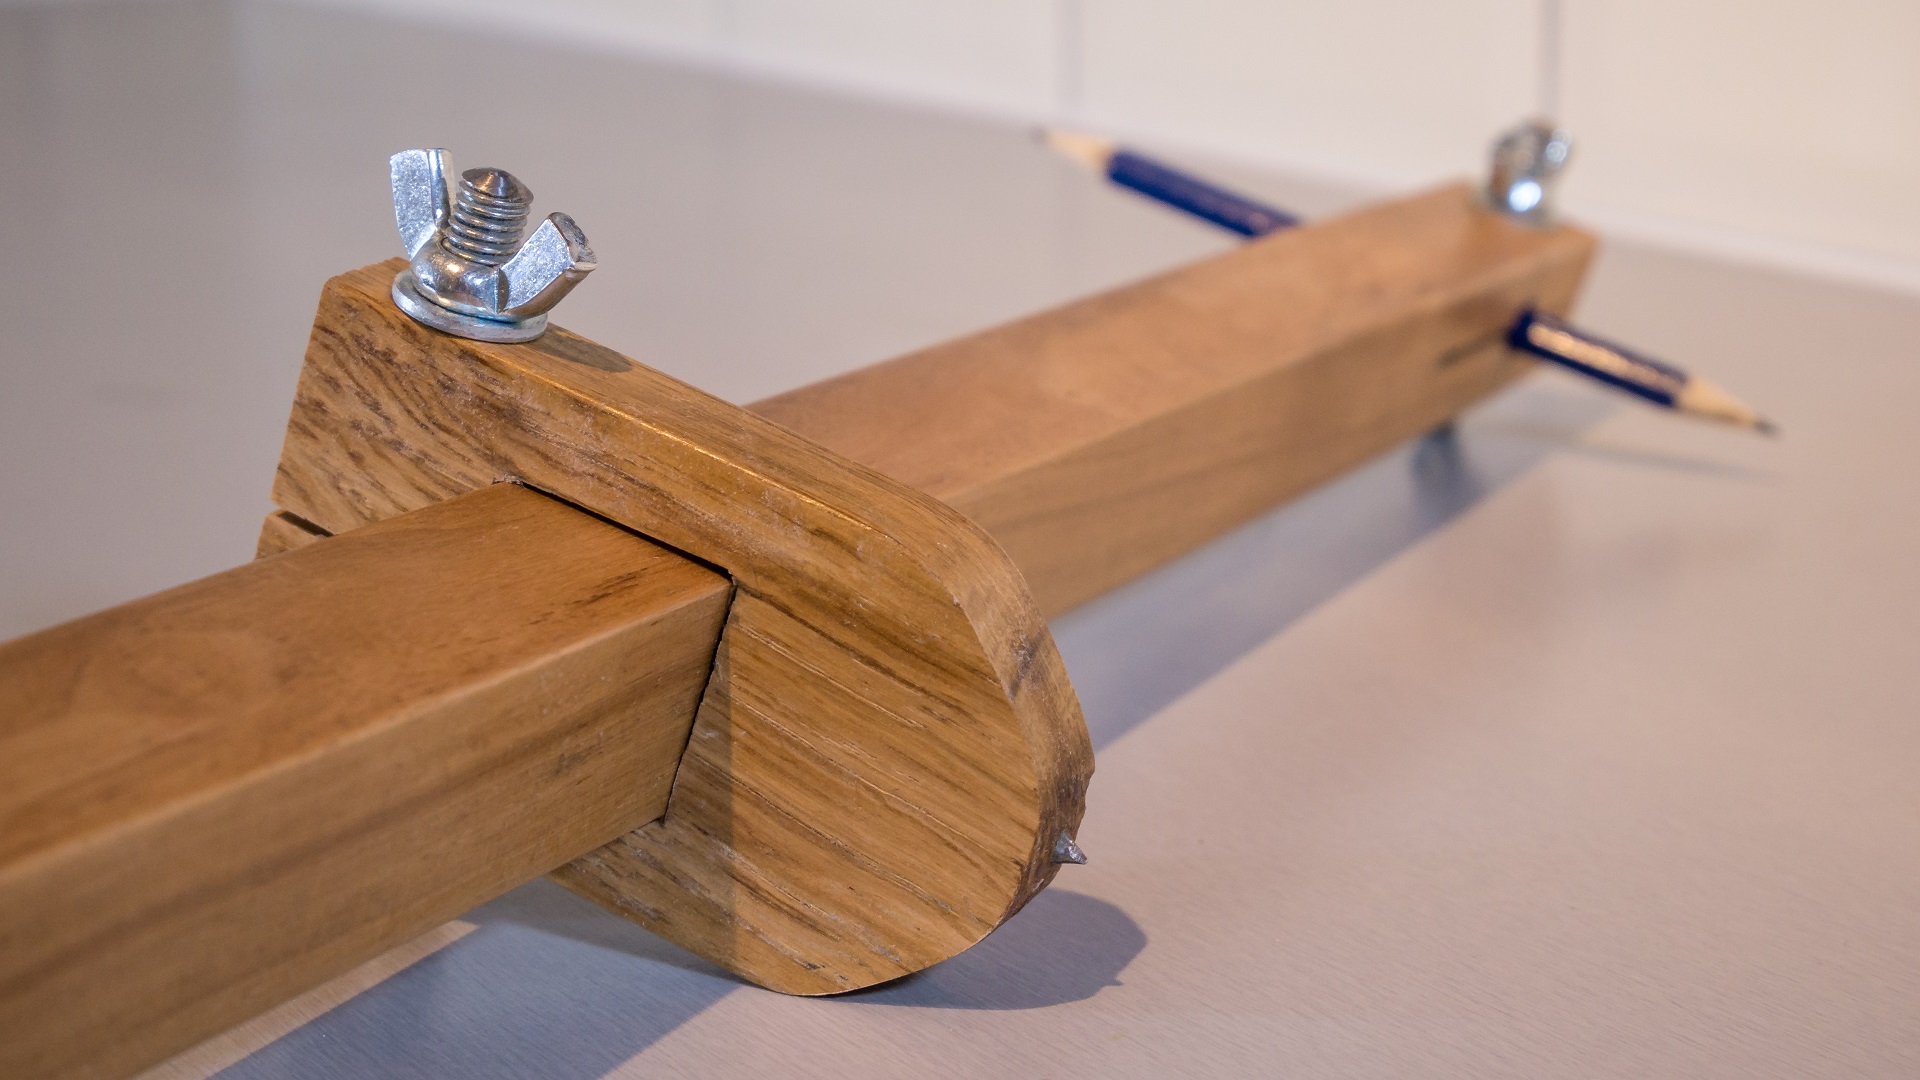
Then it was back to the scrap pile and this time I pulled out a small piece of oak to use which would hold the compasses pin.
I marked around the end of the bar of the compass on to the centre of the oak and used a 25mm forstner bit to remove most of the material inside the pencil marks, then I drilled some 3mm holes in the corners of the square and removed the rest of the material with chisels.
And the piece of oak fitted nicely on to the length of ash.
I did a bit of hand sanding to the inside of the square hole.
This piece needed a hole for a piece of threaded rod too. I drilled that on the pillar drill because the piece of oak I used was quite thin, and I wasn't confident enough to drill the hole by hand in case I didn't get it straight enough. But the pillar drill did a perfect job.
Then at the tablesaw I made another relief cut along the centre of the piece of oak in to the square hole.
I added another piece of rod, washers and wingnuts so that the piece of oak could be sinched securely on to the bar of the compass and that worked well too.
Next I marked up a pointed shape for the piece of oak where the pin would be added. I used a speedsquare to mark up the shape and cut it out on the bandsaw.
I cleaned up the bandsaw cuts at my bench sander.
I used a nail for the pin of the compass. I used the grinder to shape the head of the nail in to a point. Then I drilled a pilot hole slightly smaller than the thickness of the nail, added some super glue and hammered the nail in the hole.
I could then shape the other end of the nail to form the compass point.
I used my block plane to ease over the sharp edges of the bar of the compass to make it more comfortable to hold. And then I did some final sanding.
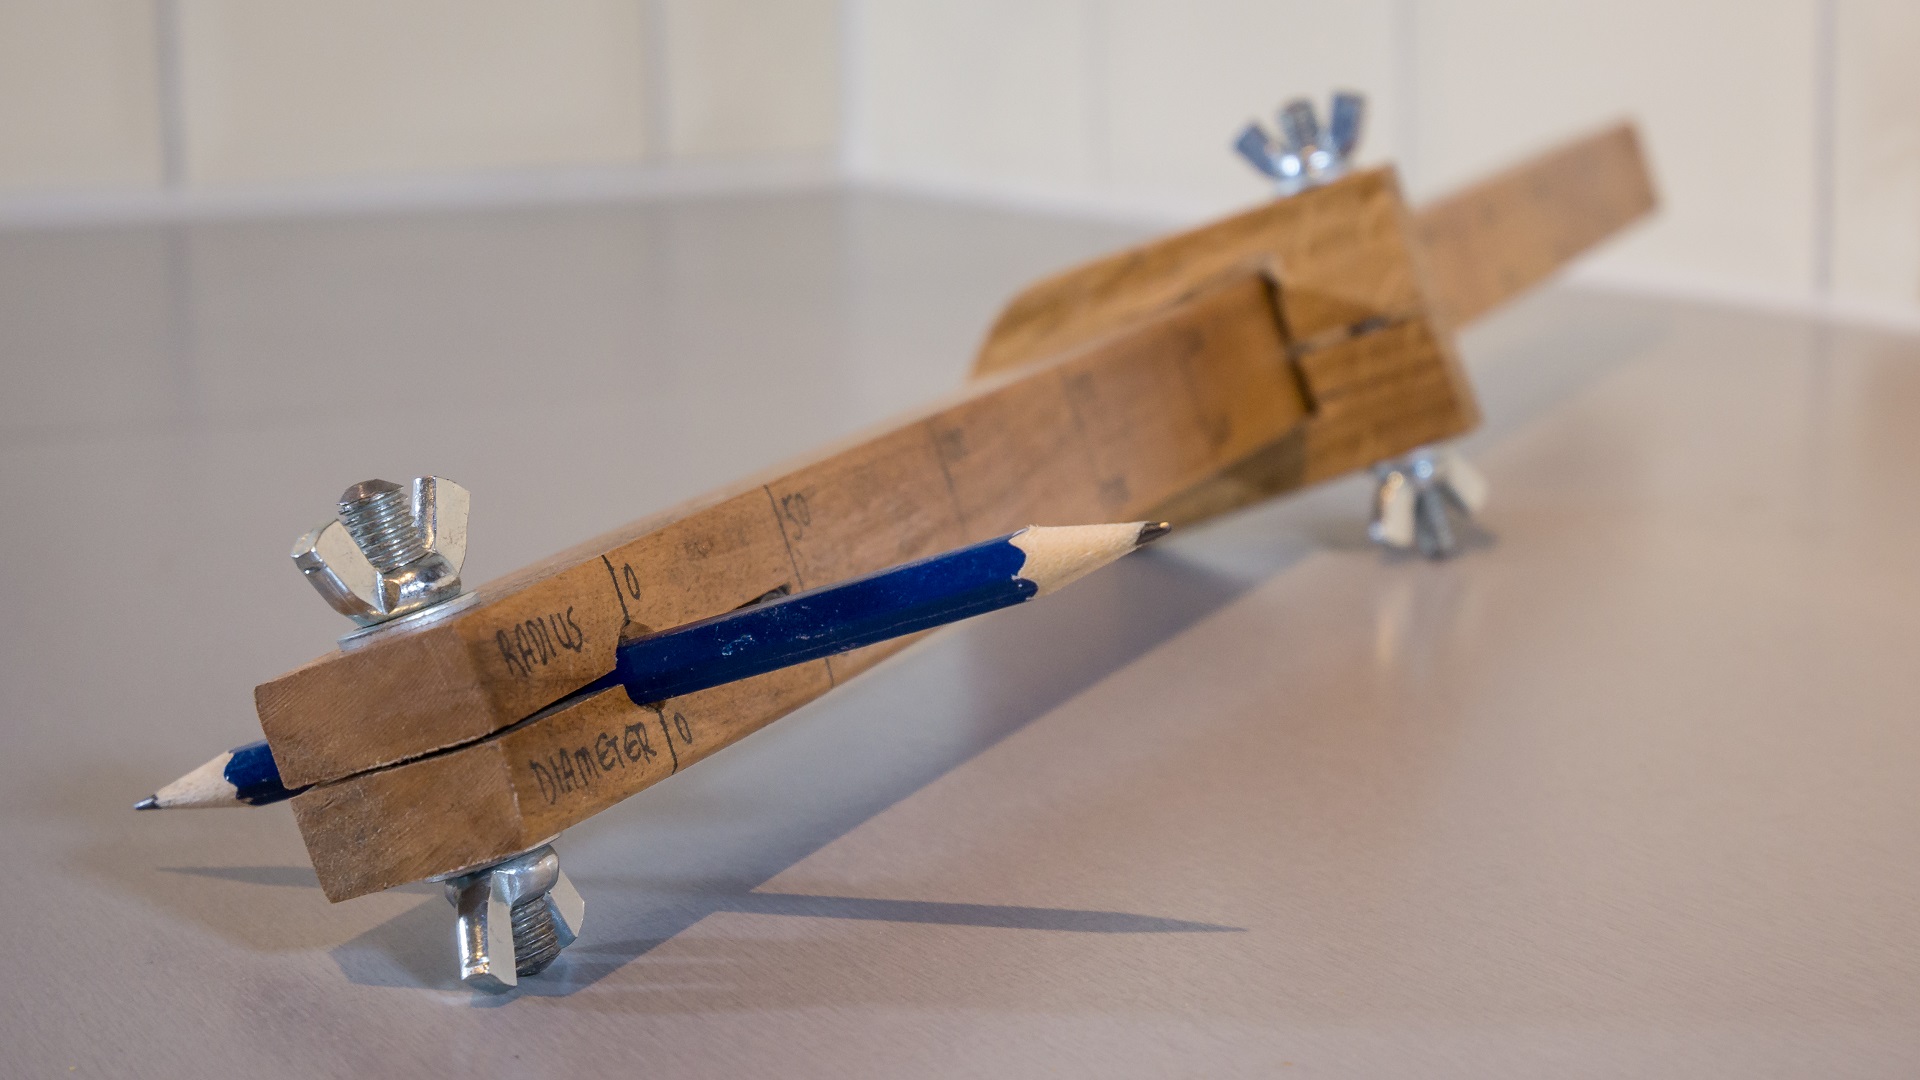
I decided to add some measurement markings using a black pen. I first marked up where the centre of the pencil point was.
Then using calipers I measured up the distance between the pin of the compass and the face of the oak piece which measured just over 7mm. This gave me a distance to offset my ruler by - so I lined up just over 7mm on the ruler with the mark representing the centre of the pencil and then made marks down the length of the bar at 50mm intervals.
I used a small square to mark up a line at each of those marks.
Then I wrote on the measurements - with radius at the top and diameter at the bottom.
I used spray varnish to seal the ink and protect the wood. I gave the pieces 3 coats in total, de-nibbing in between each coat with some 600 grit wet and dry paper.
The opposite side of the bar to the measurements got my makers mark, and I sealed that with the spray varnish too.
When the varnish was dry, I applied some clar briwax with a cotton cloth. After a few hours I buffed out the wax with a cotton cloth.
I could then add the rod, washers and wingnuts again, and try out the compass for the first time.
So I set the compass to 200mm radius, or 400mm diameter and drew a circle. Then I used a tape measure to validate that the measurement markings were cor rect.
Images: