In this video I make and install a new table top for an existing table frame. The old table top, which was located in a local office space wasn't wide enough to accommodate laptop users sitting on both sides of the table, so I was commissioned to make a new wider replacement top for it, to be stained and finished to match the table frame.
Sheet Material carrying handle: https://amzn.to/2RhuCQi (UK)
Draper Holesaw set: https://amzn.to/2Q6bUXk https://amzn.to/2CB6vE5 (US)
Makita 18v Vacuum: https://amzn.to/2T8ak9c (UK) https://amzn.to/2StwvH7 (US)
As an Amazon Associate I earn from qualifying purchases
In this video I'll be working on a commission to make a new replacement tabletop for an old table. The table was going to be used in a small office, and the problem with the old table top was that it wasn't wide enough - it was 3m by 800mm which meant that it wasn't wide enough for users with laptops to sit on both sides of the table. So the new top needed to be 1220mm wide.
This project was a challlenge for two reasons - firstly it was needed at short notice, so I needed to get it done quickly.
And secondly, access to the office which was on the second floor of a building was via a very narrow staircase. And for that reason I decided to make the table in two 1.5m x 1220mm sections.
For materials, I'd use 18mm hardwood plywood and I had it cut down to 1.5m in store which meant I didn't need to make any cuts to it, and also I could fit it inside my van to get it back to my workspace. The tabletop that I make is going to be made up of 2x 1.5m length sections to make up the 3m
I also needed some solid hardwood to trim the tabletop and for that I bought two pieces of oak. These were actually offcuts which I pulled out from this rack at my local builder's merchant. I paid about £60 for both pieces. One piece was 38mm thick and the other was 48mm thick, and rather than cut the thicker one down, I took some measurements to see if I could get all of the material I needed out of just one of the pieces so I could keep the other piece as a back up. As I'd be making the cuts at the tablesaw I needed to account for the 3mm kerf of my blade for each cut, but it looked like I had just enough material here to get 6x lengths of 12mm thick trim which would be perfect providing I didn't make any mistakes!
So with the fence set to 12mm I ripped the trim pieces, one by one. There were some burn marks from the blade, but that wasn't a problem - so so far so good.
Then I set my mitresaw to cut at 45 degrees and I made a cut at one end of each piece.
And I'd need all my longest clamps for this project. It's not often I work on anything quite this big, and that always presents some challenges when you don't have much space to work with.
I ran a bead of glue along the long edges of the tabletop.Then I could offer up one of the trim pieces with the 45 degree angle positioned correctly and I fired in a few brad nails just to hold it in place temporarily.
I then did exactly the same on the opposite long side.
And then I could use my clamps to apply more pressure and get nice tight glue joints.
I used a damp rag to clean up any glue squeeze out.
I didn't have quite enough parrallel clamps here but I did have a couple sash clamps so I used those as well.
I could then cut the end of the trim piece to length flush with the edge of the plywood. This would be where the two halves of the tabletop meet together later on.
Then using another piece of the trim for the shorter edge, I could offer that up to the mitred corner and mark the other end for length and cut at that at the mitresaw. I was careful here to cut the piece longer than necessary, and as you can see that's why there's a bit of a gap here, and that meant I could shave off a little at a time until it was the perfect fit.
Once the glue was dry I could remove the clamps I'd added earlier
And then I could add the trim to the short edge... But this time my clamps were not quite long enough to span the length, so what I did was double up the clamps, and parralel clamps work really well for this kind of thing. It was a little difficult to tighten both clamps at the same time though so I asked my partner Ria to tighten one side while I did the other side.
Once the glue had set, I added some oak wood filler to fill any tiny gaps or imperfections in the edge of the veneer.
After an hour or so I removed the clamps and then using my trim router I cut a roundover to the top edge of the table.
And then I did some sanding at 100 grit.
I also used a block plane to make sure the edges were flush. I could have used my biscuit joiner here to get the alignment better but those who've seen some of my previous projects will know that I've had problems with the accuracy of my biscuit joiner in the past, so I try to avoid using it.
By the way, all the time I was working on this half of the table in my garden, I was also working on the second half of the table inside my workshop, in exactly the same way.
To add extra strength to the trim, I'd use screws and plugs. I first cut some 8mm plugs at the drill press. And after measuring and marking where I wanted the screws, I drilled a pilot hole for the screw, then a large pilot hole for the plug, through about half the thikness of the 12mm trim. I could then add the screw, then squeeze in some glue, and add the plug. It really helps to have a small army of drills for this kind of job - ofcourse I could have done it all with one combi drill driver, but there would have been a lot of swapping of bits.
Once the glue was set I used my block plane to clean up the plugs, and they blended in really well.
I eased over the sharp edges at the bottom of the trim with my block plane too.
And then I did lots of sanding, all by hand as I didn't want the risk of sanding through the veneer.
Next it was time to stain the tabletop to match the colour of the table frame and now is a good time to explain that the plywood I was using was not my first choice of material for the tabletop - I had wanted to use oak veneered 18mm MDF as it would match the oak trim better, but at the time my local timber merchant didn't have any in stock and I didn't have time to waste I went for the ply. I first did some tests on a scrap of the same plywood to see how it looked. Once I wiped away the excess I was pretty happy with it especially as I knew that the topcoats of varnish that I apply later on will make this colour slightly darker too. I also applied it to the oak edge trim to see how the two would blend in and it actually looked fine so I needn't have worried.
I applied the stain generously and as evenly as possible with a brush and then wiped away the excess after letting it sit for about a minute or so and I've got to say at this point I wasn't really happy with how it looked - and I wish I'd have used a sanding sealer before applying the stain as it looked a little blotchy. I had thought as it was a hardwood ply rather than soft wood it'd be ok without sanding sealer. But I went ahead and applied a first coat of waterbased varnish anyway to see how it would look after that was added. And it seemed to make the blotchiness less noticeable and even out the finish a bit which was a relief.
After applying the first coat I waited for it to dry and then wet sanded at 400 grit to de nib the finish and then I wiped away any dust ready for the next coat.
But at this point I ran out of varnish - I'd already ordered some a few days before from Amazon but they failed to deliver, and I needed to get this finished so I went and bought some of this stuff from ScrewFix, and I just had to hope that it was a similar level of sheen and colour tone to the stuff I used before. It certainly looked similar as I was applying it, and it applied really nicely, it was just as nice to use as the stuff I normally use. So I wet sanded again and added a couple more coats and I thought it looked pretty nice.
But I still needed to add some final coats to the other half of the table which was in the garden, but the weather took a turn for the worse, so I needed to set up some sawhorses in my dining room and apply the rest of the finish coats in there.
You'll see that this half already had a cable grommet in the centre, and I needed to add one of those to the other half too - I used a 60mm holesaw to drill the holes. I had to buy a new set of holesaws on Amazon too because my old set didn't have a 60mm size, this one is by Draper and I'll link to it in the description box beow. Fortunately this was delivered in time, unlike the varnish.
After wiping away the dust I mixed up some epoxy and applied that to the ring part of the grommet and weighed it down for a few minutes as the glue set, and then the inside part of the grommet just pushes in to that. I didn't get any footage of that but here's what they look like, and I got those from Amazon too, again i'll include links below
The final thing I needed to fit was three of these mounting plates which I'll use to join the two halves of the table together on the underside. These will help pull the two halves of the tabletop flush with one another when I install them.
Next I needed to install the tabletop and as I'd be installing it on my own, and I had two narrow flights of stairs to navigate, I invested in one of these sheet material carrying handles - I got this from Amazon too and I'll include a link to it in the description box below too!
It's rubberised on the inside, which makes it extremely grippy, and also it doesn't damage whatever you need to carry with it. This works brilliantly, I was really pleased with it and I think it's going to come in very useful in future
So after loading it in to my van, I took it to the office and then I could install it and there were already some pocket holes in the existing frame so I could use those to secure the top from underneath.
I also secured the two halves of the tabletop together using the joining plates.
I brought along my Makita cordless vacuum just so that I could tidy up after myself. This thing works great and it's easy to throw in to the van for installations. I've had it for a while and it gets a lot of use around the home - it was only about £35 on Amazon and it works great - I'll leave a link to that in the description box too.
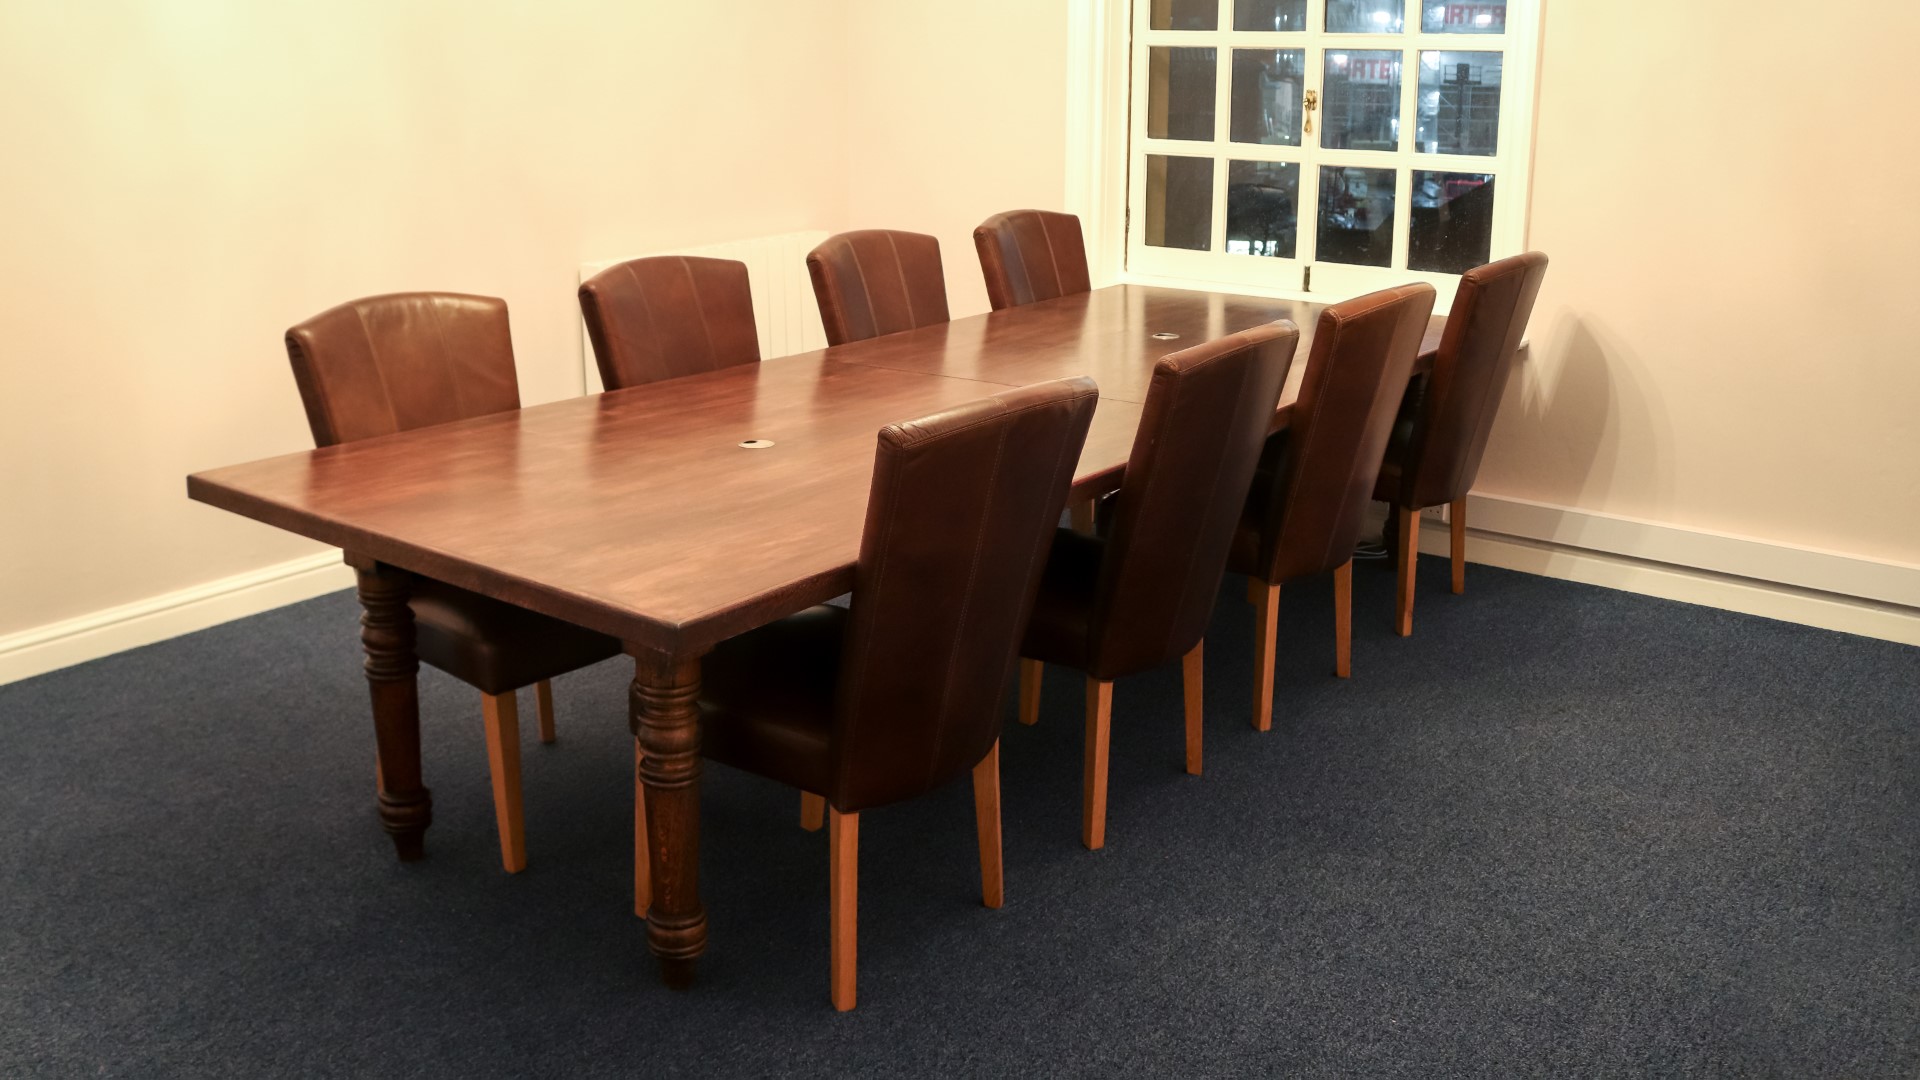
Here's how it looked once it was all installed.
For me, this project was all about overcoming challenges to get the job done. Making the table at short notice, not being able to get the oak veneered MDF that I really wanted to use, the mistake of not using a sanding sealer before applying the stain, my varnish delivery not arriving when it was suppoed to so having to go and buy a different product off the shelf, the british weather meaning I had to set up a workspace in my home to apply some of the final finish coats, and finally delivering and installing it on my own.
Despite all that, I think it turned out ok and even though it's not my finest work, the most important thing is that the client was happy with the end result and that's all that really matters. This project took about 12 hours to make, plus another couple of hours to pick up all the materials, and another couple of hours to do the delivery and installation side of things, so it was about 16 hours in total and I quoted for two days of my day rate plus cost of materials so that worked out OK.
I hope you enjoyed this video, please subscribe to my channel for more weekly woodworking videos if you haven't already, and thanks for watching.
Images: