In this video I design and build a mid century modern style cat sofa, although it could be used by small dogs or perhaps other pets (ferrets maybe?). These make for a great cat bed or dog bed for your furry friends!
Cat sofa
In this video I'm going to be making a sofa for a cat or small dog.
I had lots of offcuts of 18mm plywood left over from my recent mitre station build and this would be a great project to make use of those.
First I designed what I wanted to make using SketchUp, and here's what I came up with. Plans and cut lists for this build will be available free for my patrons on Patreon or via my Etsy store for a small fee, links to both of those pages are below in the description box.
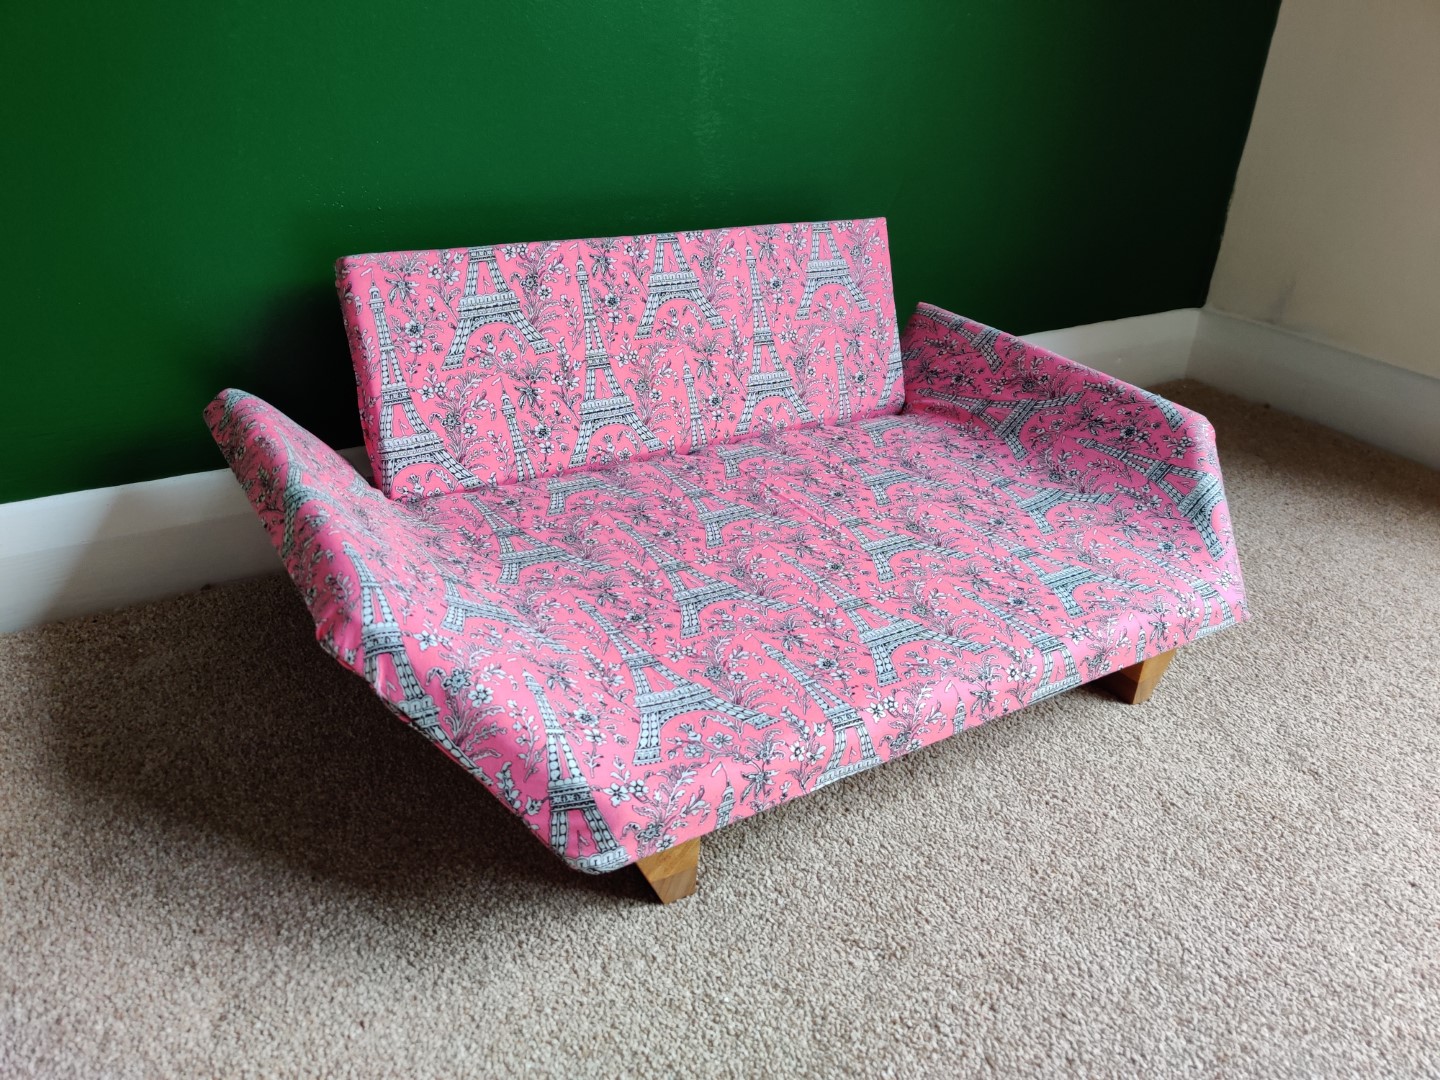
I started ripping the panels to rough size at the tablesaw. Next I want to cut some angles on to some of the edges of the panels to give the sofa it's shape, and I'm going for a bit of a mid century modern style with this one.
I'm going to be using my panel sled to make the cuts, and I used a digital angle guage to set the angle of my tablesaw blade.
I could then cut that angle to one edge, and the measure up the exact length of my panels, plus the direction of the angle and then I can line up the mark with the blade by eye and make the next cut.
For the smaller panels that also needed this angle on one of their long edges, I could simply use the tablesaw fence.
And I cut the smaller panels to length at the mitre saw.
To join the panels I'm going to be using the domino mortiser, and here I'm using a combination square to mark up positions so that all the tenons align correctly. If you don't have a domino, stay tuned as I'll explain another way of joining these angled panels.
Next I can tilt the fence to the correct angle, line it up with my pencil marks and cut the mortises. And I had to be careful to set up the domino so that the bit didn't plunge all the way through the panels and out the other side. I'm using the 8mm x 40mm dominos here.
I then made marks at the centre of the panels so that I could add a third domino and then I could add wood glue and dominos and this is where the sofa begins to take shape.
Clamping up these joints required a bit of thought and planning, and what I came up with was to cut some of these sacrificial angled blocks at the tablesaw - this angle is the same 45 degree angle of the panels that form the arms of the sofa. These are just going to be used for the glue up and then they'll be thrown away. I could clamp these tightly in place on to the bottom panel and that creates two parralel surfaces that I can use to clamp up the glue joint. And you can see here I'm getting a nice bead of glue squeeze out.
So as the domino is an expensive machine which a lot of people don't have access to, I thought I'd suggest an alternative way of re-enforcing these angled glue joints so I thought about how I could have done this before I had the domino - it's important to remember that there's always alternative ways of achieving the same thing, and those alternatives may not be as quick and convenient, but with a little bit of thinking, there's nearly always a way of making it work. I probably would have used a combination of wood glue and hot glue to join the angled cuts together, aligning them and holding them really firmly until the hot glue sets which happens very quickly, and the wood glue would provide more strength. If you don't have hot glue gun, super glue would do the same thing but you'd need to hold it together for longer, or use an activator product. Once that's done, I would have used either through dowels or screws through from the underside of the sofa in to the arm panels to re-enforce the joints, and those screws or dowels would be hidden later by the upholstery anyway. Not that it really matters, because it's the bottom panel anyway and no one would see it from above.
It was at this point when I realised I'd made my first mistake of the project. Every project has them!
When I designed the sofas I added this angle on to the front of the arm panels and I meant to cut that angle before assembling the panels but I forgot.
So to get around this, I set up a stop block at the mitre saw to allow me to cut off the angles I wanted. I wouldn't recommend doing this because it's not really a safe cut to make as a) there wasn't much of the workpiece referencing against the fence and b) the offcut is between the spinning blade and the clamp which is dangerous if anything moves while the cut is being made. I did this very carefully being mindful of the risk of kickback and didn't have any issues, but it would have been much easier to cut the angles on to the arms prior to assembling the panels.
Next I wanted to make the legs for the sofa, and I happened to have some offcuts from a previous project, these desktop smart phone stand/desk tidy things. This is oak and sapele laminated together and cut to an angle.
I added a piece of masking tape as a reference point for how large I wanted to cut my legs and made the cuts at the mitre saw.
I could then flip the sofa over and mark up where to position the legs and those are going to get secured using wood glue, and I clamped them in place. That's going to be plenty strong enough for this.
Next I spent some time sanding and I did this by hand, I wouldn't usually sand across the grain like this but this is going to get covered with fabric so it didn't matter. I also eased over any sharp edges.
Next I offered up the backrest panel and marked it up for length. I cut it at the mitre saw but then realised. I'd need to account for the thickness of some foam that's going to get added later so I decided to trim off about 10mm from the length.
You can see here that the back rest is angled backwards because of the angles I cut earlier on.
I positioned the back panel where I wanted it using my combination square and then scribed a pencil line either side, and I can then drill some pilot holes in the centre between those lines, holding my drill at roughly the same angle as the back rest. It didn't need to be perfect, but it did need to be close.
I also decided to add a roundover to the top edges of the back rest and I did that at the disc sander.
Before adding the backrest to the sofa I'm going to add some of this foam which is from an old camping floor mat. I found this in the loft when I moved home, and I don't plan on doing any camping in future so I'll use this on the sofas.
I made some knife marks at the angled corners because I want to cut away some of the foam where the backrest will be positioned later on.
I could then measure in to where the front of the backrest panel would be, mark that up on to the foam and use a straight edge to guide my knide to cut it away.
I also marked up a centre line on to the foam and the bed which will allow me to re-position it right where I want it after adding the adhesive.
The adhesive I'm using here is spray contact adhesive, so I spray it on to the back of the inside faces of the sofa, and the back of the foam too, wait for about 60 seconds for the adhesive to go tacky, and then I can line up the two reference marks I made earlier to position it from the centre outwards, and I'm using a couple of dowels to stop the edges from touching as this adhesive bonds instantly when the two glued surfaces touch one another.
I can then trim away the excess foam with a sharp knife I'm just using a butter knife that I've added a razor sharp edge to.
Next I offered up the backrest and I can scribe a line the thickness of the foam so that I know where to position more of the foam on to the backrest. I applied contact adhesive again and then I can offer up the foam to that line I'd marked up and again trimmed away the excess.
I'm going to be using some of this fabric I got from a charity shop, this used to be a pair of curtains, I think it's pretty nice and I've already used it on previous projects.
I am far from being an expert at upholstery but I can usually do a reasonably good job. I'm using an air stapler and starting with securing the front edge working from the centre outwards.
I then flipped the bed over and secured the area underneath where the backrest is going to be later, so these staples will be hidden by that, and I'm keeping the fabric pulled reasonably taught and then I can flip it again and secure the underside of the back edge.
And then I can work on the side edges, and I just kind of made this up as I went along to be honest, folding everything over to keep things nice and tidy at the front edges. And then I worked on the back edges and it didn't matter to be here if the staples were visible because it's at the back.
And then I could work on the backrest which I wrapped tightly, paying special attention to getting the corners nice and tight, and then securing with staples on the underside of the backrest.
Initially the back rest would get secured in place with some hot glue just to hold it in place temporarily which will allow me to flip the bed over and then drill out the pilot holes I started earlier in to the backrest, and then adding some screws to secure it in place nice and firmly.
I added my makers mark to the bottom of the sofa.
And I finished the legs with some shellac, which I used mainly just because that's what I had on hand at the time, but it popped the grain really nicely as you can see.
I made four of these sofas and it took me about 13 hours or thereabouts.
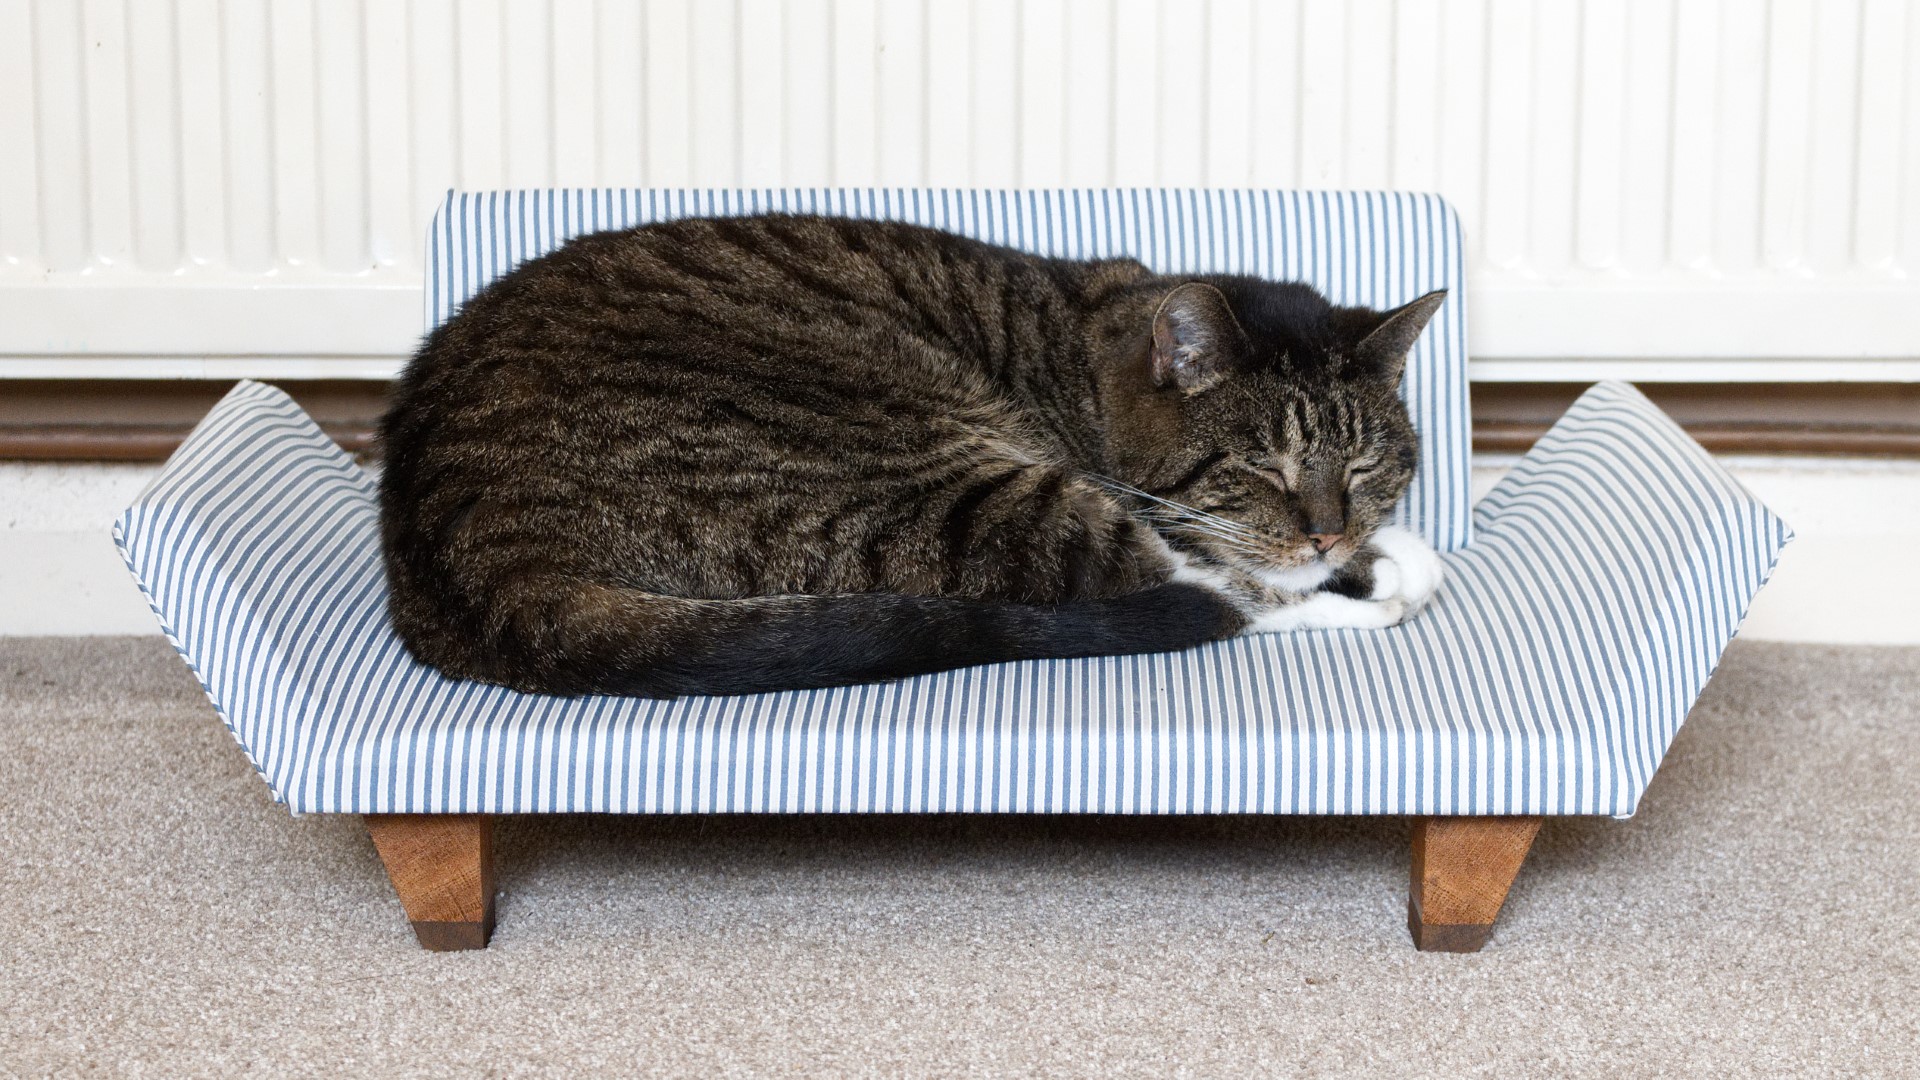
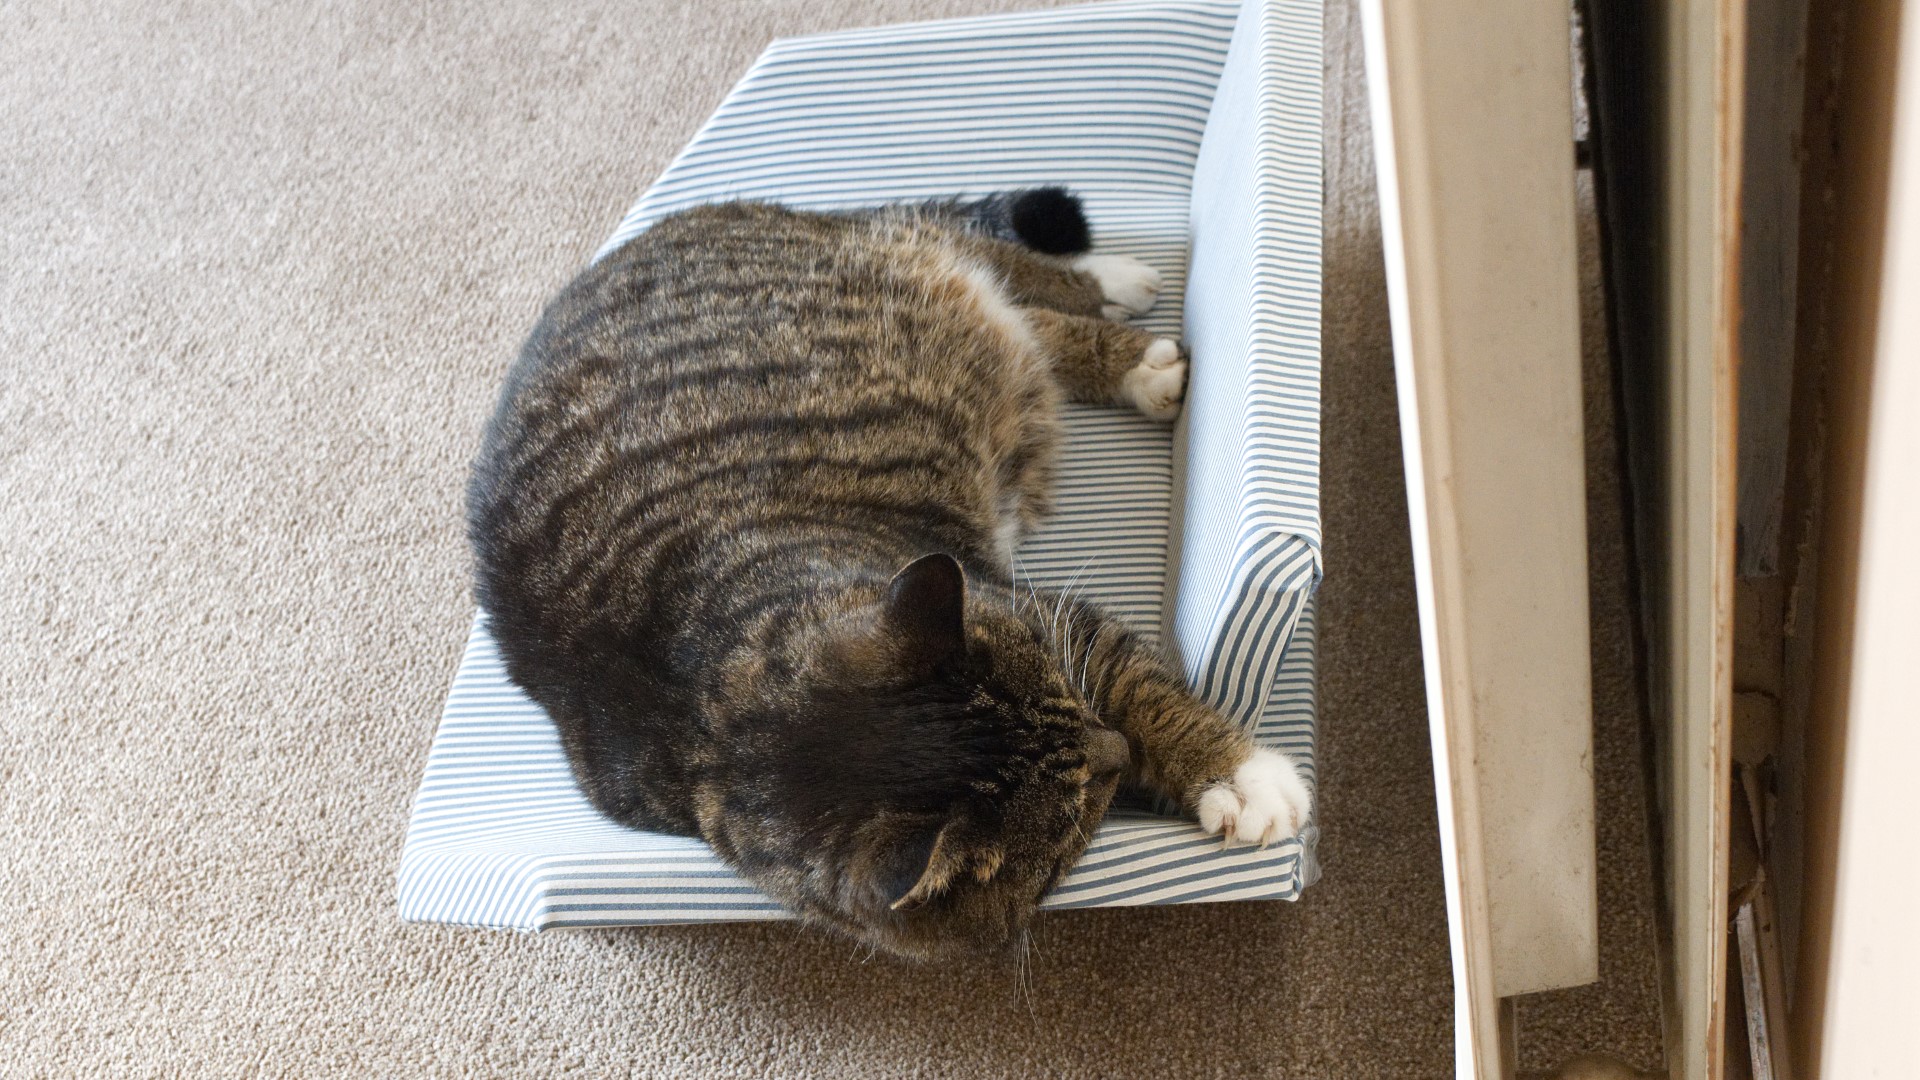
And then I just needed to persuade my cat Dylan to pose on one of them so that I could take some photos and I could then list them on my Etsy store - there's a link to that in the description box below if you're interested in checking them out.
It was really enjoyable project, I love making things for pets, as you may already know as I've done quite a lot of them on my channel already.
I hope you enjoyed the video. Please subscribe for more weekly woodworking videos.
If you'd like to receive early access to my videos, free plans and cut lists, exclusive content and a name credit at the end of my videos you can support the channel via Patreon and there's a link to that in the description box below. Thanks for watching
In this video I'm going to be making a sofa for a cat or small dog.
I had lots of offcuts of 18mm plywood left over from my recent mitre station build and this would be a great project to make use of those.
First I designed what I wanted to make using SketchUp, and here's what I came up with. Plans and cut lists for this build will be available free for my patrons on Patreon or via my Etsy store for a small fee, links to both of those pages are below in the description box.
I started ripping the panels to rough size at the tablesaw. Next I want to cut some angles on to some of the edges of the panels to give the sofa it's shape, and I'm going for a bit of a mid century modern style with this one.
I'm going to be using my panel sled to make the cuts, and I used a digital angle guage to set the angle of my tablesaw blade.
I could then cut that angle to one edge, and the measure up the exact length of my panels, plus the direction of the angle and then I can line up the mark with the blade by eye and make the next cut.
For the smaller panels that also needed this angle on one of their long edges, I could simply use the tablesaw fence.
And I cut the smaller panels to length at the mitre saw.
To join the panels I'm going to be using the domino mortiser, and here I'm using a combination square to mark up positions so that all the tenons align correctly. If you don't have a domino, stay tuned as I'll explain another way of joining these angled panels.
Next I can tilt the fence to the correct angle, line it up with my pencil marks and cut the mortises. And I had to be careful to set up the domino so that the bit didn't plunge all the way through the panels and out the other side. I'm using the 8mm x 40mm dominos here.
I then made marks at the centre of the panels so that I could add a third domino and then I could add wood glue and dominos and this is where the sofa begins to take shape.
Clamping up these joints required a bit of thought and planning, and what I came up with was to cut some of these sacrificial angled blocks at the tablesaw - this angle is the same 45 degree angle of the panels that form the arms of the sofa. These are just going to be used for the glue up and then they'll be thrown away. I could clamp these tightly in place on to the bottom panel and that creates two parralel surfaces that I can use to clamp up the glue joint. And you can see here I'm getting a nice bead of glue squeeze out.
So as the domino is an expensive machine which a lot of people don't have access to, I thought I'd suggest an alternative way of re-enforcing these angled glue joints so I thought about how I could have done this before I had the domino - it's important to remember that there's always alternative ways of achieving the same thing, and those alternatives may not be as quick and convenient, but with a little bit of thinking, there's nearly always a way of making it work. I probably would have used a combination of wood glue and hot glue to join the angled cuts together, aligning them and holding them really firmly until the hot glue sets which happens very quickly, and the wood glue would provide more strength. If you don't have hot glue gun, super glue would do the same thing but you'd need to hold it together for longer, or use an activator product. Once that's done, I would have used either through dowels or screws through from the underside of the sofa in to the arm panels to re-enforce the joints, and those screws or dowels would be hidden later by the upholstery anyway. Not that it really matters, because it's the bottom panel anyway and no one would see it from above.
It was at this point when I realised I'd made my first mistake of the project. Every project has them!
When I designed the sofas I added this angle on to the front of the arm panels and I meant to cut that angle before assembling the panels but I forgot.
So to get around this, I set up a stop block at the mitre saw to allow me to cut off the angles I wanted. I wouldn't recommend doing this because it's not really a safe cut to make as a) there wasn't much of the workpiece referencing against the fence and b) the offcut is between the spinning blade and the clamp which is dangerous if anything moves while the cut is being made. I did this very carefully being mindful of the risk of kickback and didn't have any issues, but it would have been much easier to cut the angles on to the arms prior to assembling the panels.
Next I wanted to make the legs for the sofa, and I happened to have some offcuts from a previous project, these desktop smart phone stand/desk tidy things. This is oak and sapele laminated together and cut to an angle.
I added a piece of masking tape as a reference point for how large I wanted to cut my legs and made the cuts at the mitre saw.
I could then flip the sofa over and mark up where to position the legs and those are going to get secured using wood glue, and I clamped them in place. That's going to be plenty strong enough for this.
Next I spent some time sanding and I did this by hand, I wouldn't usually sand across the grain like this but this is going to get covered with fabric so it didn't matter. I also eased over any sharp edges.
Next I offered up the backrest panel and marked it up for length. I cut it at the mitre saw but then realised. I'd need to account for the thickness of some foam that's going to get added later so I decided to trim off about 10mm from the length.
You can see here that the back rest is angled backwards because of the angles I cut earlier on.
I positioned the back panel where I wanted it using my combination square and then scribed a pencil line either side, and I can then drill some pilot holes in the centre between those lines, holding my drill at roughly the same angle as the back rest. It didn't need to be perfect, but it did need to be close.
I also decided to add a roundover to the top edges of the back rest and I did that at the disc sander.
Before adding the backrest to the sofa I'm going to add some of this foam which is from an old camping floor mat. I found this in the loft when I moved home, and I don't plan on doing any camping in future so I'll use this on the sofas.
I made some knife marks at the angled corners because I want to cut away some of the foam where the backrest will be positioned later on.
I could then measure in to where the front of the backrest panel would be, mark that up on to the foam and use a straight edge to guide my knide to cut it away.
I also marked up a centre line on to the foam and the bed which will allow me to re-position it right where I want it after adding the adhesive.
The adhesive I'm using here is spray contact adhesive, so I spray it on to the back of the inside faces of the sofa, and the back of the foam too, wait for about 60 seconds for the adhesive to go tacky, and then I can line up the two reference marks I made earlier to position it from the centre outwards, and I'm using a couple of dowels to stop the edges from touching as this adhesive bonds instantly when the two glued surfaces touch one another.
I can then trim away the excess foam with a sharp knife I'm just using a butter knife that I've added a razor sharp edge to.
Next I offered up the backrest and I can scribe a line the thickness of the foam so that I know where to position more of the foam on to the backrest. I applied contact adhesive again and then I can offer up the foam to that line I'd marked up and again trimmed away the excess.
I'm going to be using some of this fabric I got from a charity shop, this used to be a pair of curtains, I think it's pretty nice and I've already used it on previous projects.
I am far from being an expert at upholstery but I can usually do a reasonably good job. I'm using an air stapler and starting with securing the front edge working from the centre outwards.
I then flipped the bed over and secured the area underneath where the backrest is going to be later, so these staples will be hidden by that, and I'm keeping the fabric pulled reasonably taught and then I can flip it again and secure the underside of the back edge.
And then I can work on the side edges, and I just kind of made this up as I went along to be honest, folding everything over to keep things nice and tidy at the front edges. And then I worked on the back edges and it didn't matter to be here if the staples were visible because it's at the back.
And then I could work on the backrest which I wrapped tightly, paying special attention to getting the corners nice and tight, and then securing with staples on the underside of the backrest.
Initially the back rest would get secured in place with some hot glue just to hold it in place temporarily which will allow me to flip the bed over and then drill out the pilot holes I started earlier in to the backrest, and then adding some screws to secure it in place nice and firmly.
I added my makers mark to the bottom of the sofa.
And I finished the legs with some shellac, which I used mainly just because that's what I had on hand at the time, but it popped the grain really nicely as you can see.
I made four of these sofas and it took me about 13 hours or thereabouts.
And then I just needed to persuade my cat Dylan to pose on one of them so that I could take some photos and I could then list them on my Etsy store - there's a link to that in the description box below if you're interested in checking them out.
It was really enjoyable project, I love making things for pets, as you may already know as I've done quite a lot of them on my channel already.
I hope you enjoyed the video. Please subscribe for more weekly woodworking videos.
If you'd like to receive early access to my videos, free plans and cut lists, exclusive content and a name credit at the end of my videos you can support the channel via Patreon and there's a link to that in the description box below. Thanks for watching
#woodworking #cats #midcenturymodern
Thanks for watching!
Please subscribe, click like if you like, and hit the bell icon for future video notifications
MY TOOLS:
For links to the tools I use, plus some of my favourite consumables, finishes and more see links below. As an Amazon Associate I may earn a small commission from qualifying purchases:
UK affiliate store: https://www.amazon.co.uk/shop/ragnbonebrown
US affiliate store: https://www.amazon.com/shop/ragnbonebrown
HELP SUPPORT THE CHANNEL:
Support with Patreon: http://www.patreon.com/ragnbonebrown
Support with PayPal http://paypal.me/ragnbonebrown
Images: