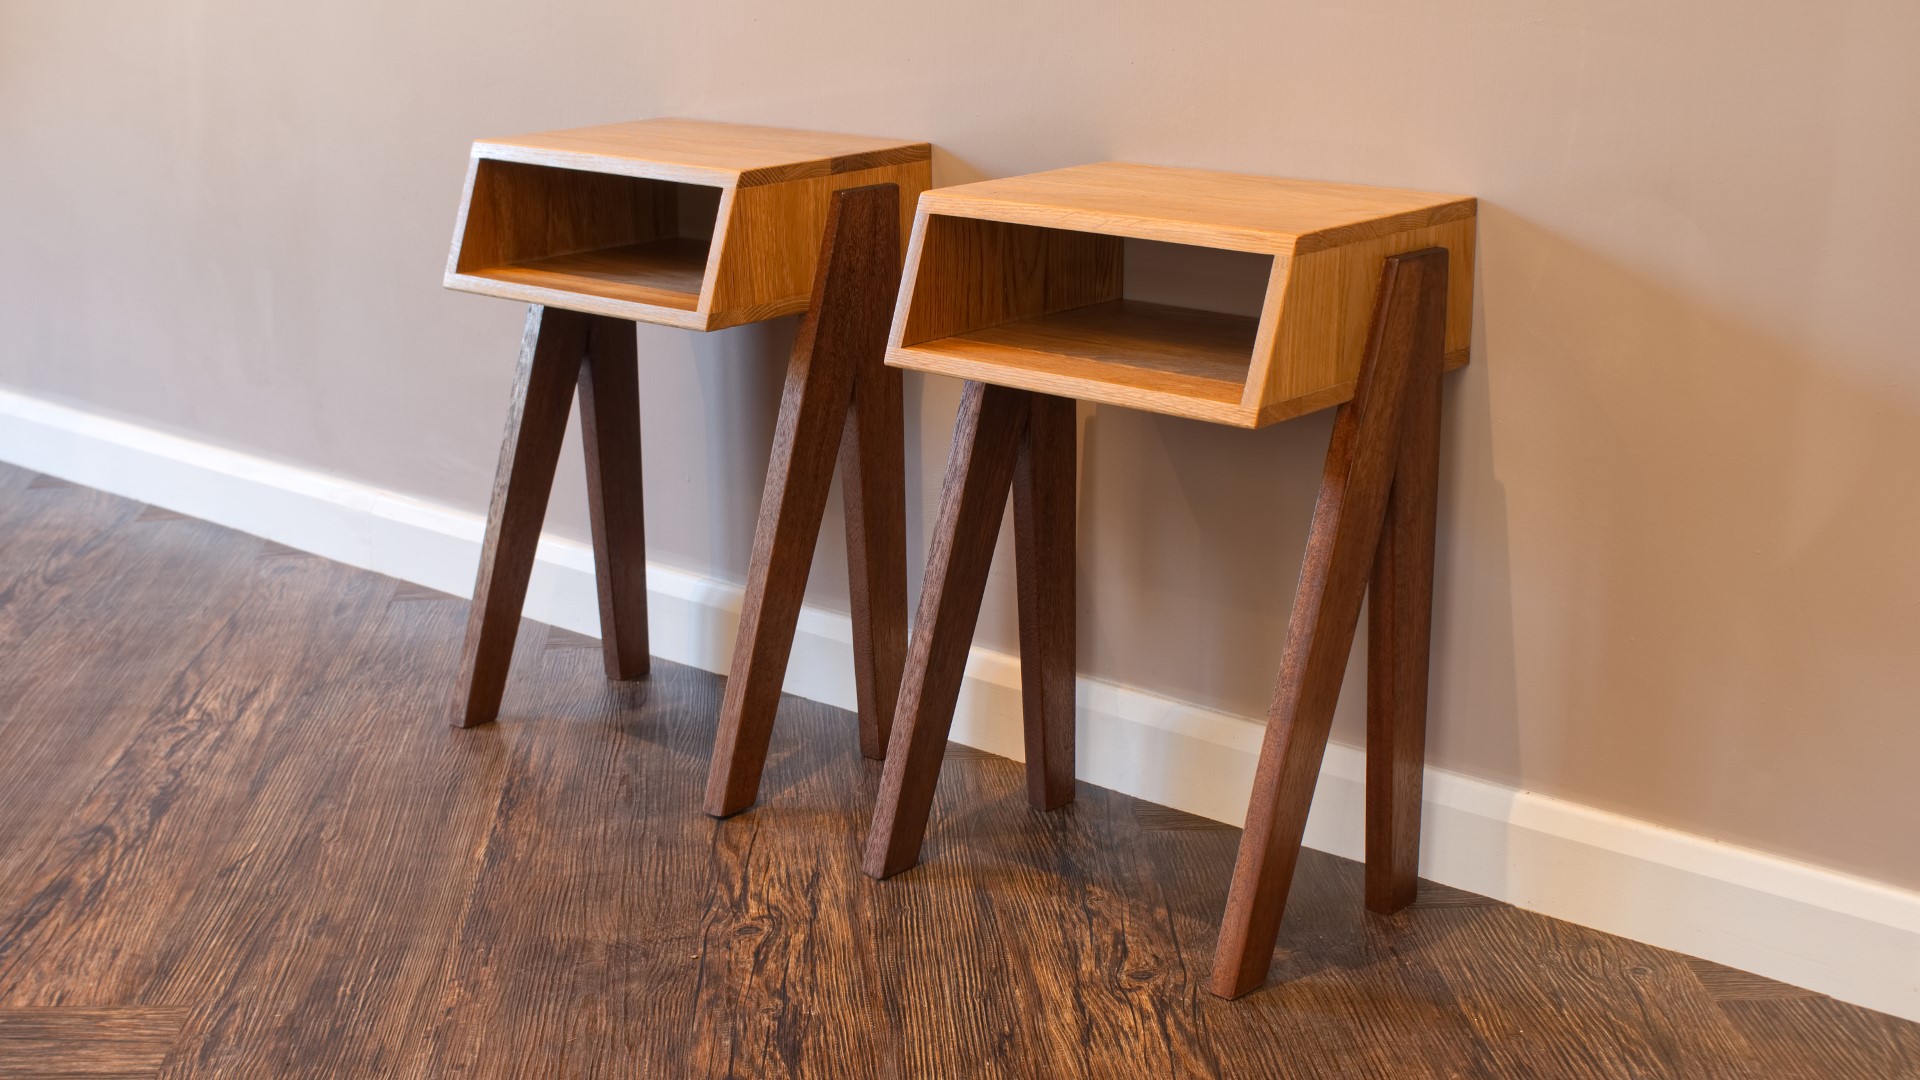
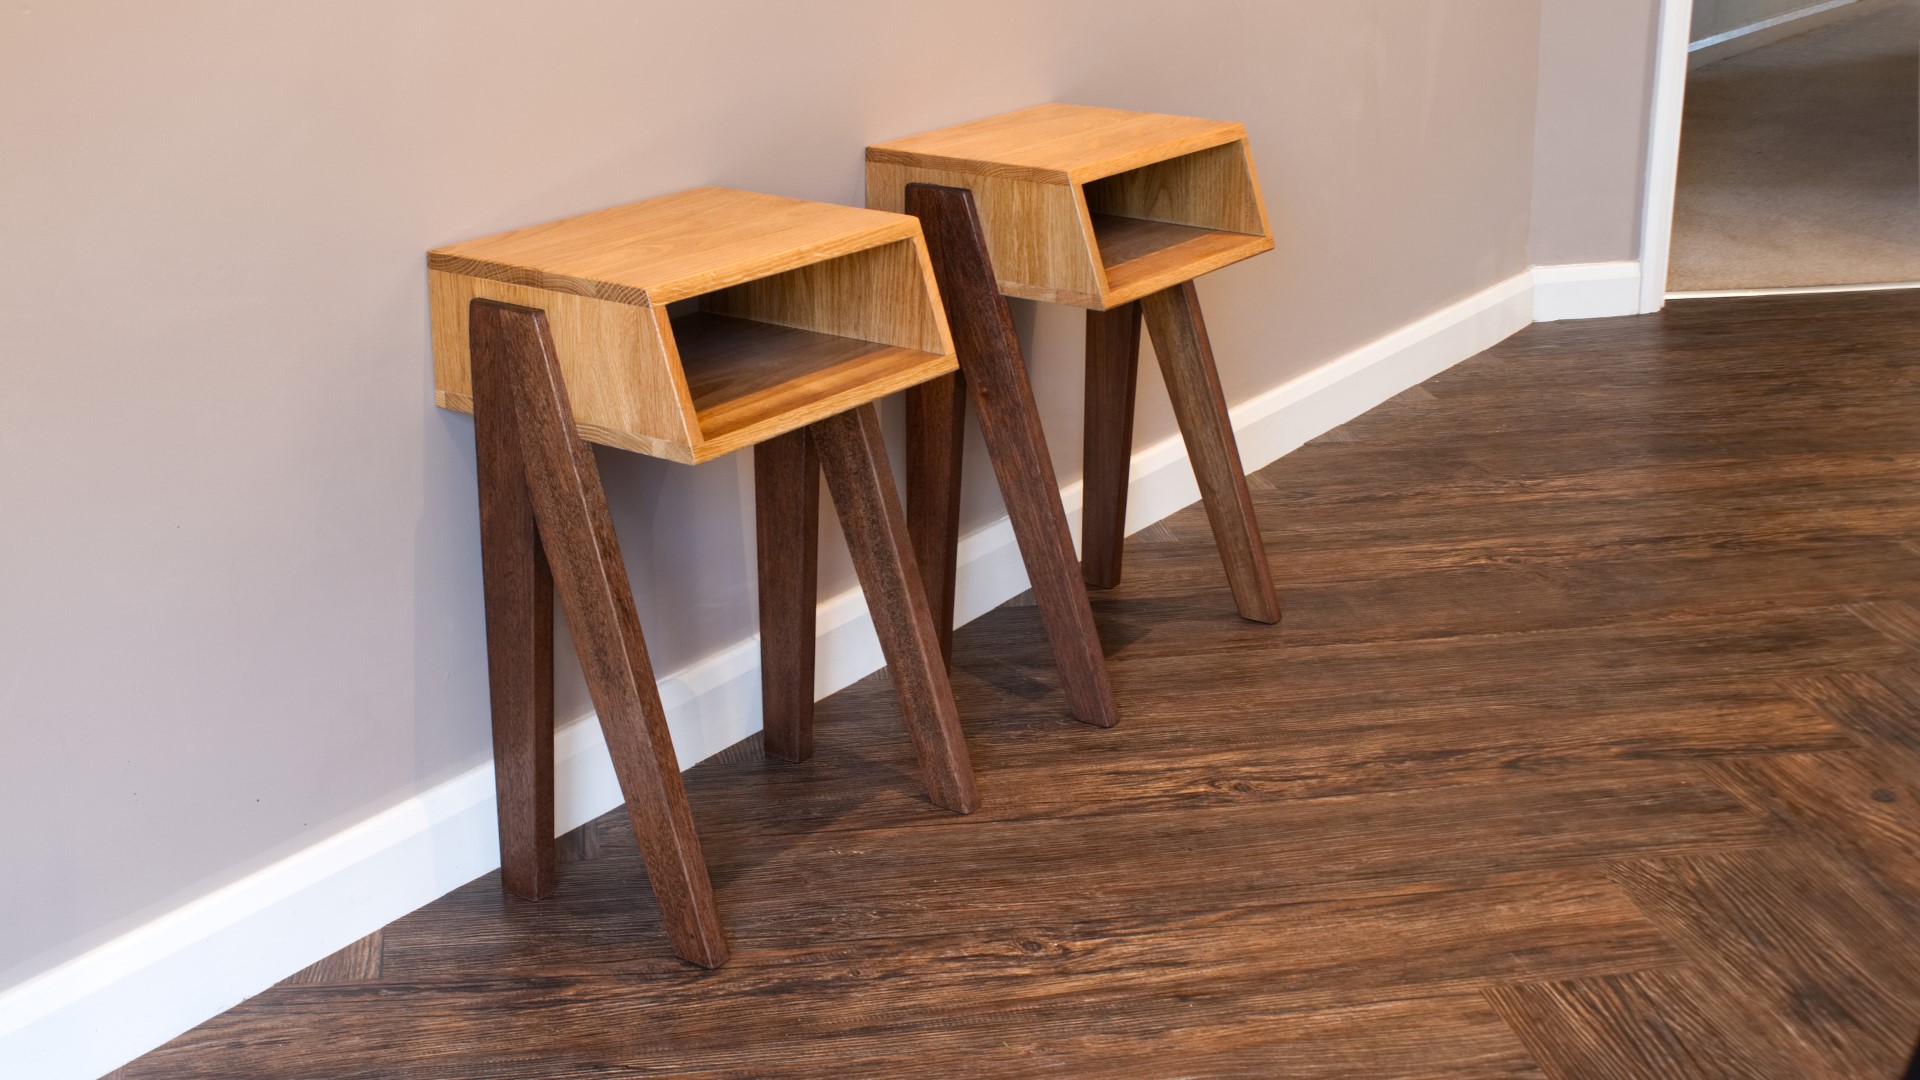
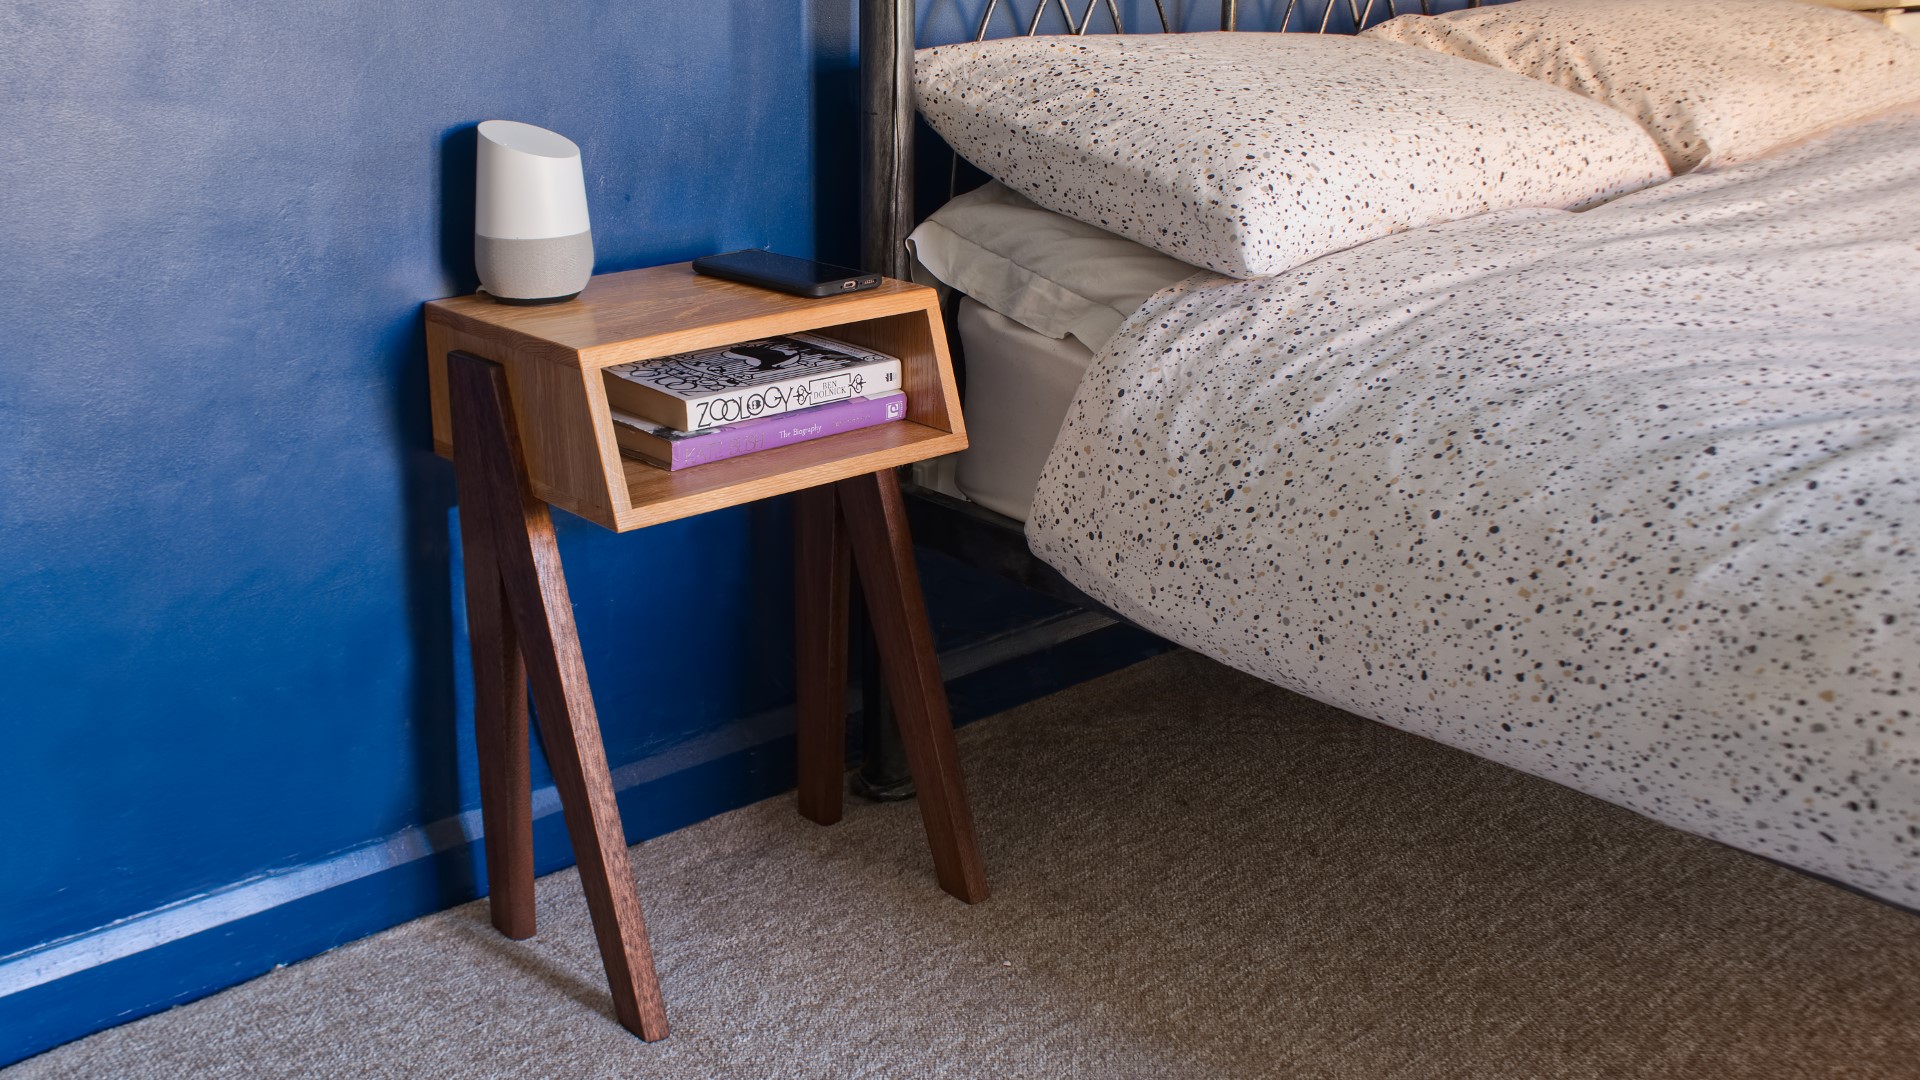
In this video I make a pair of solid hardwood bedside tables, or night stands using only one hand - my "non-dominant" left hand for a challenge set by Leo Winstanley at the Hand-I-Craft YouTube channel.
This build is made entirely from salvaged materials - the oak came from some old kitchen cabinet doors taken from our house renovation, and the mahogany was salvaged from a church refurbishment site a few years ago.
I designed these to get the most out of the materials I had on hand, in a mid century modern / retro style, with a heavy dose of inspiration taken from brutalist architecture.
Working with one hand was extremely challenging, and I talk all about that experience at the end of the video.
Bedside Table plans on Etsy (also available for free via Patreon): https://www.etsy.com/uk/listing/788945612/mid-century-modern-bedside-tables
Bedside Tables on Etsy: https://www.etsy.com/uk/listing/787561760/pair-of-solid-oak-and-mahogany-bedside
One Hand Challenge Playlist: TBC
Hand-I-Craft Channel: https://www.youtube.com/channel/UCsjajInRuovnCnw9tHfSXVA
My Kitchen Renovation Video (Patreon Exclusive): https://www.patreon.com/posts/35036878
#woodworking #handmade #furniture
In this video I'm going to be using salvaged wood to make 2 bedside tables with one hand - my left hand which is my non-dominant hand. This was a challenge set by Leo at the Hand-i-Craft channel, I'll talk a bit more about that at the end of the video.
These kitchen cabinet doors came out of our old kitchen before we renovated it recently. I made a video all about that on my Patreon page by the way, link to that in the description box below.
They were very heavy so I took a hand plane to the edge and it was a nice surprise to find these are solid oak underneath layers of paint.
I clamped down one side and figured I could use a mallet to break these apart, but that wasn't really working, possibly because my left isn't that strong. So I came up with the idea of just dropping the corners of these on the floor and that worked great!
I'm going to be using these panels which I half expected to be plywood but I was pleasantly surprised when I cut in to them off camera to find that these are solid wood too.
First I heat up the paint with my heat gun. And when it starts bubbling up like this I can use my carbide scraper tool to remove the paint. There's a link to this tool in the my tools link in the description box - it's a fantastic tool which I use all the time.
The only problem was that using one hand was slowing me down. But I remembered that my heat gun came with a scraper attachment and I decided to give that a try and that made it a little quicker but it didn't do as good a job as the carbide scraper so I went back to using that eventually.
When the doors were stripped of paint, the oak beneath looked really nice, you can see that it's darkened with age.
I wanted to cut off the trim on these and I did that at the table saw using my mitre gauge. I wouldn't recommend using a table saw with one hand, but I found that by using my body weight to push it and my left hand to guide the mitre guage it went ok.
Then I could rip the long edges, again pushing with my body and making sure to guide the workpiece towards the fence.
WIth that done I've got four lovely panels to make use of.
I cut them to length at the mitre saw and here I found it useful to use a weight to hold the workpiece in place. I'm using the dimensions from a drawing I did on SketchUp before getting started and by the way plans and a cut list for this build are available free to my patrons on Patreon or for a small fee via my Etsy store if you fancy having a go at making these yourself, be it with two hands, or with one.
To cut the smaller panels I used a marker pen mark to make the cuts consistent in size.
Here at the workbench I'm screwing down some battens to help hold the workpieces in place while I sand them, and I had to use my head here! Literallly.
I can then sand the panels using my random orbit sander
I'm going to use butt joints here, and I start by drawing a line and then masking off the areas where I don't want to get any finish, and that's because it's going to be a lot easier to finish the inside of these panels now than it will be later once they're assembled. I'm using spray varnish here.
I can then remove the tape and add some pva glue which adheres best to bear wood - and that's why the masking tape was used.
I spread out the glue and then got the panels assembled and then I can get a few clamps on. And I'm positioning the top and bottom panels with a tiny bit of an overhang here so that I can flush them up to the side panels later.
I use a damp cloth to clean away any glue squeeze out.
While waiting for the glue to dry I went looking for some wood that I can use to make the legs and I pulled out this piece which as you can see has a big nasty crack in it. But that doesn't really matter because I'm going to be cutting this in to strips and I can just cut away the bit with the crack - always nice to be able to find a use for the things which aren't perfect.
After trimming the edges square I can run the faces through the thicknesser to clean them up.
And I trim away the ends at the mitresaw because there were a few splits there.
Next I'm going to use this protractor to mark up a 10 degree angle at the top of each of the legs, this will give the front leg, the one that leans forward a 20 degree angle.
I could have just cut a 20 degree angle to one of the legs, but I thought i'd prefer the look of it with the angle on both legs, however I underestimated how difficult that was going to be with only one hand - I cut the angles roughly at the bandsaw.
And then I tried to clean them up with the block plane. Normally I'd have used a number 4 plane for this but that's really more of a two handed tool so I persevered and this was really tricky to get this squared up - and this is definitely the part I struggled most with on the project and where I really wished I could use both hands to plane these joins.
Still struggling here to get the join nice and tight, so I ended up clamping both pieces together and then using an old sanding block I had laying around, this is either 40 or 60 grit paper so it removes material quite quickly and I was able to get it more flat this way.
And then it joined together better, there was still a gap at the top, but that's going to get cut away later anyway so I went with it and applied glue.
Here I'm using the offcuts from the bandsaw cuts I made earlier as clamping blocks so that the clamps apply pressure evenly without things slipping out of place.
Back to working on the tops again and I can take them out of the clamps. I wanted to cut a 20 degree angle to the front of these too, which I thought would nicely compliment the legs and I decided I'd do that at the bandsaw after marking up where I wanted to make the cut and tilting the table.
That worked really well I just needed to sand away the bandsaw blade marks.
There were some hairline gaps where the sides were joined to the top and bottom so I rubbed in some filler.
I can then use a flush trim bit in the router to flush up where I'd left a slight overhang. And then I sanded.
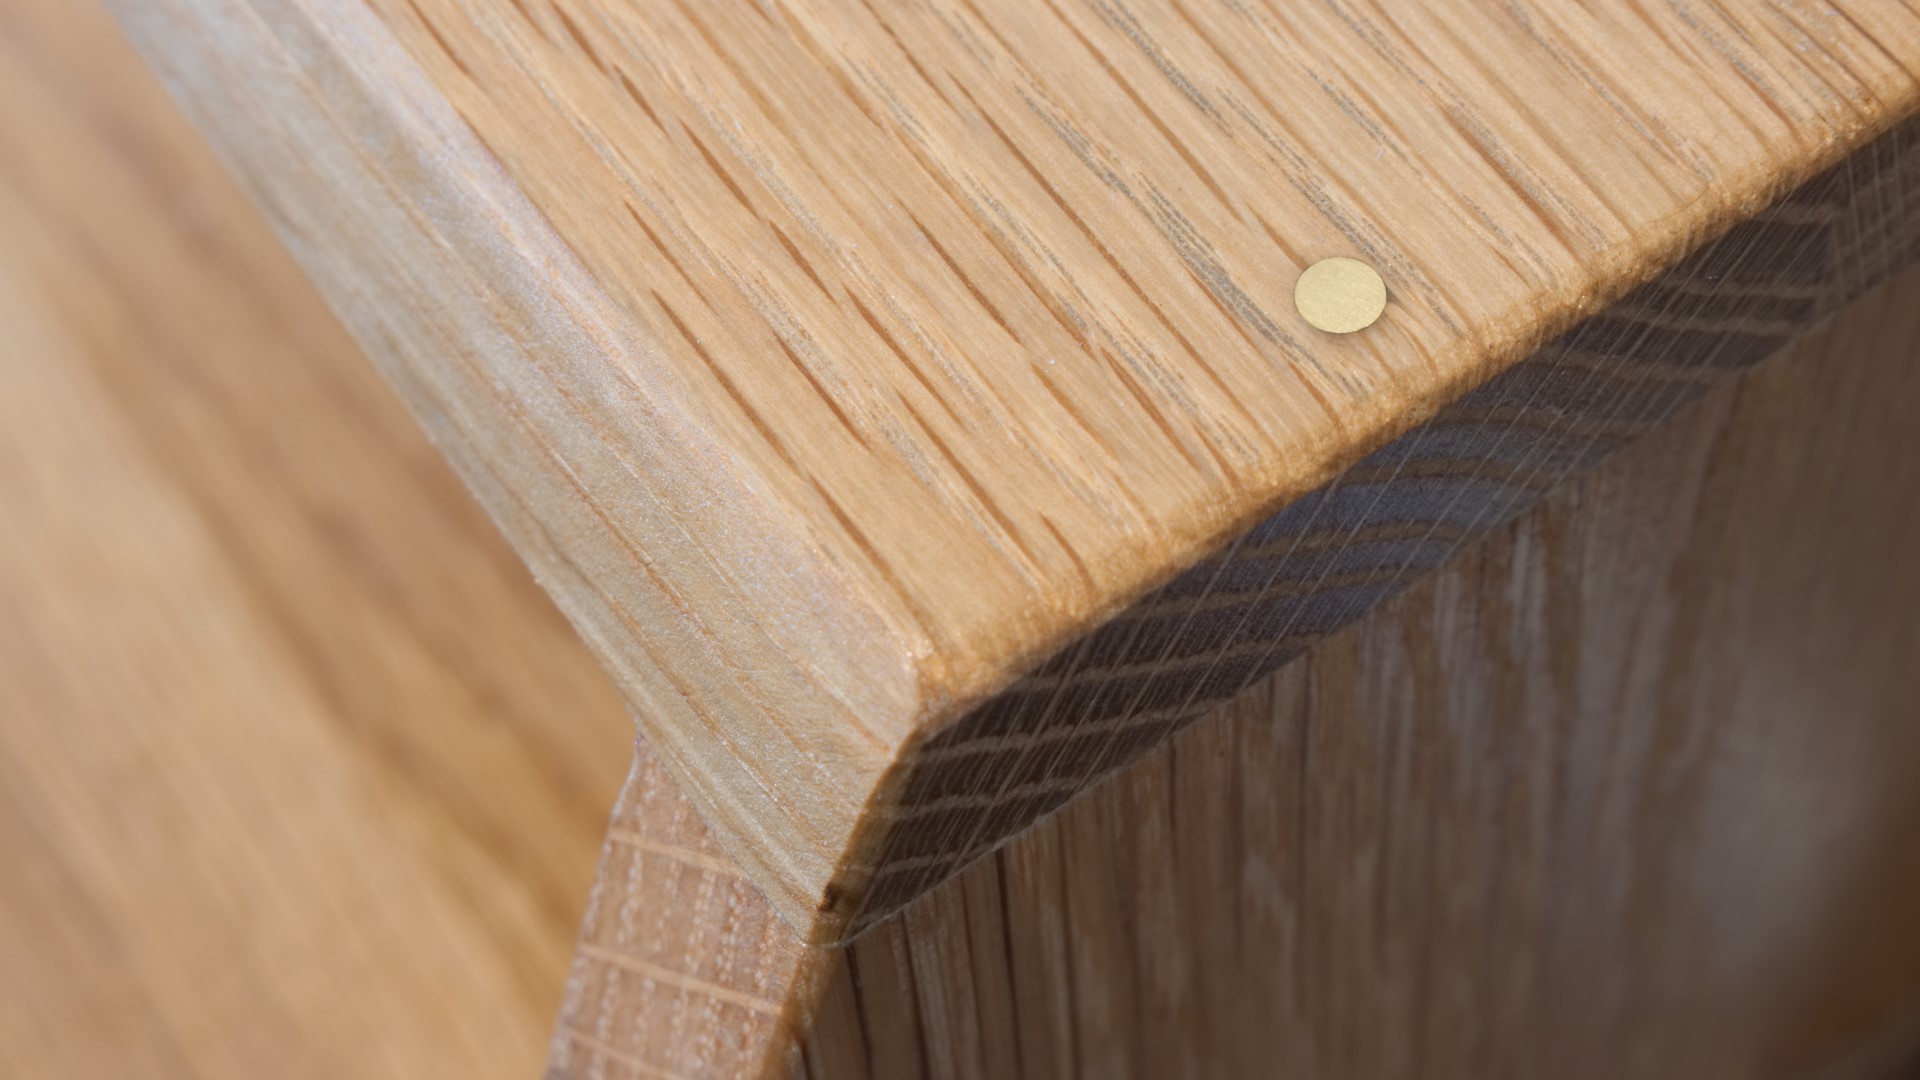
So these butt joints wouldn't be particularly strong at this point because it's an end grain to side grain joint, so I need to re-enforce them and for that I'm going to add some brass dowel. After marking up where I wanted to drill pilot holes I used a mirror to help me see what angle I'm holding the drill, which helps me to drill down nice and plumb.
I used a 4mm bit to match the diameter of the brass rod.
Then I just scuff it up with some course sandpaper to help give the glue a bit more to hold on to, and I mix up some epoxy, and get some on there and then I can knock it in place.
I used a hacksaw to cut away the excess.
And then I can sand everything and I really wanted to polish up the ends of the brass rod to get them nice and shiny so I sanded at 120, 240, 400 and then 600 grit.
For the bottom of the box, I just used screws because they won't be visible on the underside.
Now back to the legs and I could reference the back of the straight leg against the fence of the mitre saw and use that to help cut the ends of the legs at the correct angle.
And I wanted to cut a taper to these legs aswell to make them less bulky so here I'm marking up where I want the tapers to end. And I thought about cutting these at the bandsaw but that would have meant a lot of clean up work that is really difficult to do with one hand so instead I used the tracksaw, and I can use the other legs underneath to help support the guide rail at the right height.
And then I used a chisel to clean up the part where the cut finished.
I also added a round over to the legs and that worked well apart from the bit between the two legs, the crotch I guess I should call it, so I fettled that with a chisel and some sanding.
I wanted these legs to be really dark to contrast with the oak so I'm going to use some dark oak stain. I brush it on with a paint brush and then wipe away any excess with a cloth.
And here I've set up the table saw to cut the joinery for where the legs will meet the top, and I do that using the mitre guage to support the workpiece and then taking multiple passes moving the work piece along between each pass.
I'm left with something that looks like this and I can just clean up the rest with a chisel. And there were still some slight grooves left by the table saw blade so I used the end of the chisel as a scraper to clean those up.
I can then get plenty of wood glue on and clamp the legs in place and I'm using a couple of blocks on the workbench here to give me the offset between the back of the top and where I wanted the legs to be positioned.
And I got a couple of clamps on.
For finish, I used more of the spray varnish which I used for the inside of the box earlier in the video. I chose this mainly because it would be really to apply with one hand and to get in all the hard to reach areas.
I gave everything three coats, and I de nibbed
Finally I added my makers mark on the bottom. And I was a bit too heavy on the heat, so I knocked it back with some sandpaper.
On screen now are some photos of the finished project, and I'm very happy with how they turned out. We don't have a use for these so they will be available for sale via my Etsy store if you're interested in checking it out I'll leave a link in the description box.
So as I mentioned at the start of this video, this build was part of the one hand challenge set by Leo Winstanley at the Hand-i-craft channel - Leo damaged a nerve in his neck in a car accident which resulted in him losing the use of his dominant hand and part of his arm. He was unable to work for some time and decided to take up woodworking and crafting as a hobby and started his YouTube channel to document his journey. It's a great channel and really inspirational I think, and I'll leave a link to his channel below and I think there's going to be a playlist of the other videos in the challenge which I'll link to below as well as soon as I have it.
Working with one hand was far more of a challenge that I expected, and I found it really interesting that the things I had expected to struggle with the most for example using a table saw were obviously a bit awkward and difficult but actually the most difficult things to accomplish were the little things like being able to use a clamp one handed, unpeeling a roll of masking tape, or getting a heavy piece of wood off a shelf, or getting a drill bit out of the hole I'd just drilled, or simply holding a ruler and marking up a line. And needless to say it took me a lot longer to complete this project than it normally would have done had I had the use of both hands. And just to be clear, even though I successfully built the project with one hand, there was plenty here that I still allowed myself to use both hands for things like for example setting up the camera for each shot which is another thing which would have been really difficult to do with one hand, and also editing the video too. So quite an enlightening experience, I'm happy to have experienced it and now I'm very grateful to have the use of my right hand back again - let's hope that the same will be true for Leo too sooner rather than later.. Thanks to Leo for setting up the challenge.
Please subscribe to my channel for more weekly woodworking videos. If you'd like to help support the channel you can do that via PayPal or Patreon, links to both in the description box below, on Patreon you can also get early access to my videos, exclusive content, free project plans and cut lists including for this project, and a name credit at the end of my videos.
Thanks for watching.
Thanks for watching!
Please subscribe, click like if you like, and hit the bell icon for future video notifications
MY TOOLS:
For links to the tools I use, plus some of my favourite consumables, finishes and more see links below. As an Amazon Associate I may earn a small commission from qualifying purchases:
UK affiliate store: https://www.amazon.co.uk/shop/ragnbonebrown
US affiliate store: https://www.amazon.com/shop/ragnbonebrown
HELP SUPPORT THE CHANNEL:
Support with Patreon: http://www.patreon.com/ragnbonebrown
Support with PayPal http://paypal.me/ragnbonebrown
SHOP:
Etsy: http://www.etsy.com/uk/shop/KeithBrownMaker
https://teespring.com/stores/rag-n-bone-brown-merch
LINKS:
Website: http://www.ragnbonebrown.com
Facebook: http://www.facebook.com/ragnbonebrown
Instagram: @ragnbonebrown
Twitter: http://twitter.com/ragnbonebrown
Email: ragnbonebrown@gmail.com
Second YouTube Channel (non woodwork videos): http://www.youtube.com/user/keefykeef
Images: