I cut some more spruce at the tablesaw to make some columns that would later support the doors for the extension. These were glued and screwed on to the frame. I could then add cladding to the front panels.
I wanted one single piece of cladding to run the length of the front of the extension right at the top.
I measured and cut to length one of the cladding pieces.
I could then offer it up mark up the position of the doors on to it. I marked a pencil line where I wanted to remove material, and then cut it away with the jigsaw. I cleaned up the jigsaw cuts with a block plane just to get them straightened up.
Next I needed to rip some off the top of it in order for it to fit in place underneath the roof, and I was going to do that on the tablesaw but then I realised that wasn't possible - as it couldn't go against the fence due to the shape of the workpiece. With hindsight I should have made this cut first, but it was too late for that so I marked up what I needed to remove and ripped it using the circular saw instead.
That slotted in place nicely so I secured it with screws at each end, and in the middle I cut a couple of filler blocks so that I could secure it in the centre too.
So now that the columns were fitted at the front, the OSB sheet could no longer fit around it, and I couldn't remove it now either, so I needed to cut it while it was in place. The oscillating tool was perfect for this job - I just cut a couple of notches away and it was problem solved. And I could screw it down
Next I started insulating the shed - I am mainly doing this to cut down the noise as there'll be an air compressor and dust collector inside.
This stuff is Rockwool sound insulation slabs. I bought two of these packs on eBay for £52, and there was 9 slabs in each pack. I could have just about gotten away with just one pack, but I thought that I might want to double it up in some areas.
I used an old handsaw to cut it to size which worked well. This is quite nasty stuff so I wore gloves, and probably should have been wearing a respirator also.
I added to the wall, roof and underneath the floor too.
I used an old salvaged piece of chipboard as a bottom panel just to make sure the insulation wouldn't fall out.
At this point Dylan came by to inspect my work.
And as I was unsure how much weight the wall could take, I thought I'd do a sitting test. I wasn't quite confident enough to do a Matthias Wandell style jump test.
I had an old piece of plasterboard so I used that to secure the insulation in the roof. I secured it with screws in the middle, and cut some blocks of wood to use as cleats to secure it at the sides.
Next I needed to finish off the cladding, I'd left the awkward bits until last. I measured the angle of the roof with a bevel guauge and that allowed me to mark up the final cladding pieces for the side panels. The first just needed a small corner removed which I did on the
bandsaw. And the final piece was cut in the same way at the bandsaw.
Then I ripped a piece of cladding at the tablesaw to 18mm square to create some corner posts.
I ripped a small 45 degree bevel on the corner too, just to make it easier to nail them in place.
Next I started working on the doors. I first ripped a couple of battens at the tablesaw.
I measured and marked up where I wanted the battens to be in relation to where the floor was, as I wanted the bottom batten on the door to close on to the top of the floor if that makes sense....
I marked up the screw positions and then added screws through the cladding and in to the battens from underneath,
Then I could add a batten at the top and I used a clamp just to hold the cladding pieces tightly togehter.
In between the battens I could add more insulation.
I then offered up the door to check it would fit, and it was slightly too big in some areas, so I marked up the high spots with a pencil and used my planer to straighten those out, and then it fit perfectly.
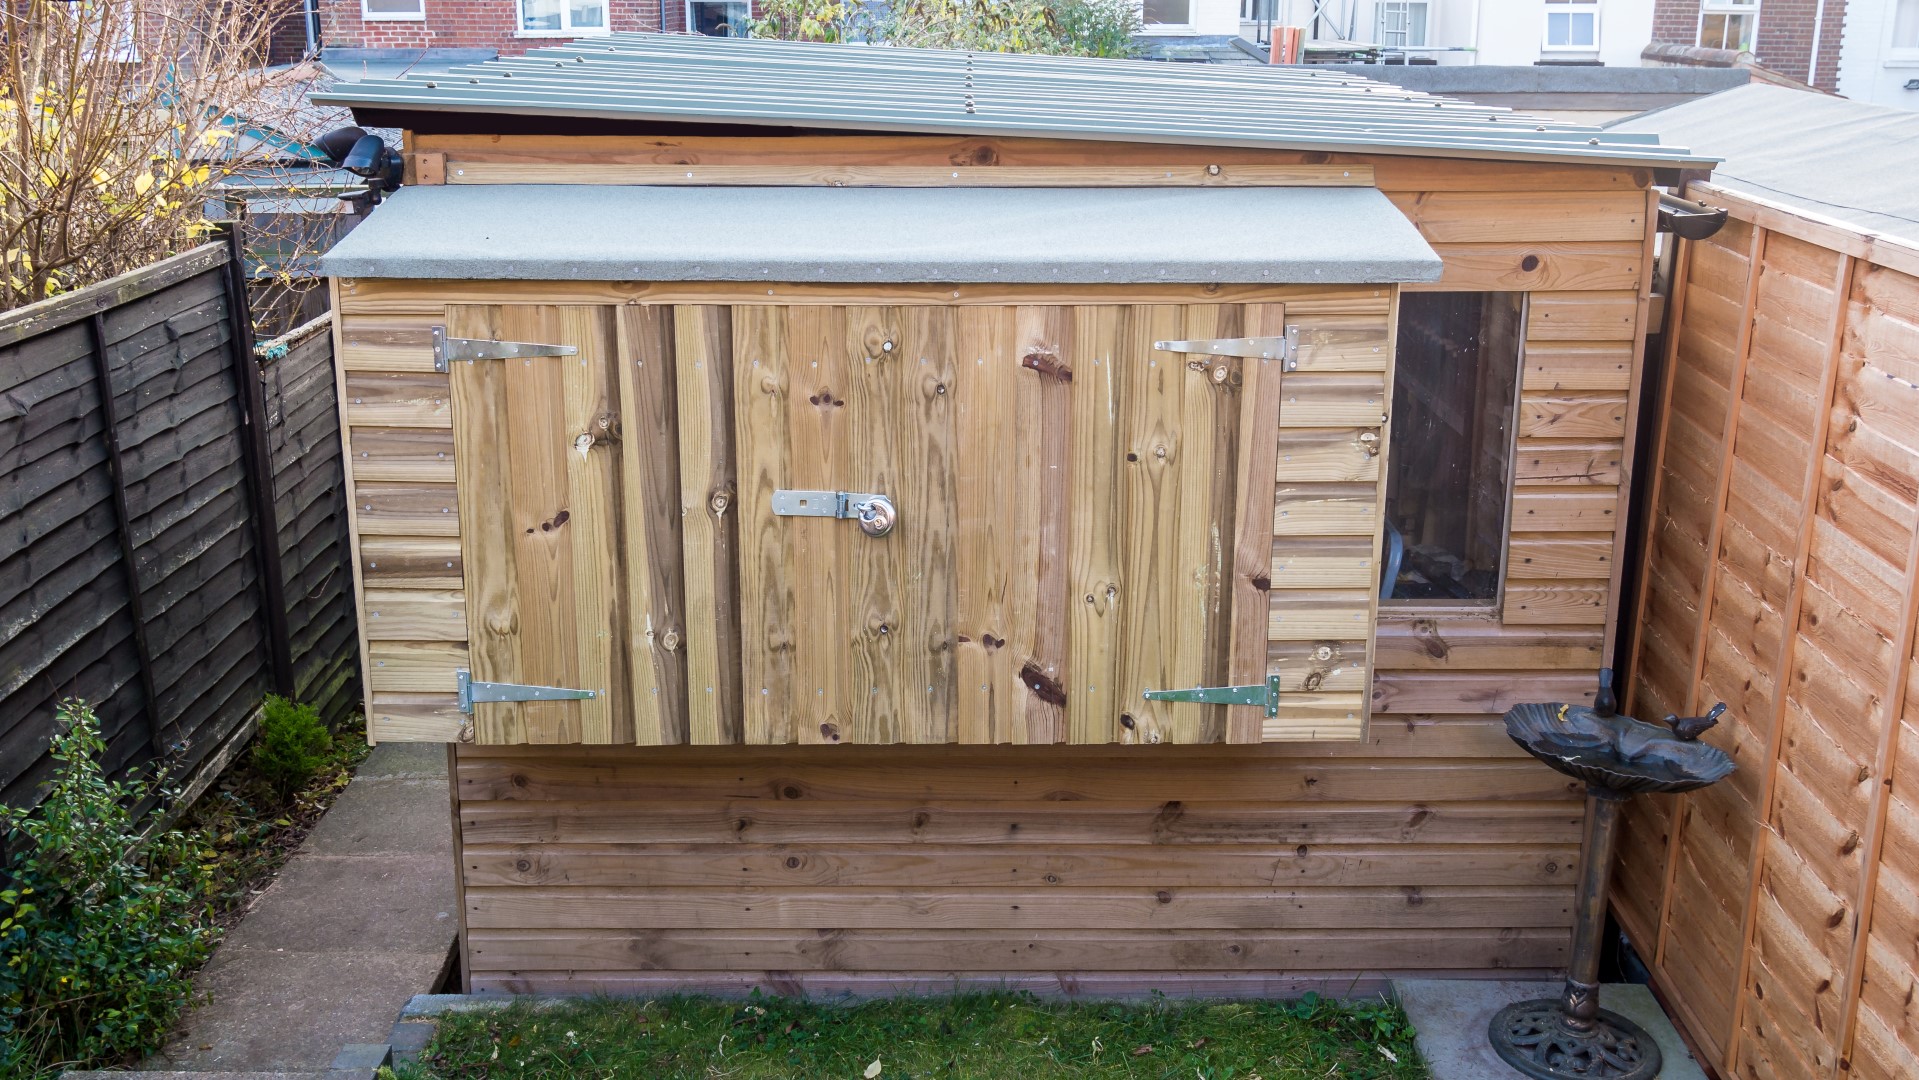
I fitted the doors using these galvanised hinges and some of these security screws to ensure that no unwanted visitors armed with a screwdriver would be able to get in to it.
Next I added a piece of hardboard to the inside of the door, glued and screwed to the battens which would hold the insiulation in place. I'm just using scrap materials here - as you can probably tell I'm not really concerned what the inside of the shed looks like - it really doesn't matter to me.
I made the second door in exactly the same way, but it needed to be ripped down to the right width, so I cut a couple of cm off with my circular saw and then fitted it in the same way as the first door. And I designed the doors so that I retained the tongue and groove overlap where the doors close on to one another so that there is no gap between them.
I chiselled away some of the insulation from the inside of the door so that I could add a small block of spruce, which I could then mount the latch on to. And I bought a padlock to keep it secure. In future I'll also extend my workshop alarm system to cover the extension too.
That's the extension all done.
I'm pleased with how it turned out, it's a lot more rigid than I expected it to be and I don't have any major concerns about the weight. I knew the extension itself was going to be plenty secure enough anyway just from the fixings to the workshop wall, I was more concerned about whether the workshop wall itself could take the weight of it if that makes sense - that could have been interesting had it have fallen down....
But the workshop walls are bolted together at the corners, so I think it'll be OK.
There are a few things I would do differently if I were to build this again. Firstly, I would have lined up the cladding of the extension with the cladding of the workshop just for aesthetics. That never occurred to me until after I'd already added the cladding. No big deal though.
Other than that it's pretty much how I envisaged it to be.
There will be a follow up video or videos which will show my new dust collection system. I thought I'd keep that as a separate video as I'm not sure how many people will be interested in that.
Images: