In this video I make a simple bird house box for my garden, and later in the video you'll see that a blue tit has already visited - hopefully they will nest in the boxes soon!
Free build plans: http://bit.ly/birdhouseboxplans
RSPB page which offers advice for building a bird box and what dimensions to use: https://www.rspb.org.uk/birds-and-wildlife/advice/how-you-can-help-birds/nestboxes/nestboxes-for-small-birds/making-and-placing-a-bird-box/
In this video I'm going to be making some bird houses. I first designed what I wanted to make in SketchUp and free plans for this build are available at the link in the decription box below if you'd like to have a go at making one yourself, and these ones are available to everyone for free, not just my Patreon subscribers. And I designed it based on guidelines from the RSPB website, who have some really useful information about dimensions that should be used to attract specific birds for nesting in the boxes. I'll link to that page in the description box too.
Please stay tuned to the end of the video if you'd like to see some birdies using them!
I had some offcuts of marine plywood left over from my recent mitre station build, this will work well for exterior use as it's water resistant so it should hold up pretty well.
It was really dirty and dusty so I went over sanded the pieces to get them cleaned up.
I started ripping the side and bottom panels to 150mm width. To get the shape I wanted for the bird house, I'd need to cut some angles at the mitre saw, firstly I'll need a 35 degree angle where the side panels meet the roof.
I'd also need to cut some 10 degree angles on to the bottom panel for where it meets the side panels. And if you've not made anything with angled cuts before, this would be a great project to get you started thinking about how the different angles all meet together.
So now I have bottom panels that look like this with 10 degree angles on two opposite sides
And two side panels with a 35 degree angle on one of the short edges.
To assemble I'm using some water resistant PVA wood glue, the stuff I use is Everbuild 502 and you can find links to that as well as lots of the other stuff that I use in the my tools section in the description box. Here I can get the two side panels assembled to the bottom panel, and I hold them in place with some brad nails until the glue dries.
Next I could make the roof panels and unfortunately I didn't have enough marine ply for that, so instead I decided to use some scraps of chipboard, which obviously isn't water resistant in the slightest, but that's OK because later on I'll be edging it and adding some roof felt to protect it.
I ripped the pieces to 200mm wide and then cut them to length at the mitre saw, and one panel I cut longer than the other by the thickness of the material, which you can see here, and that's so that I can fix them together with an overlap. I added some more glue, pinned them together to hold them in place temporarily and then drilled pilot holes and added some screws to re-enforce the joint.
Next I can offer up the sides and bottom to the roof and check all my angles meet together OK, and all looked good.
To make front and back panels, I could position the other bits on top of more of the marine ply, and then scribe a pencil line around the outside of the box part, and then the inside of the roof part. And that gives me the correct shape for the front and back panels of the box.
Cutting out the shape can be done easily with either a jigsaw, and I'm making sure to keep on the outside of the pencil line so that I can refine the shape after, but as I have bandsaw I used that.
I can then clean up those cuts with a block plane and a bit of sanding, which is entirely optional, it's not really necessary but it's going to make for a cleaner look.
Here I'm marking up where I want the entrance to be, and you can alter the size of the hole depending on what birds you'd like to attract. In my situation it's mainly blue tits in my garden at the moment so I made mine 25mm based on the guidelines from RSPB. And I used a forstner bit in the pillar drill to cut the hole, but it can easily be done with a combi drill.
Next I started to think about decorating the house, and I thought that it'd be a good idea to add masking tape first but you'll see later on that that didn't really work out as expected.
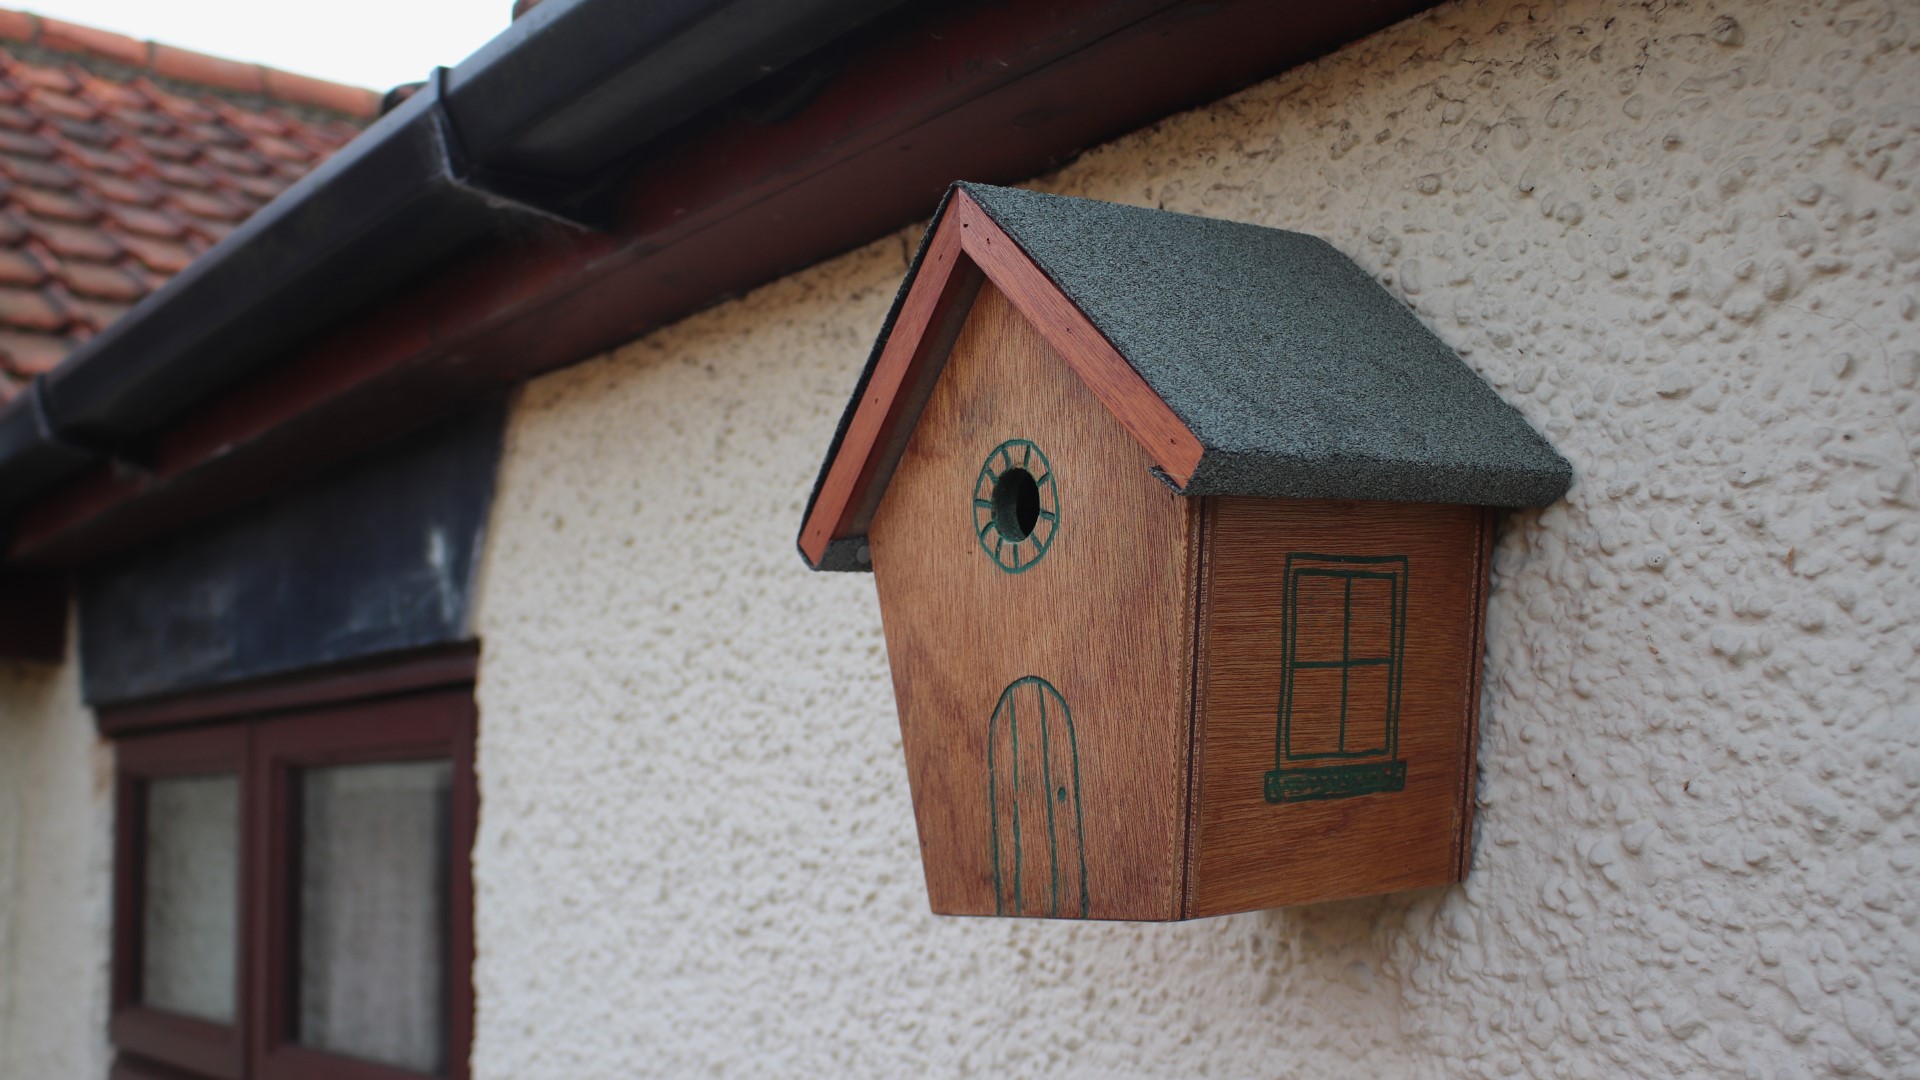
Here I'm drawing a door and then I can use a V groove bit in my router to engrave the detail in to the wood. I did this free hand rather than using a straight edge to guide the cuts and that's because I wanted the features to look kind of cartoonish in style.
I'm going to be adding some spray paint to this detail and the idea behind the masking tape was to prevent getting paint anywhere except for the engraved parts, and as you'll see it didn't really work, it just leaked under the tape.
So for the rest of the routing I didn't bother using tape. Instead I marked out what I wanted, and here I'm drawing a simple window, then I did the routing, and after adding the paint and waiting for it to dry I just sanded it away using 120 grit disc. I had to be a little bit careful here not to sand through the face veneer of the plywood. And they cleaned up pretty good!
As an after thought I also add a bit of detail around the entrance hole too.
Next I cut some mitred pieces of hardwood to use a trim for the front edge of the roof. If I'd used marine ply, I wouldn't need to do this but I did it to protect the chipboard from rain and those got glued and nailed in place too.
I had some small offcuts of roof felt left over from when I build my shed extension, and I kept them aside because I knew I'd be making some bird boxes so it was a good way to make use of them, and that got held in place with some clout nails to the underside of the roof panels.
And I cut away the excess roof felt with a knife.
Finally I added some finish to the bird boxes and here I'm using a hard wax oil that's specifically for exterior use with UV protection, you just rub it on as thinly as possible with a cloth, and it will provide a hardwearing finish that hopefully will stop the wood fading so quickly from sunlight.
To fit the roof to the box, and for that I decided to use some velcro strips, which I just stapled on to the top edge of the box and the underside of the roof, and that will hold it in place and also allow me to clean out the bird boxes after every breeding season. It's also quite loose fitting, which is actually a recommendation because it allows for better ventilation in the box.
I fitted a keyhole fixing to the back of the box so that I can mount it on to my walls using a screw. These are really handy and they just screw in place.
I added my makers mark to the bottom of the box
And then finally here I am marking up for some some ventilation holes to the bottom panel
I made a few of these bird boxes because this build was all about killing two birds, if you'll excuse the pun, with one stone.
Firstly, I made one for my mum because she asked me to make one for her a long time ago, and secondly I kept spotting some blue tits outside the french doors of our office, which is where I sit and edit videos, and every morning they would repeatedly fly around of the walls as if they were looking for somewhere to nest. That wall is North facing, and according to the RSPB page they like to nest either facing North or East for the optimal weather conditions. So I wondered if they were looking for somewhere to nest and that's why I put making some bird boxes further up my priority list because I really want our garden to be a welcoming place for wildlife and also it'll give me some entertainment watching them come and go through my window. And they didn't disappoint, because after only a couple of days of me putting them out there I saw a bluetit investigating not only one, but two of the boxes which was really exciting. I'm going to put some feeders out there too at some point before the winter sets in.
To be honest, I wasn't really super impressed with how these turned out, they're OK I suppose, I like the shape of the boxes, but I kind of had an idea in my head of how I wanted them to look with the cartoonish style windows and doorways but they don't look as good as I'd hoped. But that doesn't really matter, as long as the birds like them, and hopefully my mum too, that's all that that really matters.
This is a pretty quick and simple project, making all three was just over half a day's work, and I made them entirely from offcuts and stuff I already had, so they didn't cost much to put together.
I hope you enjoyed the video, and I hope I inspired some of you to make your own bird boxes, whether it's using my plans or designing your own, it really is quite rewarding making something like this and seeing it get used by the local wildlife, I really do get a lot of pleasure from it.
Please subscribe to my channel for more weekly woodworking videos. If you'd like to support the channel on Patreon you can receive early access to my videos, exclusive content, free plans and cut lists and a name credit at the end of my videos too. Thanks for watching.
Images: